The basics of beverage photography
Having given you a taste of the
basics for food photography, we couldn’t possibly leave out its favorite
partner: drinks – a specially all of its own. Our expert advice will equip you
with all the tools you’ll need to get started
FROM SUMPTUOUS Barista-style coffee and glass-chilled cocktails to high-speed
splashes and the allure of mouth-watering 20-year-old Scotch on the rocks, the
art of great beverage photography is an area of expertise all of its own. Its
demanding detail for lighting, composition and technique make it just as much,
if not more, of a creative discipline than photographing its dry counterpart.
In fact, we could probably fill a book with all you need to know, so we’ll have
to suffice with the basics.

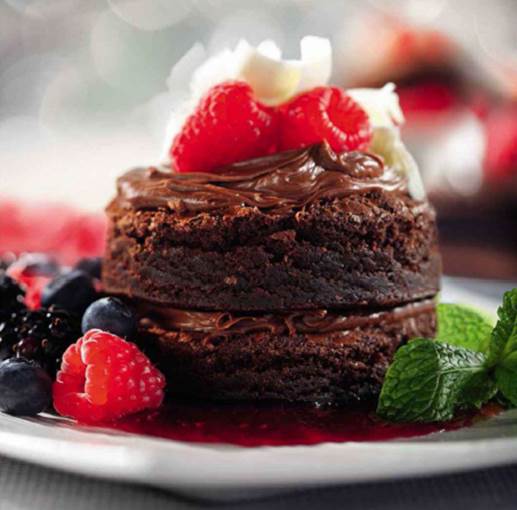
As
you can see from the following images, styling drinks is just as important as
food – so don’t forget your garnishes and props
As you’d expect, and as we’ve already
outlined, lighting is crucial when it comes to food and especially beverage
photography. Whether it’s backlighting, natural lighting, a multiple studio flash
set-up, lighting to eliminate or at least minimize reflections in the glass is
what helps create a smooth image that doesn’t distract from what you want to
convey. Sometimes the reflections add to the appeal and atmosphere, but for
those where it doesn’t, experiment with using black card to ‘flag’ light and
control its fall-off and beam.
When picking color and your lighting style,
think about the emotional reaction you want the viewer to have and come up with
a concept that complements the nature of the drink and the subject’s style. For
instance, a rustic setting with coffee beans and warm lighting is ideal for a
steamy coffee portrait, while a water-beaded tumbler filled with cascading
whisky should have its amber color and warmth emphasized under smooth lighting.
Propping, composition and styling are no less important than with food
photography, so you also need to think about garnishes: ice cubes, fruit
slices, mint leaves and zest twists – you can leave the tacky little umbrellas
in the drawer, unless you’re going for a ‘wish you were here’ approach. Also
consider the translucency of the subject; beer and milkshakes, for instance,
won’t work as well backlit as a clear Martini or vodka due to their density.
Look on stock photography sites and at food and drink photographers’ work for
inspirational ideas and different approaches, until you find your own style.
Look
on stock photography sites and at food and drink photographers’ work for
inspirational ideas and different approaches, until you find your own style.
Try different angles and vantage points
when composing, though you’ll find the best shots are usually taken at a lower
angle than most food photography. This is because drinks are served in vertical
glasses, so it offers a more flattering and natural perspective. The same
metering and technique principles apply to drinks as with food: use a wide
aperture for a shallow depth-of-field, an incident light meter to take readings
from each light to manage the exposure and keep it simple; focus on the quality
of the light rather than composing an elaborate image, at least to begin with.
Start by shooting cranberry juice, martinis or wine as they look great with
garnishes and are fairly easy to photograph. Also try iced teas, mojitos and
orange juice use lemon twists and mint leaves to garnish, and spritz glasses
for a more thirst-quenching appearance.
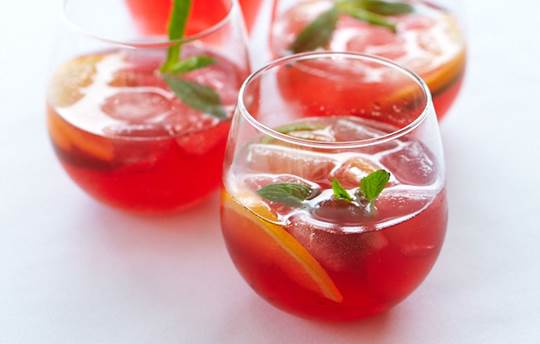
Shaken not stirred
Professional food and drink
photographer Ross Durant shows you how to capture a James Bond classic
The translucency of a martini makes it
perfect for illuminating from behind, transmitting colored light through the
liquid – it’s the same for lemonade, iced tea and soda water, too, so you could
try this technique out on a number of subjects. Add a slice of lemon, a garnish
of mint leaves and a dash of your own creative style and you’ll have yourself a
striking beverage image. Make sure you have a good lemon zester to hand and be
prepared to hand-curl and re-curl many a zest for this shoot so they stay fresh
and tight.
The
translucency of a martini makes it perfect for illuminating from behind,
transmitting colored light through the liquid – it’s the same for lemonade,
iced tea and soda water
While lighting the glass to avoid
reflections should take a lot of your attention, you need to also give due
consideration to the composition, especially the background. Make sure the
colors in the background and surface work with the color of the beverage and
that there is interest in the background, be it created by lighting or an extra
subject here I’ve used a second glass. The concept for this shot was a
nightclub setting, with lashings of color and energy. Colored flash gels can
add creativity and atmosphere, and the more you layer the gels, the more
saturated the colors will become. Opt for gels that are tempered not to melt
under high heat and get a variety of colors; you’ll find different combinations
change the impact of the image. For instance, I’ve used orange and purple for a
vibrant, energetic mood but you could use green and blue for a more chilled,
calmer look.
For this shoot, I used two 750 watt
tungsten Fresnel lights in the background, approximately eight feet from the
glasses, shining on a foil background at 300 above the table. I used
a two-stop ND filter on the left orange-gelled light to drop the exposure down
in line with the right purple-gelled light. You may need to do this if one
flash gel is denser than the other and you’re using continuous lighting. I used
tungsten lights instead of flash so that I could try moving the foil during the
exposure to capture some movement in one of the shots; a flash’s duration will
be too fast for this. I also used a polarizer on my lens to increase the
exposure by two stops to 1/13sec to capture the motion. Instead, you could
simplify the effect by creating a still colorful Background Bokeh using two
flashguns. I also used a small 25-watt snooted tungsten light four-and-a-half
feet away from the glasses, 200 above the table to focus the light
towards the olives.