Record a time-lapse sequence on your
next photo shoot
If you recently went to the movies, I
watched TV or surfed YouTube videos, chances are good you've seen some
time-lapse photography. Time-lapse photography is all the rage right now.
Feature films and documentaries have long
used time-lapse photography to wow viewers. Remember watching the flower grow
from seedling to mature plant in mere seconds in a film at school or watching
the stars rotate in the night sky over a jagged Himalayan peak in a TV
commercial?
Time-lapse photography used to be a complex
process reserved for high-end productions, but not anymore. Today, this
dazzling technique is available for any photographer, and it has never been
easier. Some DSLRs even create the movie in camera. It's time to get out and
shoot some time-lapse!
How It Works
Time-lapse photography involves shooting a
large number of frames over a long period of time and then merging them into a
movie. Two hours of shooting time and hundreds of frames can be merged into a
10-second movie clip, in essence, speeding up time from hours to seconds. On
the extreme end, some time-lapse photography involves shooting over the course
of weeks and months, and then merging the sequence into a few brief minutes of
footage.
The possibilities are very exciting.
Imagine watching your next two-hour photo shoot from start to finish in a
10-second movie or seeing the transformation of light from a rosy sunset to a
starry night in 30 seconds of video. See interesting clouds passing overhead?
Some of the best time-lapse sequences include passing storms and interesting
clouds streaking through the sky.
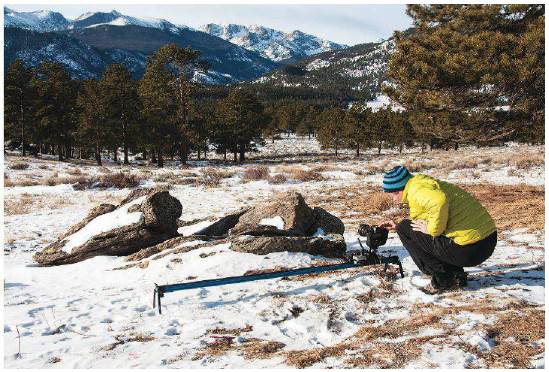
The gear needed for time-lapse sequences is
minimal. Depending on your camera system, you may only need a camera and
tripod. The third item needed is an interval meter, which allows you to set up
the time-lapse sequence. First, you determine your exposure, and then you set
the interval meter for the delay between shots and the total sequence duration.
Once the interval meter is programmed, you start the sequence and come back
minutes or hours later when the time-lapse is finished.
There are two popular options for interval meters,
either in-camera or an interval meter cable release. Camera manufacturers took
note of the popularity of time-lapse photography, and a number of cameras have interval
meters built right into the camera.
I use a Nikon D4 for most of my time-lapse
photography, and the camera has an interval meter option in the shooting menu.
All I have to do is set up my sequence and hit the shutter button. Nikon takes
this a step further, and even offers a time-lapse movie option where the camera
actually creates the movie once the sequence is complete.
Don't fret if your camera doesn't have an interval
meter. The other option is to buy a cable release for your camera that has an interval
meter. Similar to an in-camera interval meter, these cable releases let you
program the delay between frames and the overall time of the sequence.
Shooting The Sequence
Once you have the gear needed, it's time to
shoot your time-lapse sequence. Start simple; don't go for the three-hour,
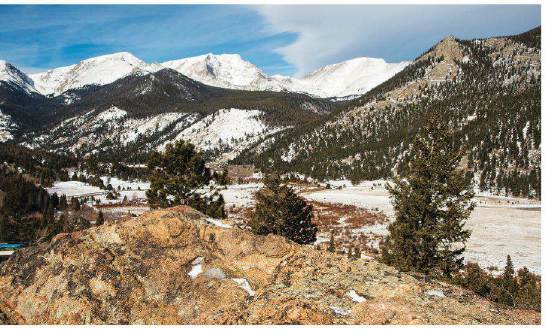
sunset-to-stars sequence over El Capitan on your first attempt. Better to try a
midday shot of passing cumulus clouds over your house.
The first consideration is which camera
mode to use. It makes sense to use an automatic mode like aperture priority to
adjust for any differences in exposure during the time-lapse. But this can
cause a lot of headaches when you seem all the frames together after the shot.
Flicker is a common problem in time-lapse movies, and is often caused by
different exposures during the sequence.
Shooting
The Sequence
A better choice is to use manual mode. When
I shoot a time-lapse, I go manual on everything with my camera. First, I
determine my exposure using | manual mode so my exposure stays consistent for
every shot. The ambient light in the scene may change during the sequence, but
today's cameras have great dynamic range and can handle slight exposure shifts.
Next, I focus on my subject and then turn
off my autofocus. If your camera is autofocusing for each shot, it may miss
frames as the camera focuses back and forth. I shoot on a tripod to keep each
frame identical in composition, critical when you make your final movie. I also
turn off my vibration reduction since the camera is stable on my tripod. I also
set my white balance to a fixed value. Don't use auto white balance and risk a
color shift between exposures. Once the camera is ready to go, it's time to set
your interval meter. This can be daunting at first. What's the right amount of
time and delay between frames for your subject?
Try this formula with simple daylight
scenes like passing clouds or flowing water. Set your shooting delay for five
seconds between frames and an overall time of 25 minutes. You'll capture 300
frames in 25 minutes, which will produce a 24 fps movie clip approximately 12
seconds long. For rotating stars at night, try using ISO 3200, a 20-second
exposure at //4 and a delay between shots of five seconds. Focusing at night
can be difficult.
Try setting your camera to infinity focus
or using live view to help focus on stars. Make sure you have a fresh battery
in your camera.
These shooting formulas are only the
beginning. Experiment with your time between shots depending on the speed of
your subject. Busy street scenes with people walking and cars driving past can
be shot with a quick interval like one or two seconds. Slow-moving subjects
will require a longer interval between shots.
Another consideration is what image quality
to use and your flash card capacity. If I shoot in RAW, I'll need a bigger
capacity card than if I'm shooting in JPEG. RAW images will give you better
options to adjust images after the sequence, but take a lot of processing power
and more hard drive space