There is no need to have a sophisticated device
or complex lighting techniques to capture photos which are bright enough.
Below are some guidelines to avoid five metering
errors that are most commonly encountered by photographers to get the shots that
match their "intentions".
1. The black or white subject turned into gray
The metering system of the camera often sees
the brightness of the scene as the standard midtone. The photo may have very
bright or very dark areas, but the average brightness lies in in between these
areas. Therefore, if you shoot a very bright subject at full frame, for
example, winter landscapes or a dazzling sandy beach, the camera will reduce the
exposure to take that as the midtone and it leads to the fact that white
subjects often turn gray. In the other case, if the camera's metering system
gets confused and take black object as the midtone, it will result in that the
black can also be turned into gray.
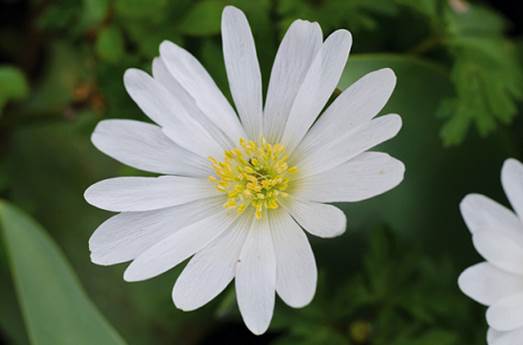
White
subjects often turn gray.
The solution is quite simple. You just need
to use the exposure compensation control to increase the exposure higher than
the value suggested by the camera to make the white “truly” white, or reduce
the exposure to make the subject and dark again. Just follow the histogram
displayed on the screen and drag the bar to the right of the measure to
increase the exposure or drag it to the left to reduce the exposure. However,
do not increase too much exposure and leave a large peak at the top of the
chart to the right, which avoids many of the brightest spots from being
"burned".
Another way to avoid this error is to place
a gray cardboard in front of the camera lens and in the same light as the main
subject is. Then, set the camera to manual exposure mode and set the
spot-metering mode. Please note that you should let the gray cardboard fill the
spot-metering area and adjust the exposure of the camera as proposed. Next, take
the gray cardboard out of the frame and the photo position according to the
adjusted exposure, then press the shutter button. Then, the camera will have
the correct gray balance with the environment in which you are shooting and the
colors will be more accurate.
2. Choosing the wrong ISO setting
If you want to shoot indoors in low light
conditions without a tripod, you should adjust the sensitivity setting (ISO) at
the highest level. Then, you will see the camera suggests a very high shutter
speed while the aperture is very small.
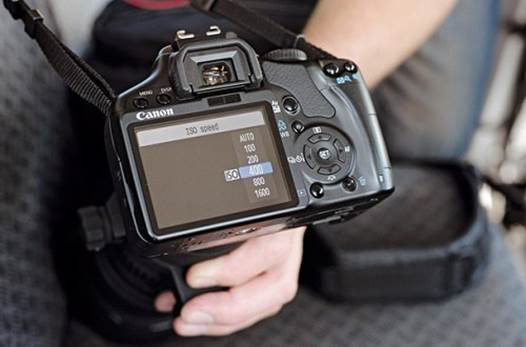
If
you want to shoot indoors in low light conditions without a tripod, you should
adjust the sensitivity setting (ISO) at the highest level.
If the camera is set to automatic mode or
semi-automatic, in some cases you may not be able to shoot as you may exceed
the maximum shutter speed or the minimum aperture setting is not small enough.
The ideal ISO sensitivity is recommended
when shooting outdoors or in conditions with much light of 100 or 200, whereas
the appropriate ISO for shooting indoors is 400 or 800. The ISO levels from
about 1600 or more are only appropriate where there is a very weak light
condition and often also causes grain (noise).
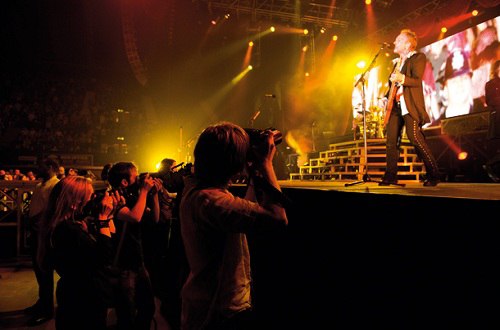
3. The speed too slow "to catch" the move
When trying to adjust the exposure to keep
all of the bright areas and the dark areas that have noise, it is easy to
forget that the shutter needs to be adjusted fast enough to capture any motion
in the scene.
It
is easy to forget that the shutter needs to be adjusted fast enough to capture
any motion in the scene.
This problem is especially common when
shooting indoors in relatively low light conditions or shooting a music
concert. In some cases, you just need to adjust a bit more aperture for faster
shutter speed, but usually you need to increase the ISO setting. Many
photographers are often afraid to use high ISO settings for fear of image
noise, but if you adjust the sensitivity range of the camera and do not use any
other extended settings, that does not matter. Remember that it is better that
photos have noise rather than are blurry.
Another solution is to use a flash to add more
light and will also increase the shutter speed faster. This method is often
used for portraits of friends and family home. But to capture the musical
performances, you have to use high ISO settings and a large aperture.
4. The subject is backlit in low light
When the subject is lit from behind or
darker than the surrounding background, the camera can easily be confused when
trying to expose the most important part of the photo while trying to balance
the exposure of the entire frame.
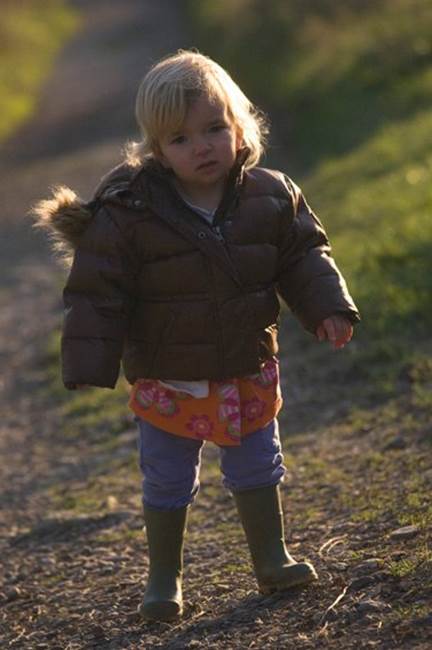
A
backlit photo
The easiest way to get the correct exposure
for the backlit subject is to switch to the spot-metering mode or
center-weighted mode.
The center-weighted mode focuses more on
exposing the center part of the frame accurately. Meanwhile, the spot-metering
mode only focuses on the brightness of the object under the selected spot-metering
exposure settings.
5. Clouds in landscape photos are too bright
This error occurs when there is a lack of
balance between the brightness of the sky and the ground in landscape photos.
However, in this case, the camera's metering system has the priority for the foreground
and adjusts the exposure, which makes the brightest part of the sky "burned".
This problem can be solved by using the ND Grad filter to balance the exposure
of the scenes or applying modern digital technology to create high dynamic
range photos.

This
error occurs when there is a lack of balance between the brightness of the sky
and the ground in landscape photos.
The best HDR method is accomplished by
coupling two or more photos taken with different exposure settings for each,
one set for the sky and another set for the ground. Then the image can be
bonded with an image editing software or a dedicated HDR app. Because the two
images need to match each other so it is important not to move the position of
the camera, it is best to set the camera on a solid tripod.
Some cameras today are equipped with a built-in
HDR feature, so you can capture directly on the camera without having to use
any additional software to edit the photos for your lifestyle.