If you love food as much as
photography, you’re in for a treat. Grab your chef’s hat and camera, and learn
how to make delicious-looking images whatever your skill level inside and
outside of the kitchen
Love it or hate it, McDonald’s is a
brilliant example of good food photography. If you’re hungry and want something
quick to eat, nothing looks more alluring than a plump Big Mac or Quarter
Pounder on a billboard – even though you know deep down that it doesn’t taste
quite as succulent as that image would have you believe. Good food photographs
trigger a reaction in the viewer, making them crave what they see, but getting
to that stage isn’t as simple as it sounds. Often the most uncomplicated images
are the most considered and well executed. And like any good portrait shoot,
food photography hinges on presentation, detailed styling and a concept that
complements the food to get your taste buds tingling. But whether you’re
someone who takes pride in cooking and photographs the food you crate before
devouring it, or you’re just interested in the art of food photography, there
will be lots on offer in this article to give you food for thought…
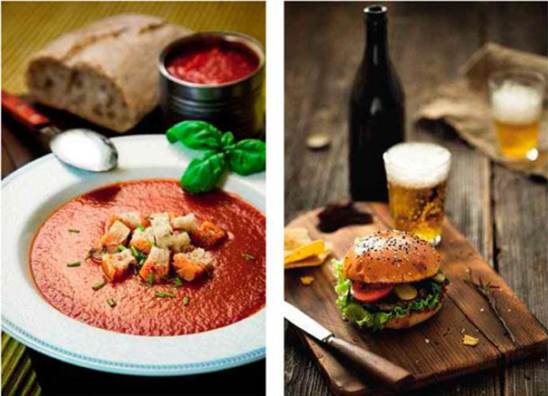
Both
these images contain and/or control the viewer's eye within the frame
ONE OF THE FIRST steps to creating a good food image is design, and that happens
even before the ingredients come out of the cupboard. Devising a concept,
carefully selecting your subjects and choosing how you’ll style your image are
all part of the design process – then comes the placement of elements to
compose the best shot for retaining the viewer’s interest. You want to lead
your viewer around the image and control the interaction between the various
subjects’ shapes, lines and colors for compelling impact. First decide what
your main subject will be – the focus of the image or, as foodies like to call
it, the ‘hero’ piece – and then you can consider the position of accent
elements, like garnishes, other food items and cutlery, to make it look more
appetizing. Now, this is easy if you have a professional food stylist on call,
but for us hobbyists there are a few guidelines we can use when doing it for
ourselves, which many pros use, too.
Like with any good photograph, the
rule-of-thirds and the rule-of-odds apply with food photography, so while
breaking the rules can work, too, rely on these fundamental compositional
guidelines to get you started. If you feel like exploring more creative
solutions, remember to incorporate visual balance in the image – think about
symmetry and asymmetry – you’ll know if it’s not balanced by a sense of
something missing from the composition. Repeated patterns work well, too, such
as subjects in the foreground and background styled with the same shapes and
textures, as are proportions and the scale of your ‘hero’ compared to other
elements. If you had a cupcake on a large plate, for instance, the balance and
impact would be much weaker than if it was a small plate putting emphasis on
the cake. It always works better to photograph much smaller portions than you’d
eat, too, so not to overwhelm the image, as subjects will naturally look larger
in photographs. An effective way to visualize whether you’ve a strong
composition or not is to follow the viewer’s line of sight to make sure you
lead them from the bottom to the top of the frame without inviting their eye to
wander or leave the picture too early. You want to contain and control the flow
of their gaze for as long as possible. This is where accent items come in as not
only do they add visual appeal, but they fill empty spaces and add color and
texture where needed.
Knowing
how to use props and style your food to get the best from what you’ve got can
go a long way towards a better picture
Your choice of background is really
important, as in many respects it brings the whole composition together. Rustic
backdrops like painted or distressed wooden panels, slabs of slate or textured
fabrics can all work well if they complement the concept, tone and texture of
the subject. For instance, for images that ooze relaxed rustic home comfort,
choose a rough texture with plenty of interest, whereas a polished,
fresh-looking, Michelin-star styled dinner looks better against a sleek and
simple background of a complementary color or a close-up on a white plate.
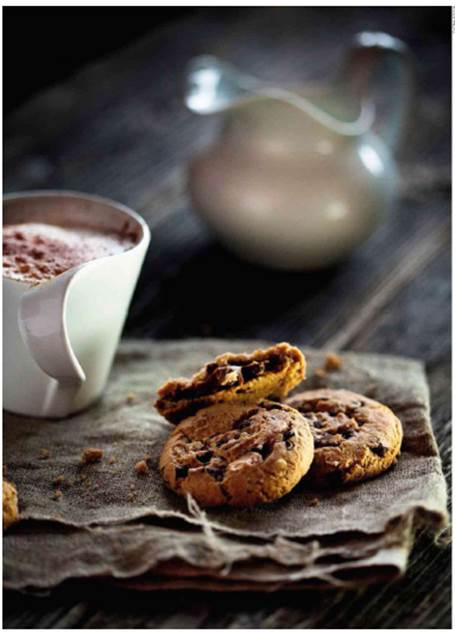
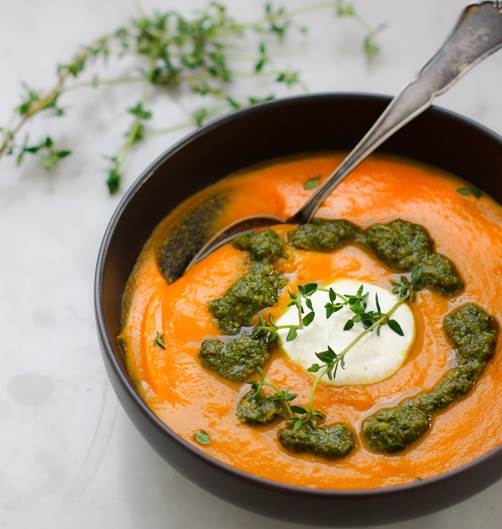
Food,
glorious food! using a wide aperture for shallow depth of field and odd numbers
can create really soft but strong
While most professionals have a food
stylist to ensure the plate is perfect, it’s not essential. However, knowing
how to use props and style your food to get the best from what you’ve got can
go a long way towards a better picture. Propping is part of the fun, too: visit
antique shops, kitchen stores, stone mason yards and catering rental companies
for unusual utensils and materials such as stone of slate to use as backdrops –
it will allow you to be much more creative than just placing food on a plate.
You’re creating your still-life scene, using the food as the focal point,
delivering a sense of the food and the feelings viewers get if they were to eat
it – and props can dramatically alter this. Depending on the style you want to
create, the perfection of the props or the food you’re using is relative. If
you’re going for old-world charm and comfort food, a dug-in chocolate cream pie
and dirty dessert spoon on a slate surface may seem more tempting than if it
was pristine, suggesting even the photographer couldn’t resists a taste. But,
regardless, try to pick subjects that are as flawless as possible avoid bruised,
burnt, chipped or crumpled specimens unless that’s the look you want. If your
primary aim is to take beautiful pictures of the food you cook to eat, all you
need to do is master working with natural light, basic presentation and the
technical tools like shooting with a wide aperture for shallow depth-of-field.
But if you’re shooting for stock or blogging, there are instances where you may
need to create the food for photography, not to be eaten.
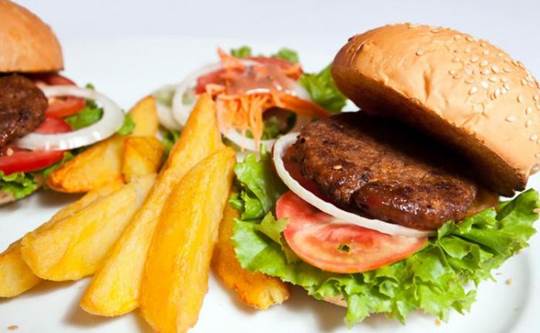
Repeating
subjects is a good way to create simple but strong compositions
Grabbing a book on food styling can help
you prepare various foods, but here are a few tips and tricks we’ve grabbed
from the professionals. Undercook the item so the outside is perfect, even if
the inside is raw, and if it’s turkey you’re cooking, rub the skin with
washing-up liquid before cooking to prevent the skin from cracking. Some
substitutes for real food can make photography much easier – for instance,
artificial flake ice is ideal for images of cooling beer or soda bottles as it
won’t melt. Similarly, artificial ice cubes, ice cream, steam and fake foods
can also be used in the background as long as they’re out of focus. Additives
are mixed with strawberry sauce to thicken it for pouring over a dessert and
pancakes are sprayed with Scotch Guard so the syrup doesn’t soak into them. A
water spray bottle is great for refreshing raw fruits; rub sliced apples and
pears with lemon juice to stop browning; and compose spaghetti, not in a heap,
but it small swirls on a plate for a more appetizing appearance.
Whatever you’re shooting or however you
style it, remember less is more when it comes to good food photography.
Everything must have its place, its purpose within the scene and work together
in terms of composition, texture and color. Don’t overcomplicate the image with
lots of props or garnishes; keep the ‘hero’ the star of the shot. Technically,
though, there are only a few techniques to master: selective focusing, shallow
depth-of-field (using an aperture between f/2.8 to f/8) and experimenting with
angles and viewpoints for varying impact. Most food photography is shot 200
to 350 above the surface of the food, but directly overhead shots
can work well, too. There’s a lot to consider, as food photography is as much
of an art form as cooking, but if you follow our advice, you’ll create some
tasty results.