WINDOWS XP/ VISTA / 7
Set up the Recycle Bin in the notification tray so it is
always within reach
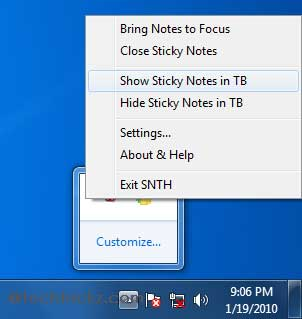
The handy tray icon is always visible
and offers some information without any effort.
The Recycle Bin cannot easily be shifted
into the taskbar, since trying this only pins it to the Windows Explorer icon,
which is not all that helpful. However, with the free tool Mini Bin
(www.e-sushi.net/minibin/) linking and functioning from there can be made
possible. For installing, unzip the ZIP archive and click and start the EXE
file. The option 'Start Mini-Bin at system boot' option must be activated so
that the tool remains active on a permanent basis. You can directly start the
program once the installation is complete. The tool is not a replacement for
the Windows Recycle Bin but just an additional access method; the usual system
Recycle Bin is always available and can be used even now. With this tool you
can simply open the 'old Recycle Bin' directly by double-clicking, or empty it
immediately using the context menu. Configuration is not really necessary: you
must just adjust the icon in the info area in such a way that the small recycle
bin is always visible. The tool tip message even shows the current filling
status and informs about when the next automatic emptying cycle is expected.
You can uninstall the tool at any time from the Software dialog in the Control
Panel.
WINDOWS XP / VISTA / 7
Use a picture of your choice as the folder preview You
need to access the same folders fairly regularly, but waste lots of time
scanning lists to find them.

Use a photo on your folder icon to
make it stand out against a sea of similar yellow icons.
You can replace the images assigned at
random by Windows Explorer to visualize various folders' contents with an
appropriate association of your own. However, you can select only one image
file and not many thumbnails at a time—and that too must be done manually. For
this, right-click on the desired folder icon in the relevant view and select
the context command 'Properties'. Go to the 'Customize' tab. Now, click on the
'Select file' option in the 'Folder picture' area. Mark the desired field and
then click on 'Open'. Confirm this change using the 'Yes' button and then the
'OK' button. Windows saves these individual settings for the respective folder
in a file called 'desktop.ini' located in the row beginning with 'Logo='. The
change can even be cancelled in the same dialog by clicking on the 'Restore'
option.
NOTE: Do not mistake this setting with the
'Folder icon' option. This will change the icon permanently and then will not
allow any dynamic image for the folders.
WINDOWS XP / VISTA / 7
Connect Microsoft SkyDrive as a network drive under
Windows You use a SkyDrive account to back up your files and share them with
friends, and the process be made even easier.

Mount your SkyDrive account as a
drive in your Windows Explorer for quick access.
DB SkyDrive is offering all those who have
registered themselves for Windows Live a free 25 GB online memory space as a
part of Windows Live; you can simply call it up in the browser and can even
manage it by yourself. It is even better if you connect the memory space as a
network drive in the system. For this, all you need is the correct
identification of your own account, which can be copied from the URL indicated
in the browser. Open your SkyDrive account in the browser after getting
yourself registered there. The URL in the address bar looks somewhat like
'https://skydrive.live. com/?cid=1234567890abcdef'. Mark and copy the part
after 'cid=' or make a note of the 16-digit 'cid'. Now, you can start the
Windows Explorer. Right-click to the left of the structure on 'Computer' and
select the context command 'Connect with the network' or 'Assign network'.
To begin with, define the desired alphabet
for the SkyDrive like maybe 'Z:' in the list field. You should take any
alphabet that comes later in the series of alphabets so as to avoid any
conflicts with other drives or memory cards. Enter the 'Folder' in the form of
'\Server\SharedFolder', where 'Wdocs. live.net@SSLV is the server and then the
CID is the share name. Activate the option 'Restore connection in case of
disconnection' for automatic access. You have to sign in again for Windows Live
using your access data after clicking on 'Finish'. The new drive should now
appear in the Explorer.