Creating Document Information Panels
When creating Office documents for use with
SharePoint, certain metadata is required by default, such as a title
for the document and any relevant tags. Along with the default metadata
that’s required by the Document content type, you can add additional
metadata that will be stored as specific columns in the document
library. This data is captured using a Document Information Panel, and
customization of such a panel is another important use of InfoPath.
From the Site Objects pane in SharePoint Designer, select Lists And Libraries. Add a new Document Library and name it Purchase Orders.
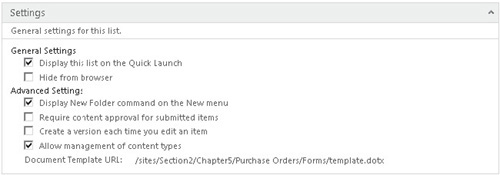
Double-click
the Purchase Orders icon to manage the settings for the document
library. In the Settings section, check the Allow Management Of Content
Types checkbox, as shown. Click the Save icon in the upper-right corner
of the Designer window to persist the changes.
From the Site Objects pane, select Site Columns. Add a new column of type Currency. Type the Name of the column as Amount and add it to the Custom Columns group.
Add another column of type Single Line of Text. This time type the name Customer Reference. Again, add it to the Custom Columns group.
Click the Save icon in the upper-right corner of the Designer window to persist the changes.
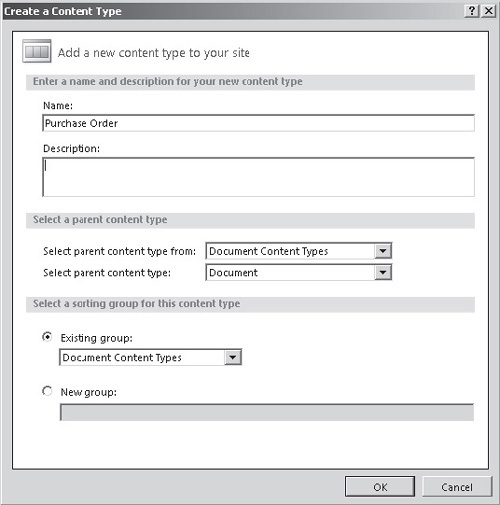
From
the Site Objects pane, select Content Types, and then, from the New
section of the Content Types ribbon, click Content Type. Type the Name
as Purchase Order and the parent content type to Document, as shown next. Add the content type to the Document Content Types group.
Double-click the Purchase Order content type to manage its settings, and then click the Edit Columns button in the ribbon.
Click
the Add Existing Site Column button to add the Amount and Customer
Reference columns that we created earlier. Click the Save icon to
persist the changes.
With
the Purchase Order content type selected, from the Actions section of
the Content Types ribbon, select Apply to List. Select the Purchase
Orders document library from the Lists and Libraries picker.
Note
We’ve
touched on a few key concepts of the SharePoint data structure in the
course of setting up this example.
Configuring
document information panels can be done only from a browser-based user
interface. Using the browser, navigate to the Purchase Orders document
library. From the Library tab of the ribbon, select Library Settings.
In
the Content Types section, click the Purchase Order content type and
then select the Document Information Panel settings link.
Document
Information panels are configured at the content type level. In effect,
a document information panel is responsible for providing a user
interface to capture and display data that is stored in the columns
that are referenced by the content type. In the case of our example, we
added two additional columns: Amount and Customer Reference.
Click
the Create A New Custom Template link. This will open InfoPath
Designer, where we can customize the system generated Document
Information panel.
Select the Customer Reference text box, and then from the Properties tab of the ribbon, select Change Control | Combo Box.
Click the Edit Choices button, and using the Add button, enter a few sample customer reference values.
To
publish the Document Information panel to SharePoint, click File to
enter the backstage area, and then select Publish Your Form. When
prompted, enter a filename on the local file system to save the form
before publishing.
If you navigate to the Purchase Orders document
library, you can now select New Document | Purchase Order from the
Documents tab to see the fruits of our labor. A blank Word document is
shown with our custom information panel at the top of the page.