Using InfoPath Forms in SharePoint
In SharePoint applications, InfoPath forms are used
in four main ways: to create form templates, custom forms for
SharePoint lists, document information panels, and workflow forms.
Creating Form Templates
SharePoint form templates are similar to forms used
by other Office applications such as Word and Excel. Using the InfoPath
client, you create form templates that are used for a SharePoint
document library. As users complete the form and submit the data to
SharePoint, the form is stored in the document library in the same way
a Word document or any other content would be stored.
The main benefit in using InfoPath in this context
as opposed to Word is that, although the InfoPath form can be completed
using the InfoPath client application, for users who don’t have the
client application installed, the form will be automatically rendered
for completion in the browser. Another key benefit is that the
individual data items captured in an InfoPath form can be bound to
columns in the document library. Although this is also possible using
other Office applications, with InfoPath it’s a bit more transparent.
Note
In SharePoint 2010, you can install Office web
applications so that a web-based version of applications such as Word
and Excel will be available for use via the web browser if a user
doesn’t have the client application installed. In this case, using a
Word template would also allow users to complete forms within the
browser.
In the preceding example, you learned how to create
a basic form and publish it to a form library. In effect, we created a
form template that SharePoint can use to create new documents for
storage within the MyForms library. To see this working, navigate to
the MyForms library, open the Documents tab in the ribbon, and select
New Document. You can see that our InfoPath template is displayed in a
new page. Click Save and then enter MyTestFile
as the filename. Click Close to return to the MyForms document library.
You can see that a new document named MyTestFile has been added to the
library.
Let’s take a look at a more in-depth example of this
type of form to see how you can capture data in InfoPath and save it
within specific columns in SharePoint. In this example, we’ll create a
custom form that can be used by employees to request demonstration
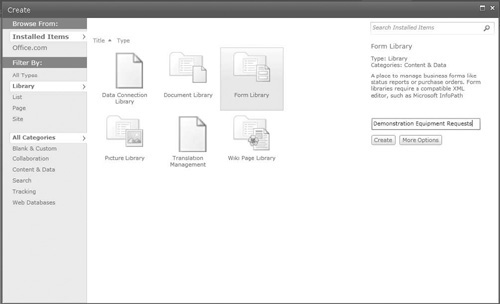
equipment. We’ll create a new form library for this example.
Click Documents from the menu on the left and then select Create. Add a new Form Library and name it Demonstration Equipment Requests.
Open
InfoPath Designer. In the New section of the backstage area, select
SharePoint Form Library and then click Design This Form.
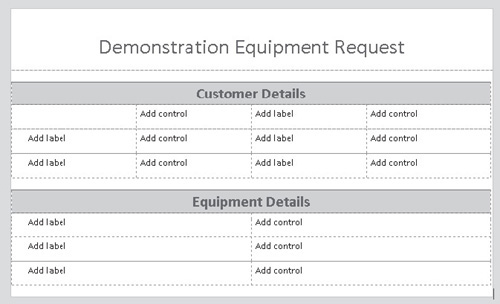
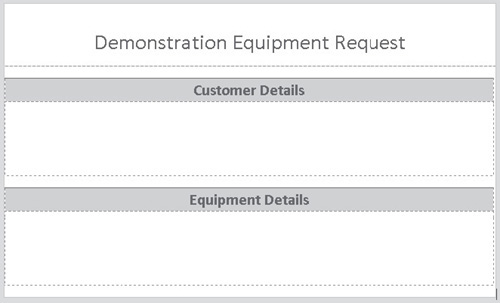
Change
the form title to Demonstration Equipment Request, the top section
title to Customer Details, and the bottom section title to Equipment
Details, as shown here:
Before
we add data entry controls to the page, we’ll define the data structure
for our form. Behind the scenes, the data structure is defined as an
XML schema. In the Fields pane on the left side of the page,
right-click the myFields node and then select Properties from the
context menu. Change the Name to EquipmentRequest.
In the Actions section, click Add Field. Create a new field of type Group and type the Name as Customer. Repeat this step to create another group named Equipment.
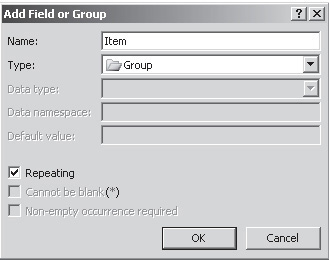
Select the Equipment node and then click Add Field. Add a group node and type the Name Item; however, this time check the Repeating checkbox, as shown:
Now we can begin to add nodes for our individual fields. Within the Customer group, add the following fields:
| Name | Type | Data Type |
|---|
| CustomerId | Field (element) | Whole Number (integer) |
| CompanyName | Field (element) | Text (string) |
| AddressLine1 | Field (element) | Text (string) |
| AddressLine2 | Field (element) | Text (string) |
| City | Field (element) | Text (string) |
| StateProvince | Field (element) | Text (string) |
| PostalCode | Field (element) | Text (string) |
Within the Item repeating group, add the following fields:
| Name | Type | Data Type |
|---|
| ProductNumber | Field (element) | Text (string) |
| ProductName | Field (element) | Text (string) |
| StandardCost | Field (element) | Decimal (double) |
| ListPrice | Field (element) | Decimal (double) |
| Quantity | Field (element) | Whole Number (integer) |
| LineTotalCost | Field (element) | Decimal (double) |
| LineTotalValue | Field (element) | Decimal (double) |
In the Equipment group, add the following fields:
| Name | Type | Data Type |
|---|
| TotalCost | Field (element) | Decimal (double) |
| TotalValue | Field (element) | Decimal (double) |
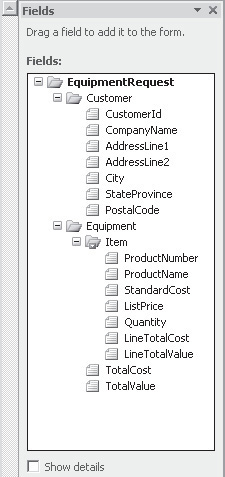
After
all fields have been added, the data structure should look as shown
next. If any fields are not in the correct location, right-click the
wayward field and select Move from the context menu to relocate the
field within the data structure.
We can now start adding controls to capture data for
our fields. The design experience in InfoPath is very much data-led.
When we define the data source first, creating a user interface is
often a case of simply dragging the appropriate data elements onto the
page. InfoPath Designer automatically inserts an appropriate input
control that is bound to the correct field.
In
the Customer Details section, select the cells that are underneath the
title, and then, from the Layout tab of the ribbon, select Merge Cells.
Repeat this step for the Equipment Details section. The revised form
should look as follows:
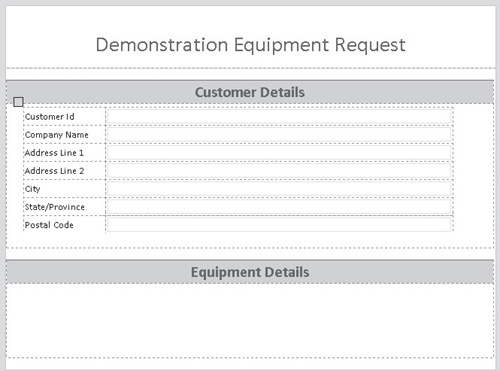
Drag
the Customer group element into the Customer Details section of the
form. InfoPath Designer will automatically add text boxes for each
field together with labels for the field name. Rather than having the
controls laid out sequentially on the page, we can reformat them into a
table by converting the section control into a Controls in Layout Table
control. Select the Section control, and from the Properties menu in
the ribbon, select Change Control | Controls in Layout Table.
Although
our layout table looks much tidier than the standard section control
layout, we no longer have field labels. We can add these in by
selecting a control within the layout table and then choosing Insert
Left from the Layout tab in the ribbon. To get the name of the field,
place the cursor over the adjacent text box control; this will show the
field element to which the control is bound. Using this technique, add
in appropriate labels for each field.
Tables
in InfoPath can be resized in much the same way as they are changed in
Word and Excel: simply drag the edges of the columns to the appropriate
size. Using this method, resize the table so that all data can be
clearly seen as shown:
Now
that we’ve added controls to capture details of the customer that’s
requesting demonstration equipment, the next section of our form allows
users to enter details of the equipment required. Since more than one
piece of equipment may be required by a customer, we’ve added a
repeating Item section to our data set. We can allow users to add as
many items as they need by creating a repeating table on the form.
Drag the Item repeating Group onto the Equipment Details section of the form.
Select Repeating Table from the pop-up list of options.