Make quick and highly effective adjustments
to your images using the Blending modes in Photoshop or Photoshop Elements.
Blending modes are a powerful and speedy
means of making significant and effective adjustments to your images.
Getting to grips with layers and Blending
modes is one of the most important things you can do when it comes to
developing your Photoshop skills. Although some Blending modes will probably
remain seldom used, you'll find yourself using other modes so often that you'll
be wondering what you did before.
If you think of Photoshop's layers as a
stack of acetates, Blending modes are your means of determining how the layers
interact with each other. The best thing about Blending modes is that you can
make adjustments as you go, for instance by using the opacity slider or
changing a layer's Blending mode altogether.
These easy-to-follow steps will show you
just how easy Blending modes are to work with. You can follow along with your
own images if you prefer, or practise using the example image shown here which
you'll find included on I the free disc at the back of the magazine.
- Soft Light

Soft
Light
Duplicate your layer by dragging it onto
the Create A New Layer icon at the base of the Layers palette. Then go to the
drop-down menu at the top of the Layers palette and select Soft Light blend
mode for a swift and simple way of improving the contrast in the image.
- Saturation

Saturation
Click on the Create New Fill or Adjustment
Layer button at the base of the Layers palette and select a Hue/Saturation
adjustment layer. Change the Blending mode to Saturation. Select the reds and
then the yellows from the menu and boost the saturation of each.
- Hue

Hue
Hue Complete the effect by creating a
second Hue/ Saturation adjustment layer and switching the blend mode of this
layer to Hue. Select the blues and then the cyans and adjust the hue of each to
make them look less cool and more rich and green.
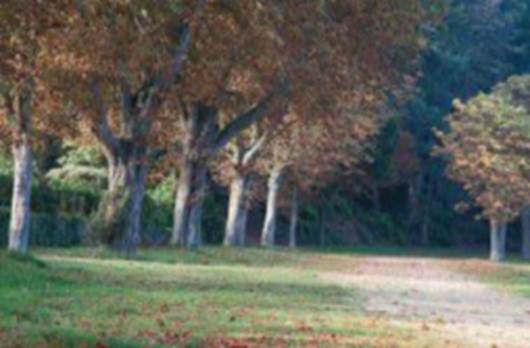
Before:
This image has a lot of potential but looks rather flat and dull
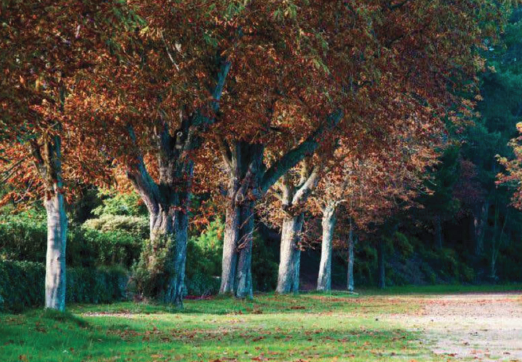
After:
After only a few minutes in Elements, the image has a lot more punch