How to take mesmerising images of subjects on a large
scale
Macro photography is an accessible genre
that everyone can get involved in. No matter where you live or what your budget
is, there are plenty of shooting opportunities that you can make the most of.
In this photographic guide we’ll show you everything you need to know about
capturing glorious macro images. From packing the right kit, through to
tracking down your subjects, there won’t be a topic or question left
unanswered.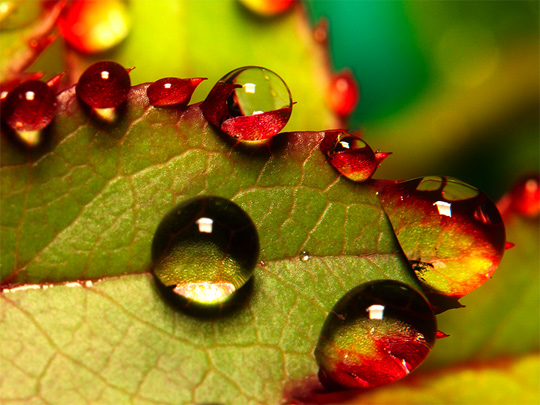
Macro
photography
Great macro shots have the power to
captivate the viewer and hold a gaze in ways that other photographic genres
simply can’t achieve. The magic of bringing small, untouched words to life on a
large scale is something that people find very hard to resist. In order to
progress your skills to a pro level, you need to be aware of a few techniques
to achieve a truly high-end finish. We’ll teach you how to perfect your
lighting, create complementary backgrounds and choose the right settings for
maximum impact. Let’s get started…
Shooting techniques
Try out these methods for perfect
macro results
Lighting your macro shots

Lighting with macro shots
Forget bright sunshine – an overcast day
offers the best light for outdoor macro shots, as the cloud cover acts as a
giant softbox and eliminates harsh shadows. You should always have a reflector
handy to help bounce light into your subject.
If you using extension tubes,
Teleconverters or filters, you will often find your light is limited and you
need to supplement the shot with another light source or a longer shutter
speed. You can increase your chances of capturing a great macro image, simply
by using flash. Using flash will give you much more control over the exposure,
and minimises the need to shoot at such a wide aperture or a long shutter
speed. Smaller apertures like f16 and f22 give you increase depth of field and
flash also helps to freeze any movement caused by camera shake, the breeze or
the subject itself.
Another advantage of flash is that it will
illuminate and highlight the details and textures of your subject, which is one
of the major features of a successful macro image. It also helps to produce
brighter, more vivid colours.
You can purchase complete macro flash systems
that mount on your macro lens, usually consisting of two separate flash heads
that you can adjust to suit your shot. Brackets, clips and stands are also
available that enable you to position one or two flashes off-camera. Thekey is
to angle the flashes to produce an appealing result that doesn’t make the use
of flash look too obvious or clumsy.
Macro backgrounds
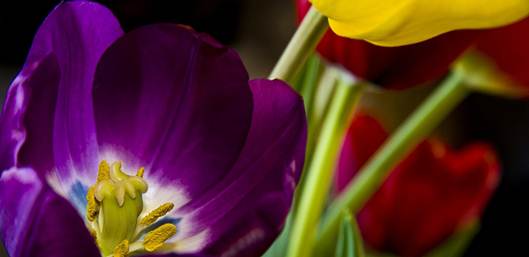
The background of a macro shot is as
important in the success of a shot as the main subject. It should complement
the subject and help emphasise the detail in your subject rather than compete
with it. An easy way to do this is to control your depth of field, keeping the
subject in focus but subtly blurring-out the background.
A simple shift of your viewpoint could also
help you find a different colour or tone in the background that might look
better behind your subject, so move your lens around until you find something
that works. Avoid strong shapes or highlights behind your subject as these will
detract from the shot.
A spot of ‘gardening’ is often needed to
tidy up the surroundings. This refers to when you remove any stray branches,
leaves or other objects to help give you a clear background for your shot. Use
common sense in this instance. It’s never advisable to start ripping up flower
beds and possibly even disturbing protected species just to get a good
photograph. Normally you can just tuck leaves and other pieces out of the way
just while you take your photo.
Another trick to easily manipulate the
colour of your background is to place coloured card or fabric behind your
subject. Pick a matte-finish material to avoid unsightly reflections and
position it around ten centimetres behind your subject so you can throw the
paper texture out of focus. You can do this both indoor and outside- use pegs,
clips or a mini stand to hold you background firmly in place. Dark velvet is
recommended for its fantastic light-absorbing properties on a very bright day.
Your settings
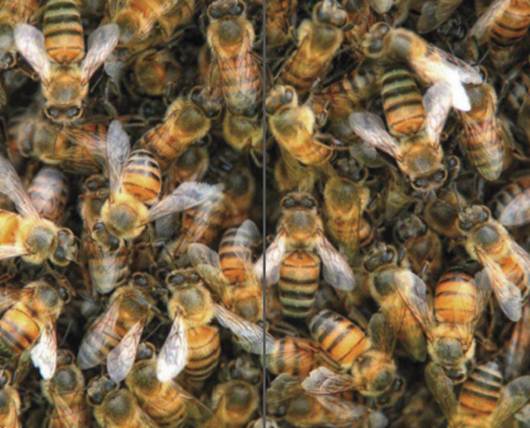
Aperture
- The visible sharpness gained from depth-of-field adjustments are tiny when
shooting in macro, and the different between f5 and f22 can often be measured
in mere milimetres.
Taking a great macro shot requires a
careful balance of your camera settings. To get the juggling act right,
consider how every setting will affect the final shot.
Start by determining the degree of
depth-of-field you want to achieve. For a shallow depth of field select an
aperture of around f11 either in Apenture Priority or manual mode. This will
keep the details of your main subject sharp while throwing the background out
of focus.
Next consider your shutter speed. It may be
that your camera has selected a slow shutter speed if you’re working in
Apenture Priority. If this is the case, you will need to use a tripod, monopod
or flash to help save your camera’s self-timer to minimise any camera shake
during the exposure.
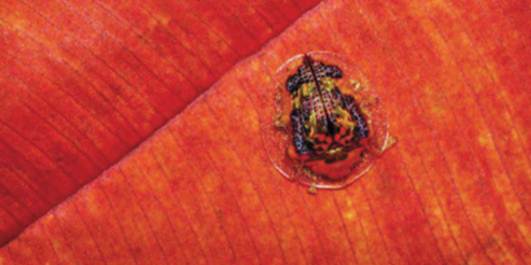
Look
closer - Be aware of the miniature life forms around you. Even small
objects such as plant leaves can contain even smaller subject that deserve
attention from your camera lens.
It’s recommended that you focus manually.
Switch your lens to MF and carefully focus on the most important part of your
subject. If it’s a bug, then the head should be your main focus point. Position
your camera on the same level as your subject and be prepared to get down into
the underground to do this. If you have a tiltable LCD, then switch to Live
View and use your screen to compose your shot.