After debugging and testing
in the iPhone Simulator and on your own device(s), you’ll want to build a
deployment version of your app for ad hoc testing by your beta testers
(friends, family, etc.) and then a final version for submission to the
iTunes App Store.
Ad Hoc Deployment and Testing
Once you’ve tested your app as much as you can, the
next step is to hand it off to some additional beta testers to make sure
they understand how to use it and don’t stumble across any bugs.
Apple’s number one reason for rejecting apps submitted to the App Store
is crashing bugs they find during the review process—it’s worth your time to make sure your app is rock solid before submitting it.
The first step in doing ad hoc testing is to collect
the device IDs for each of the test devices and add them in the
Provisioning Portal. Note that you’re only allowed 100 ad hoc test
devices and they only reset once a year, so make sure that you’re
signing up people who will be available to test all of your
applications. Once you’ve got the device IDs added, you’ll need to
create a Distribution Certificate and use it to create an Ad Hoc
Provisioning Profile that includes all of the device IDs. Download that
profile and save it someplace safe—you’ll be sending it to each of your
testers along with your app.
You don’t want this extra stuff in your released application; it will
slow it down or worse. For instance, suppose you left the NSEnableZombie
environment variable set to YES. Now when the application ran, released
objects would be turned into zombies rather than the objects being returned
to available memory. Your application would be sluggish and could be
abruptly terminated by the device’s operating system. We get rid of this
extra debugging information by building a release version of your app.
To build a release version for ad hoc distribution,
you’ll want to create a new scheme (essentially a conveniently named
collection of build settings). In the pull-down menu at the top of the
window, select New Scheme, give it a name like “Ad hoc distribution,”
and pick Launch Scheme from the two choices. This creates a new scheme
where we’ll change some build settings, while leaving your original
scheme easy to switch back to for additional debugging builds.
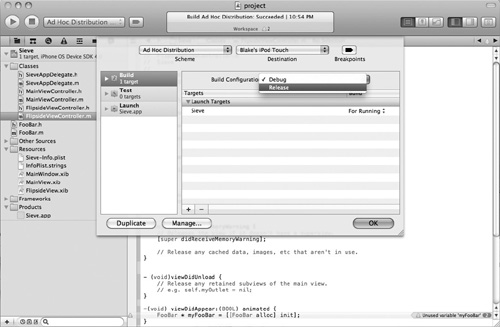
In the pull-down menu, select Edit Active Scheme,
click Build in the left column, and change the Build Configuration from
Debug to Release (Figure 1). Click OK to save the change to the new scheme.
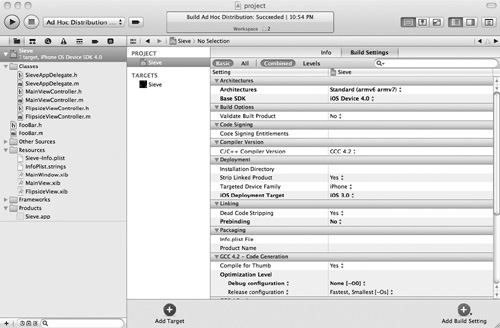
Now select your app in the navigation panel on the left and then click Build Settings (Figure 2).
Make sure the Base SDK is set to the most recent one available. Under
Deployment set the Targeted Device Family to “iPhone”. Set the iOS
Deployment Target to the minimum version of iOS that your app requires.
Unless you’re using features only available in newer OS versions, iOS
3.0 is probably good, since it will allow anyone whose device is at
least updated to iOS 3 to use your app.
Now
we’re ready to build the App file that you’ll be sending to your ad hoc
testers. Make sure that you’re building for a device rather than the
simulator by checking the pull-down menu. Then select Product | Clean Ad
Hoc Distribution from the main menu followed by Product | Build Ad Hoc
Distribution. You can check the Xcode Preferences to see where your App
file was written, but it probably defaulted to
Library/Developer/Xcode/DerivedData/workspace-name/Build/Products/Release-iphoneos/app-name.
This is the file that you can send to your testers along with the Ad
Hoc Distribution Profile that you created earlier. They can just drop
both files onto iTunes and then sync their device to start testing.
Distributing Your App via the App Store
To really build the final version of your app for
submission to the iTunes App Store, you should check Apple’s current
instructions for submitting apps. Complete instructions can be found on
the iPhone Developer web site. You must have an iTunes Connect Account
if you wish to sell your app on the App Store.
You will want to make another new scheme similar to
the one we made in the preceding section, but this time, when creating
the scheme, select Distribution Scheme rather than Launch Scheme. This
will build an archived version of your app for uploading to iTunes
Connect.
In addition to building a
release version of your app, if you are submitting it to the App Store,
you will also have to create an icon for it in several sizes, upload
sample screenshots, write a description of your app, and pick a category
for it. Complete instructions are available on Apple’s web site.