1. Deploying the Report
Currently, you can't deploy a report to Azure, so all reports must be deployed locally. To deploy a report, follow these steps:
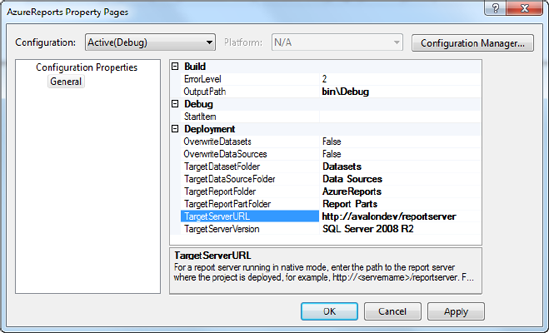
Right-click the report solution, and select Properties from the context menu. In the Property Pages dialog, the only thing you need to enter is the TargetServerURL, shown in Figure 1. Notice also the name of the TargetReportFolder, which in this case is AzureReports—the name of your Visual Studio solution. Right-click the solution in Solution Explorer, and select Deploy from the context menu. When the report has deployed successfully, open your browser, and navigate to http://[machinename]/Reports. You should be presented with your SQL Server Reporting Services Home folder and the AzureReports folder. In the AzureReports folder is your newly created Documents report. To view the report, click the link for it.
You just walked through a
simple example of creating a report that pulls data from SQL Azure.
Let's modify it to add a subreport that pulls data from the on-premises
database.
2. Creating a Subreport
Your report is called
Documents, but it displays users—and that's why you're going to add a
subreport. You want to display all documents for the related users (one
user can have multiple documents). To do this, you need to create
another report and, along with it, a new data source and dataset. This
time, however, you want to pull the documents from your on-premises
database. Thus, the users come from SQL Azure, and the related documents
from your on-premises database. Follow these steps:
You
need to create the subreport to display the documents. Create a new report and an associated
data source and dataset. For this exercise, the name of this new report
doesn't matter. The data source should be pointed to the local,
on-premises copy of the database, and the dataset should be the same as
the dataset for the Azure-based report. With
the new report open in Design mode, create a new data source that
points to your local (on-premises) copy of the TechBio database. This
new data source can use a different authentication method if you like,
such as Windows Authentication (integrated security). Create
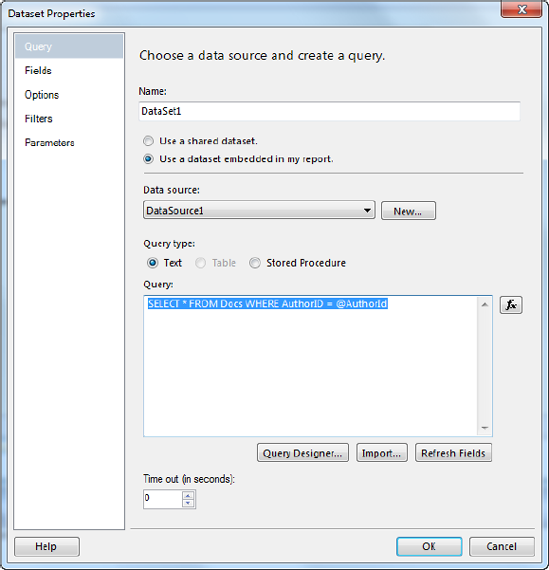
a new dataset based on this new data source. On the Query page in the
Dataset Properties dialog, select the data source you just created, and
use the Text query type. Enter the query shown in Figure 2:
it pulls from the Docs table, and you need to apply a filter so that it
gives you only the documents for the associated user. You want this to
be dynamic, so your filter uses a parameter that you define shortly.
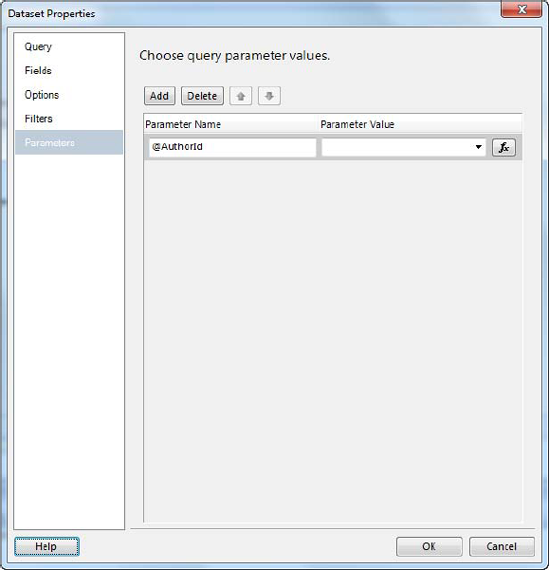
Select the Parameters page of the Dataset Properties dialog (see Figure 3),
and notice that the parameter was added for you when you used it in the
query on the Query page. It's nice to see that SSRS automatically picks
up this information.
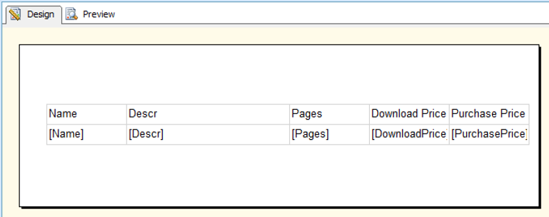
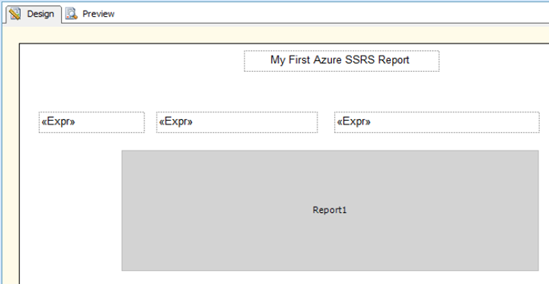
Your
next step is to design your report. Back on the report, make sure the
Design tab is selected, and drag a table onto the report. Again, the
table has three columns by default, and you want to display five; so,
add two more columns, and then center the table on the report. From
the Report Data window, drag Name, Descr, Pages, Download Price, and
Purchase Price columns onto the table. When you're done, the report
should look like Figure 4.
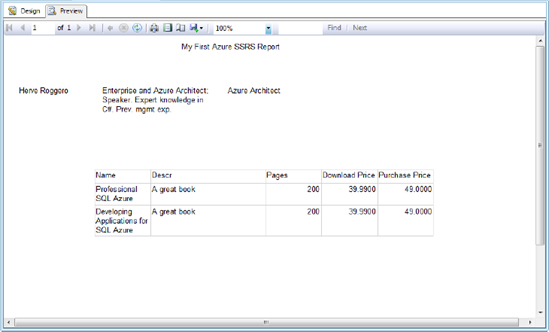
Test
the report by selecting the Preview tab. The report prompts you for an
AuthorId value: type in a valid value (111 or 113 should work). The
report should display the appropriate data for the id you entered.
2.1. Adding the Subreport to the Main Report
Now that you're confident that your subreport works, let's wire it up to the main report:
With
the first report open (the Documents report), there are two ways you
can add a subreport: you can either drag the report you've designated as
a subreport from Solution Explorer onto the parent report, which
automatically sets the appropriate properties of the subreport; or you
can drag a SubReport control from the Toolbox onto the parent report and
manually set the properties. How you choose to do it isn't important,
as long as the appropriate properties are set; you access them by
right-clicking the subreport and selecting Properties. In the Subreport
Properties dialog, make sure the correct report is selected as the
subreport. Select
the Parameters page, and add the parameter that is being passed from
the parent report to the subreport—in this case, AuthorId. You
need to make a change to the parent report so your data is displayed
correctly. Right now, the table lists all of the users. If you kept it
that way, the report would list all the users and then list all the
documents. Instead, you want it to list the users and associated
documents, grouped by user. To do this, delete the table on the parent
report and, from the Report Data window, drag the Name, Intro, and Title
fields from the dataset onto the report, as shown in Figure 5. Now, when you run the report, it lists a user and that user's documents, as shown in Figure 6.
|