Add passwords
To add a new entry to a group, select the
group then right-click the main panel and select ‘Add entry'. A new window
opens. Enter a title, username and the password. Again, KeePass will judge the
strength of the password for you. Enter the URL for the login page where the
credentials will be used, and finally click 'OK'. Now save the database by
clicking the floppy disk icon at the top.
The most immediate way to use usernames and
passwords saved in the KeePass database is to click on one, then click its URL
in the lower pane of the user interface to bring up the relevant login page,
and finally drag and drop the username and password into the input fields of
the website.
You can also right-click an entry, select
'Copy username' or 'Copy password' and paste the text into the input box on the
website. Note, by default, you have12 seconds before the clipboard entry is
erased to prevent malware stealing the pasted credentials.
You can also have KeePass attempt to
automatically fill in the username and password fields when you visit a website
and want to log in. To do so, right-click the relevant entry and select 'Edit/view
entry'. This makes the same window appear as when you added the entry's
details. Click the ‘Tools' button at the bottom of the window and a small
dropdown menu appears. Then click Select field reference > In username
field.
A new window appears. Due to a glitch, you
must select the entry you want to modify again. Click both the radio buttons
marked 'Username' in the lower part of the window, then click 'OK'. Click 'OK'
on the parent window. When you select the entry in the main user interface, the
details including the URL appear in the lower pane. As before, click the URL to
bring up the login page. Return to KeePass, right-click the entry and select
'Perform Auto-type’. Back on the login page, the username and password fields
should fill themselves in and log you in.
Most login pages allow you to enter a
username then press [Tab], enter the password, and finally log in by pressing
[Enter], This is also the default action of Auto-type. If you need to add an
extra tab between username and password for Auto-type to log you in properly,
you can edit the sequence by right-clicking on the entry, selecting 'Edit/ view
entry' and clicking on the Auto-type tab on the resulting details window. Click
the ‘Override default sequence' button and you can add a new '[TAB]'to the
sequence.
Securing KeePass
KeePass has a lot of options for
customising its behaviour, chief among which are the security settings. To
access these, click 'Tool /Options’. The resulting window has several tabs.
Ensure the Security tab is selected. The four most important checkboxes are at the
top of the pane, and relate to the length of time before KeePass locks itself
after periods of inactivity. However, there are also some very useful options
in the lower pane. Among these are the options for locking the interface and
exiting KeePass instead of locking. These are very useful in situations where
you need to get KeePass off the screen as quickly as possible and have it
secure itself. Also make sure you tick the box that locks KeePass if you
suspend the computer. That way, if you’re running it on a laptop when you're
out and about, you can simply close the lid and the program will be locked and
secure when you (or anyone else) next resume operation.
If you visit lots of websites every morning
when you first boot up, you can also have KeePass run automatically when the
current user logs in. On the 'lntegration' tab, simply click the box marked
'Run KeePass at Windows startup (current user)’. If you use this option, you
will have to remember to have your USB memory stick inserted when you boot up
the computer.
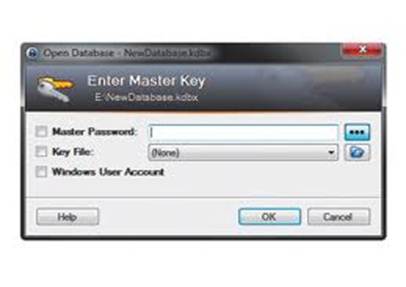
After you set KeePass to run at boot,
the master password window should appear
Many of the other options might seem as if
they’ve been included simply because they're possible, but lots of them are
actually very useful. One such option is on the Interface tab. Clicking 'Drop
to background after copying data to the clipboard' brings the window behind
KeePass to the front. If this is your web browser, it's a convenient way of
grabbing focus to paste a username or password into a website's login page.
So, KeePass can securely look after all
your passwords, thereby requiring you to remember just one. It's easier to
change just one password on a regular basis rather than needing to change
perhaps several dozen, but change it regularly you must. In fact, you should do
it every few weeks or so. It’s easy enough to by going to File > Change
master key. As long as you remember to take your USB memory stick with you, you
will never forget the passwords to your accounts no matter where you are and no
matter how many times you change their individual passwords.