MIDI controllers – power at your fingertips
Massive is, amongst other things, a
wavetable-based synth, and one of the things that makes it so great is the
myriad ways in which you can interconnect its oscillators, filters, effects,
envelopes, LFOs, performers and steppers. And there’s yet another layer in the
form of eight Macro controllers that can be routed to almost any of the synth’s
parameters. Using Massive’s MIDI learn system, these Macros can be easily
assigned to knobs or faders on a hardware MIDI controller, for real-time
hands-on control.
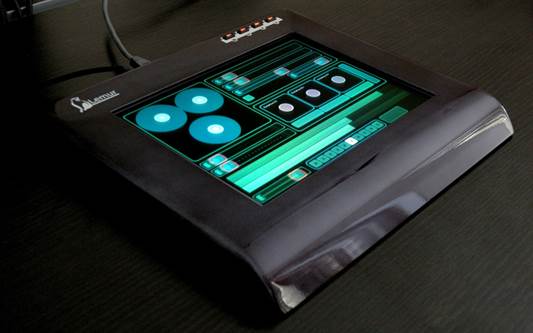
The
satisfyingly chunky but expensive Lemur controller is thankfully also available
as an app
In this tutorial, we’re going to program a
Massive patch that uses all eight Macros, then assign them to a MIDI controller
– JazzMutant’s amazing Lemur iPad app, in our case, although any controller
(iPad-based or not) will do.
The original JazzMutant Lemur was a piece
of bomb-proof multi-touch hardware that enabled you to design and program your
own controller interfaces. I’s largely priced itself out of the market these
days thanks to the success of the far cheaper iPad, but happily it’s a huge
success as an app and remains one of the most comprehensive MIDI controllers in
existence.
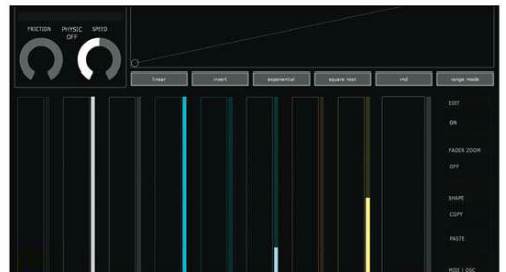
Lemur comes with a set of awesome preset
controller setups already installed, including one called AB Faderlab,
comprising nine faders (eight sub-faders and a master fade), which is the one
we’re using here. The sub-faders correspond nicely to Massive’s Macro
controllers, and each one features a response curve that you can manipulate,
enabling precise control of that fader’s output from top to bottom. Thus you
can have a fader transmit anything from a simple line or curve to a series of
random, haphazard steps and slopes.
Step by step: Taking control of
Massive’s Macro controllers
- Once your Lemur app is open and connected
to your computer either via Wi-Fi or USB, open the AB Faderlab
project. This comprises eight faders and a master fader, and an interface
that’s ready to use out of the box (‘AB’ stands for Antonio Blanca, sound
designer and Lemur wizard).
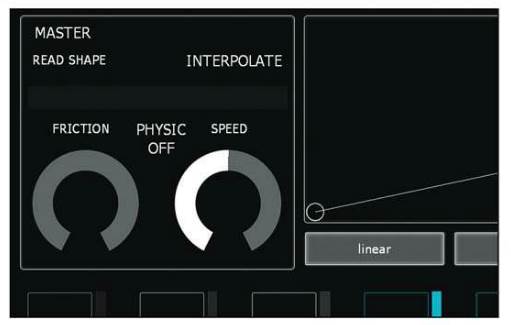
- At the top left is a box labeled Master,
or the number of whichever fader was last moved. Here we can change the
mode of each fader to either Quantize or Interpolate. Choose
Interpolate. Turning Physic off (so that the display reads Physic
On, weirdly) gives you the snappiest faders.
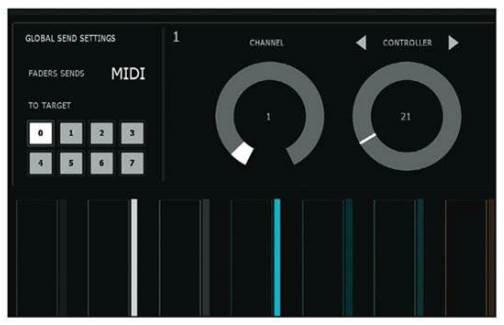
- Hit Open in the MIDI Osc
section of the Options box (bottom left) and the top panel reveals
Lemur Targets, mod wheel enable, and a pair of rotary encoders that
set the MIDI channel and controller number for each sub-fader. Start with
Controller 21 for Fader 1 and work up incrementally to Controller 28
for Fader 8.
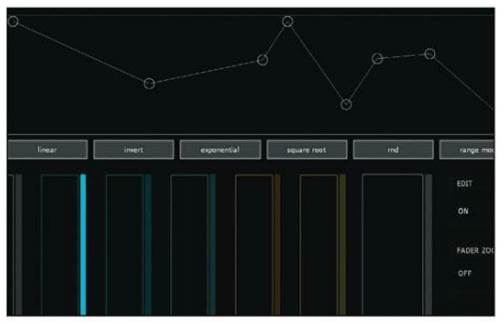
- Each fader has its own response curve.
Double-tapping creates/deletes a breakpoint, and you can create a complex
custom curve for the output value of each fader. Once you’ve defined each
of your Massive Macros, program a suitable curve for each.
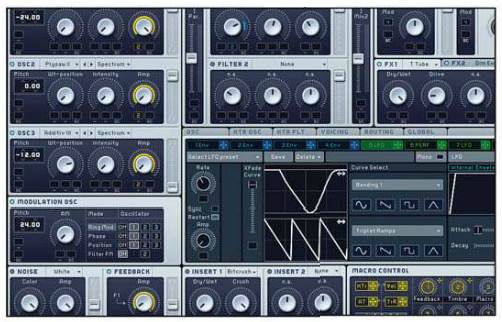
- Load the CM octopusher start.mnsv
patch into Massive. Route Macro 1 to the Amp control of the
Feedback module (click and drag the little yellow cross above the Macro 1
knob and drop it on the left-hand box beneath the Amp control of
the Feedback module). Click and drag up on the resulting little yellow 1
to set the depth of control.
- Route Macro 2 to the Amp controls
of all three oscillators. When setting the depth of control, set the Amp
control in Osc 1 to be the inverse of Oscs 2 and 3 by pushing the knob all
the way up, then dragging the depth down, as shown. Macro 2 will then
become a timbre control, switching between Osc 1 and Oscs 2 and 3.
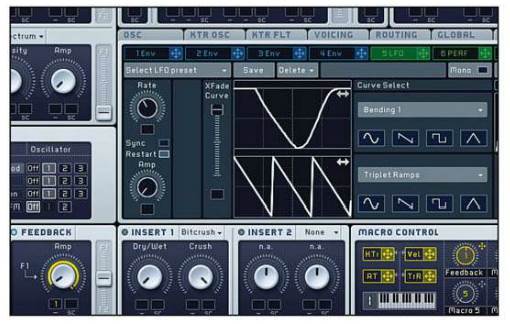
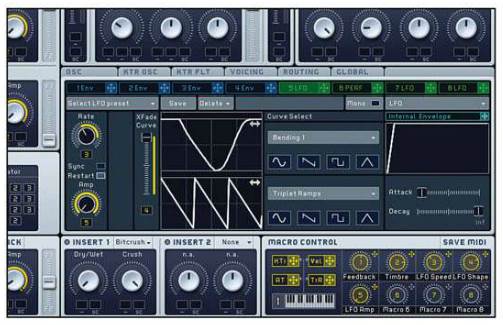
- Now route Macros 3, 4 and 5 to the Rate,
XFade Curve and Amp controls, respectively, of LFO 5. Click
the horizontal grey bars in the Curve Select area of the LFO 5 window and
put a simple Bending 1 at the top and Triplet Ramps at the
bottom. Route LFO 5 to Filter 1’s Cutoff, Osc 2’s Pitch and
Osc 3’s Wt-position.
- Route Macro 6 to the Intensity and
Pitch of each of the three oscillators. Set the pitch mod depth to +12
on Osc 1 and +7 on Osc 2. Macro 6 at its full, extent will now
create intervals of a fifth and an octave between the three oscillators.
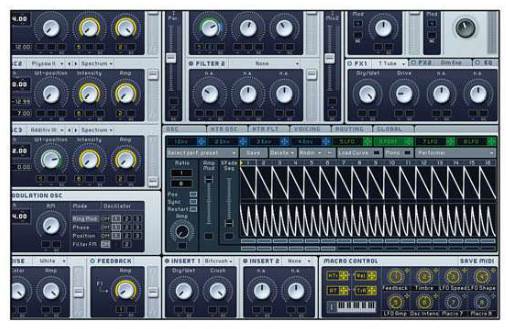
- Route Macros 7 and 8 to the Amp
and XFade Seq controls, respectively, of LFO 6 (which should be set
to Perf mode). Using the Load Curve function, make a 16-step
sequence at the top and a 32-step sequence at the bottom. Route LFO 6 to
the SC slot under the Amp knob of the Feedback module.

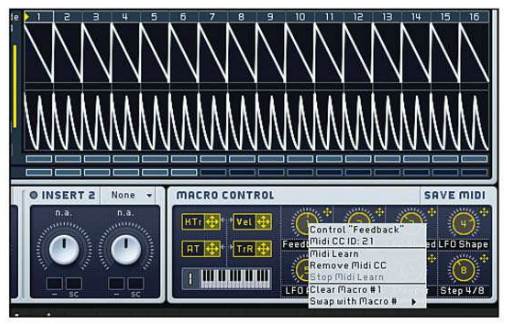
- Put your sequencer track into record
mode, right-click Macro 1, select Midi Learn and move Fader 1 on
the Lemur. Repeat this process for all eight Macros and you’re ready to do
some damage. Now you can play with the response curves, create killer
start and end states, and experiment with randomness in between. (CM
octopusher.nmsv, lemur_octopushy.mp3)