Windows 8’s new UI can look pretty messy, so
we have a look at tidying it up a bit
Congratulations. You have just purchased
Microsoft’s newest and most daring operating system to date. Yes, Windows 8,
the one that has created so much newsworthy attention over the last year with
its implementation of a new-fangled user interface, formally known as Metro.
But it’s not that bad, really.
No doubt you’ll be installing the
publically released version of Windows 8, which is due out any day now, and
it’s more than likely you’ve already had a bash at the preview releases, which
Microsoft saw fit to grace us with a number of months ago. Then again, maybe
you’re starting your Windows 8 experience fresh, with no prior knowledge other
than what you’ve read online, or in one of the many magazines that have so far
commented on it. Either way, you’re going to install it and be presented with
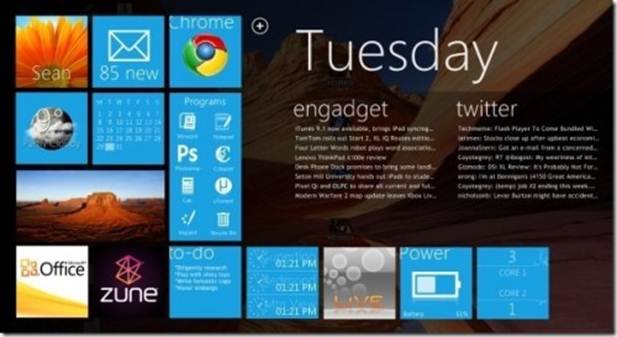
the new UI in its default state, which (even to someone who likes the new UI)
doesn’t look particularly nice to begin with. But panic not; there is a way to
create order from this creative chaos and ultimately become a more productive,
and subsequently tidier, user interface.
How
To Tidy The Windows 8 UI?
Clearing The Tiles
To start with, you have several tiles on
the new UI that, in most cases, you aren’t likely to use, at least not straight
away. There’s nothing worse than starting a new layout with unnecessary excess
baggage. That being the case, have a good look at the default tiles and
consider whether you really need the Finance app. Or the People app? Or even
the Travel app? We slimmed the tiles down by removing the following: Finance,
Sport, Travel, Calendar, People, Mail, Messaging, Camera (since this is a
desktop PC we’re using, and we don’t have a webcam attached) and News, but of
course it’s up to you. To remove the tiles from the UI screen without
uninstalling them (after all, we may need them at some later date), simply
right-click the offending tile and select ‘Unpin from Start’ from the menu that
appears along the bottom of the screen. You can do this either individually, or
as a group by right-clicking the other tiles that you don’t want to appear on
the UI.
Just removing those tiles will offer a
significant deal of space. What we now need to do is group them accordingly,
and name them.
You’ll inevitably end up with several ‘live
tiles’ that could really do with being turned off, before you scream and
install Windows 7
Grouping
Grouping the tiles in some semblance of
order can make a productive interface; after all, the new Windows 8 UI is, to
all intents and purposes, merely an over-complicated quick launch bar, albeit
one that fills an entire screen. Nevertheless, moving the tile around into
groups significantly tidies the UI start screen.
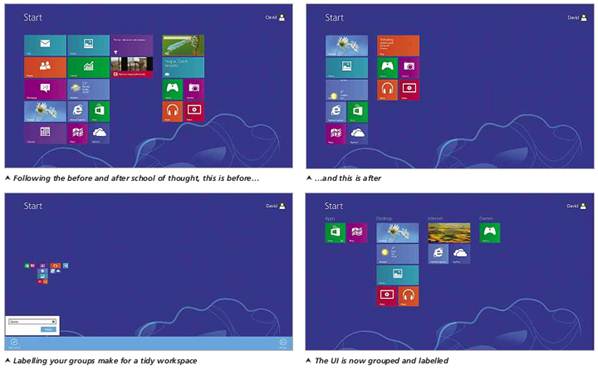
Grouped
and labeled
To group the tiles, simply left click and
hold, then drag the tile across the screen. As you do so, you’ll notice a
thick, pale band appear, separating the start screen into columns. You can drag
and drop any of the tiles on the screen into any of these semi-hidden columns,
thus creating groups. The trick is grouping them according to their particular
traits.
Grouping the tiles depends greatly on how
you see the relevance of each app. We created a group that we will eventually
label as Internet, so we dragged the Internet Explorer, SkyDrive and Bing
application tiles into a grouped column. It’s personal preference, at the end
of day, but making sense of the groups and the associated tiles goes a long way
to becoming more productive within the new UI.
Tile Sizing
While grouping the tiles, you’ll no doubt
come to the point where you’ll end up with a couple of large rectangular tiles,
and perhaps a single, smaller, square tile, which, depending on your outlook on
life, may throw the proportions of the nicely balanced desktop view into
disarray. While this probably won’t bother most users, those who like their
tiles, blocks, icons and so on to be neatly ordered (and I’m one of those
‘labelled’ folk who like to have neat lines and ordered symmetry) will simply
hate the ruined aesthetics.
The best way to gain some order, and create
a more balanced tile hierarchy is to right-click one of the longer, rectangular
tiles and have a look at the menu at the bottom of the screen again. In this
menu you will see a number of icons, one of which is labelled as ‘Smaller’;
click this, and the rectangle will be reduced in size to become one of the
smaller squares. Similarly, right-clicking on one of the smaller square tiles
can reveal a ‘Larger’ icon, which, as you’ve already guessed, will expand the
tile to make it one of the bigger rectangular ones. Be aware, though, that this
doesn’t work with every tile, for reasons dictated by the default programming
behind the app and the size of the default images used within the tile’s
graphics. Therefore, if an app doesn’t support a wide tile logo, or graphic,
then it cannot be resized to a wide tile, and the same applies for the smaller
square tiles.
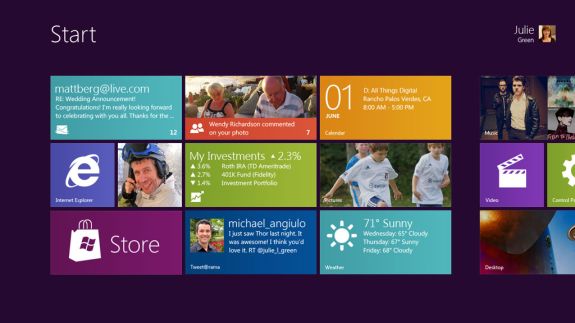
Live Tiles
Another feature that started life as a ‘cool’
addition but has since become another annoyance is that of the ‘live tiles’.
Live tiles display web-enabled updates, images and so on while the tile is
displayed on the UI. A News tile, for instance, will stream an RSS type
newscast displaying the most up-to-date headlines. The Bing tile streams
trending information, and the latest Bing imagery, and the Weather will dish
out the relevant information from either around the globe, or if you have
already set up your location, from the local area. It’s a nice idea, but
ultimately it’s becomes tiring very quickly, and starts to grate on the old
eyes, especially if you have numerous live tiles displaying their wares all at
once.
Another
feature that started life as a ‘cool’ addition but has since become another
annoyance is that of the ‘live tiles’.
While grouping the tiles, you’ll inevitably
end up with several ‘live tiles’ that could really do with being turned off,
before you scream and install Windows 7. All that’s needed is to simply
right-click the live tile, look to the bottom of the screen for the menu, and
left-click the icon labelled ‘Turn live tile off’. This will return the tile to
its default image or icon and hopefully leave your sanity intact.