Creating an External List in SharePoint
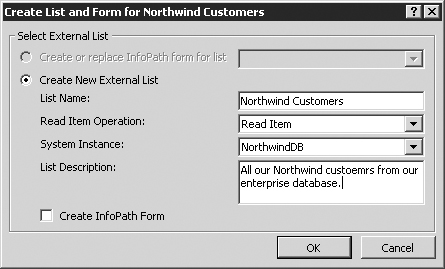
From the External Content Type summary page in
SharePoint Designer, you will notice an icon in the Lists & Forms
group called Create Lists & Form. Clicking this icon displays a
dialog where we specify our external list properties (see Figure 6).
Note
You have the option to create an InfoPath form
instead of the standard SharePoint list form when you define your new
external list. This is extremely useful if you plan to extend the form
with custom branding or functionality.
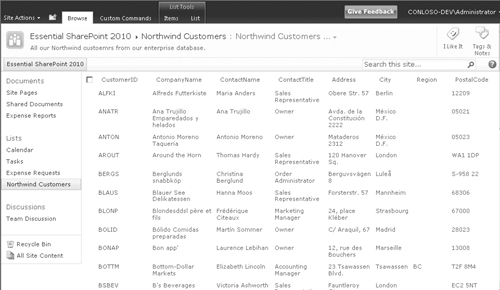
After our list is created, its association to the
External Content Type will be listed in the External Lists section of
the summary page in SharePoint Designer. Returning to our SharePoint
site, we now see a new list containing our Northwind customers as if it
were all manually created through the SharePoint UI. Figure 7 displays our external list in all its glory.
Now, in case you were reading too fast, let me
recap. We opened SharePoint Designer and created a new External Content
Type that points to the Customers table of our Northwind database in
SQL. We then defined our operations, selected the fields we wanted, and
saved the External Content Type with a new name. We then used the
External Content Type to create an external list in our SharePoint
site, which allows us to read and write all the customer data that is
in the SQL table. This is powerful: a complete application without
having to write any code!
Note
Because
the ability to create BCS-based solutions is both simple and powerful,
governance is needed. Be sure you have a rigorous test plan, especially
for shared environments. Simple changes to the farm, such as a service
pack install, need to be validated by your business units who are
running SharePoint-based solutions.
There’s even more power with BCS. In the next
sections, we add even more functionality to our external list by adding
custom actions, integrating the customer list with our document
library, and finally creating our composite application.
3. Adding Custom Actions to an External Data List
One restriction with an external list is that you
cannot associate workflows with it. However, you can create custom
actions accessible from within the ribbon or the list item (context)
menu. This allows you to direct the user to a URL and send the list
item as a value in the URL query. With this sort of functionality, we
can create custom services that can access the list data using the ID
and process the external data, all from within the SharePoint list
interface.
Let’s see an example. Taking our existing customer
data, we wish to add a custom action that calls a service that displays
a report from SQL Server Reporting Services for the current customer.
This service is an asp.net page that takes a single query value—the
list item ID.
If we open the newly created external list in
SharePoint Designer, we see an icon called Custom Action in the ribbon.
This allows us to create a new action for the list item menu. Selecting
this option displays the dialog in Figure 8 where we can specify the properties of the action.
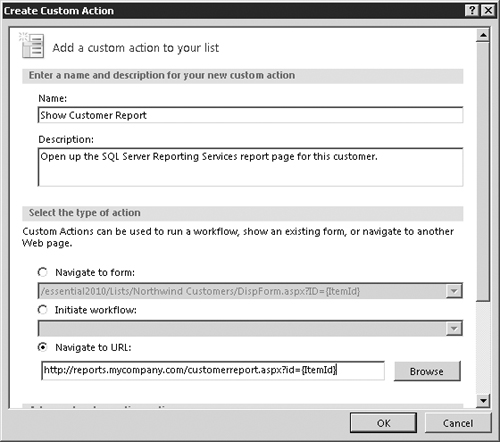
For our new action, we tell it to Navigate to URL
where we specify the URL of our aspx page. Notice we pass the list item
ID in the URL using the format {ItemId}. SharePoint converts that to
the actual list item ID.
Note
Creating the service page for this demonstration is beyond the scope of this book.
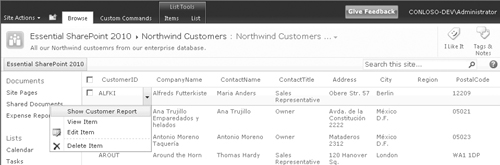
Figure 9
shows our new action in the list item menu. We could also have
specified an icon if we had one handy. Selecting this new action will
redirect the user to the aspx page we specified while sending the item
ID in the URL. The aspx page can do any number of things now that it
has a reference to the item in the list, including starting a custom
workflow.
To
achieve all that we have achieved without the BCS would have required
using a custom code-based solution. What took us a matter of minutes
would previously have taken weeks. There is no doubt that BCS is going
to be very popular with your business users.