1. Taking Stock before You Begin
Before you launch InDesign,
open a new document, and begin working, you must answer several
fundamental questions about the publication you are producing:
What is the basic
nature of the piece? Will it be printed, or will it be distributed over
the Internet or an intranet? Is it going to be published as a print,
PDF, Flash, or Web piece, or perhaps in several formats? What are its dimensions? How
many pages will it have? If it will be a multipage publication, will it
have facing pages like a book or a catalog, or will it be single-sided
like a flip chart? How many columns will each page have? How wide will the margins be? Does
the budget allow for the use of color? If so, how many colors? What
kind of paper will it be printed on? What kind of printer or printing
press will be used? How
will the publication be distributed? Under what circumstances will it
be read? What's the life expectancy of the publication? If
the publication is bound for the Internet, will you create an HTML file
(which can be viewed by anybody with a Web browser), a Flash
presentation (which may require further work in Adobe Flash Professional
and require users to have the free Adobe Flash Player viewer
application or browser plug-in), or a PDF file (which requires viewers
to have the free Adobe Reader application or browser plug-in)? And
what about the content of your publication? What programs were used to
create the text files and graphic files your publication will contain?
Did you create the content yourself, or did others? What file formats
were used for text and graphic files? What is the most effective way to
present the content given the production requirements and budget?
As you answer these questions, a
rough image of your publication begins to take shape in your mind. When
you're ready to begin turning your ideas into an actual publication,
you have a couple of choices. Many designers whose skills date back to
the days of paste-up still prefer to use traditional tools—a drawing pad
and colored markers or pencils in this case—to create rough sketches
before they fire up their page-layout or illustration program. Other
designers who were never exposed to such archaic tools are comfortable
doing their brainstorming and sketching on the fly, using their favorite
software. Whatever method suits you is fine. Keep in mind that, at this
early stage, you shouldn't be spending much time fine-tuning details.
You can do that later with InDesign.
An
overly careful person can plan forever, in which case, nothing actually
gets done. At some point, when the image you have of the publication
you're creating is clear enough in your mind to begin work, it's time to
create a new InDesign document. 2. Setting Up a New Publication
After you launch InDesign, you have two options: You can choose the Open command (choose File => Open
or Ctrl+O) to open a previously created document or template , or you can
choose File => New => Document or Ctrl+N to create a new document.
When you create a new document, the New Document dialog box, shown in Figure 1,
appears. It is here that you implement many of the decisions you
arrived at during the planning stage, including page size, number of
pages, number of columns, and margin width. Although you're free to
change your mind later, you save yourself time and potential headaches
by sticking with the basic page parameters you establish in the New
Document dialog box.
|
To change the measurement units shown in the New Document dialog box, choose InDesign => Preferences => Units & Increments or choose Edit => Preferences =>
Units & Increments or press Ctrl+K in Windows. Next, choose the
measurement system you want from the Horizontal and Vertical pop-up
menus in the Ruler Units area. If you change preferences when no
documents are open, your changes are applied to all subsequently created
documents.
|
|

2.1. Creating new documents
Here's how to create a new document:
Choose File => New => Document or Ctrl+N. In the Intent pop-up menu, choose Print or Web, based on the type of document you are creating.
Use Web for documents designed to appear on a computer screen, such as
Flash animations and PDF documents you don't expect readers to print.
Note that the options for the two types of intents aren't different,
though the defaults are; specifically, the Facing Pages option is
deselected by default for Web pages and selected for print pages, and
Web pages use a default measurement of pixels whereas print pages use a
default measurement of picas. If you know exactly how many pages your publication will have, type the number in the Number of Pages field. If you don't know for sure, you can always add or delete pages later as needed. If you want the document to start on a page number other than 1, enter it in the Start Page # field.
If you choose an even number and select the Facing Pages option in Step
5, InDesign has the first page start on the left of a spread rather
than on the right. This new option also sets the page number in the
Numbering & Section Options dialog box. Select
the Facing Pages option if you're creating a multipage publication that
will have a spine, such as a book, catalog, or magazine.
You do not need to select this option if you're creating a one-page
document, such as a business card, an ad, or a poster. Some
publications, such as flip charts, presentations, and three-ring bound
documents, have multiple pages but use only one side of the page. For
such documents, don't select the Facing Pages option, either. If
you want to flow text from page to page in a multipage document, such
as a book or a catalog, select the Master Text Frame option. When you select this
option, InDesign automatically adds a text frame to the document's
master page and to all document pages based on this master page. This
saves you the work of creating a text box on each page and manually
threading text through each frame. In the Page Size area, you can choose one of the predefined sizes from the pop-up menu.
Your options are Letter (8.5″ × 11″), Legal (8.5″ × 14″), Tabloid (11″ ×
17″), Letter Half (5.5″ × 8.5″), Legal Half (7″ × 8.5″), A4 (210mm ×
297mm), A3 (297mm × 420mm), A5 (148mm × 210mm), B5 (176mm × 250mm), US
Business Card (2.5 × 3 inches), Compact Disc (4.7222″ × 4.5″), eight
variations of Web page sizes (600 × 300, 640 × 480, 760 × 420, 800 ×
600, 984 × 588, 1024 × 768, 1240 × 620, and 1280 × 800), or Custom. If
you choose Custom as the page size, you can type values in the Width
and Height fields. But you don't have to actually choose Custom: No
matter what page size is selected, if you type values in those fields,
the Page Size automatically changes to Custom. The minimum height and
width is 1 pica (0.1667″); the maximum is 216″. |
When you specify page size,
make sure the values you type in the Height and Width fields are the
size of the final printed piece — and not the size of the paper in your
printer. For example, if you're creating a standard-sized index card,
type 5i in the Width field and 3i in the Height field.
|
|
|
If you want to print n-up
— meaning several "pages" on one sheet, such as several business cards
on an 8½-×−11-inch sheet of paper — you can create a letter-sized
document (8.5″ × 11″), but you have to arrange the business cards within
the page boundary and add your own crop marks for each card.
|
|
To set the page orientation, click the Portrait or Landscape iconic button.
Clicking the Portrait iconic button produces a vertical page; clicking
the Landscape iconic button produces a horizontal page. You can also
specify Height and Width values by clicking the up and down arrows
associated with these fields. Note that if you change the dialog box's
default orientation setting (usually Portrait), the existing Width and
Height values are swapped. Type a value in the Columns field to specify how many columns your pages have. You can also specify the number of columns by clicking the up or down arrow associated with the Column field. Specify a gutter distance (the gutter is the space between columns) in the Gutter field. You can also specify a gutter width value by clicking the up and down arrows associated with the Gutter field. Specify margin values in the Margins area. The margin
is the white area around the outside of the page within which page
elements — text and graphics — are placed. A document doesn't have to
have margins (you can type 0 into these fields), and if you want, you
can place text and graphics in the margin area. If
the Facing Pages option is selected, Inside and Outside fields are
available in the Margins area. Designers often specify larger inside
margins for multipage publications to accommodate the fold at the spine.
If Facing Pages is not selected, Left and Right fields replace the
Inside and Outside fields. You can also specify margin values by
clicking the up or down arrows associated with the fields. If you click More Options, the Bleed and Slug area of the New Document dialogbox appears (refer to Figure 4.1), and the More Options button changes to Fewer Options.
The More Options button expands the dialog box to provide options to
setbleed and slug areas. (The button then changes to Fewer Options,
which if clicked hidesthe Bleed and Slug area.) A bleed area
is a margin on the outside of the page for objects you want to extend
past the edge of the page — you want them to extend at least ⅛ inch so
if the paper shifts during printing, no white space appears where the
image should be (touching the edge of the page). The slug area
is an area reserved for printing crop marks, color plate names, and
other printing information — some output devices cut these off during
printing unless a slug area is defined. For both bleed and slug areas,
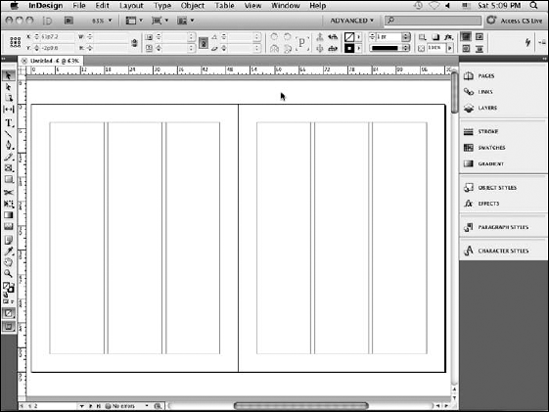
you can set the top, bottom, left, and right margins independently. Click OK to close the New Document dialog box. When you do, your new, blank document appears in a new document window. Figure 2
shows the window of a newlycreated document that uses settings typical
for a magazine (8 × 10⁷/16 inches, or 48p × 62p7.5). Note how the zoom
level appears both in the Zoom field in the application bar and after
the name of the document in the document tab.
|
You can bypass the New Document dialog box by pressing Ctrl+Alt+N. When you use this method, the most recent settings in
the New Document dialog box are used for the new document, except that
the new document will have just one page and start at page 1, no matter
the number of pages or starting page number set in the previous
document.
|
|
NOTE
InDesign CS5 adds several
features to the New Document dialog box. The Intent pop-up menu is new,
and the default measurement for Web pages is now pixels instead of
points (they achieve the same result). Also new is the Start Page #
field.
2.2. Creating your own document types
InDesign lets you create predefined document types, called document presets,
to supplement the standard ones such as Letter. Note that a preset is
much more than a saved page size; it also includes margins, columns, and
the other settings specified in the New Document dialog box.
There are two ways to create document presets:
You can save these
new-document settings by clicking Save Preset in the New Document dialog
box. These saved settings appear in the Document Preset pop-up menu in
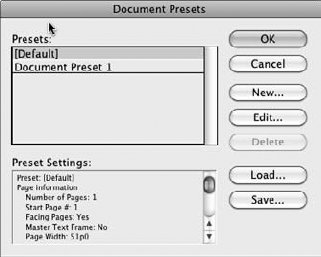
the future. You can choose File => Document Presets =>
Define to create (by clicking Define) a new document preset or import
one (by clicking Load) from another document. It opens the dialog box
shown in Figure 3.
When you create a new preset, or edit an existing one, you get a dialog
box that essentially matches the New Document dialog box, shown earlier
in Figure 1. Modify the settings as desired and click OK to return to the Document Presets dialog box.
|