You're almost there. In this section, you walk through the steps of deploying the ASP.NET application in the cloud:
You need to publish your project. Right-click AzureExample, and click Publish. This action, upon success, opens two windows:
Windows Explorer. This window contains the two files you need to deploy in Windows Azure. You need this window soon, so don't close it.
Internet Explorer.
The Windows Azure Portal is automatically shown as well, because you
need to deploy the binaries there. You may be prompted to sign in first.
When
you've logged in, the Internet Explorer window shows you the home page
for your Windows Azure projects. Click the Windows Azure project under
which you previously created the AzureExample service.
You should see the page shown in Figure 1 at this article. Click AzureExample, which should bring you to what you saw earlier in Figure 4.
On
the right side of the browser page is a vertical bar with a
left-pointing triangle. Click the triangle to open a split page with
both Production and Staging sections, as shown in Figure 1.
Deploying in staging creates a temporary service that you can use to
test before promoting to the final public URL. This way, you can test
that your application is working as desired before deploying it.
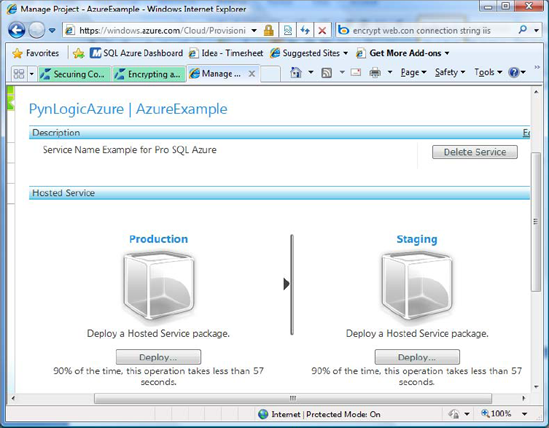
Click the Deploy button under Staging. Doing so brings up a new page (see Figure 9-16) with the following fields:
Application Package. This is the package that Visual Studio built for you. It's the file with extension .cspkg
in the Windows Explorer window. Clicking Browse opens an Open form. You
may find it easier to copy the entire path from the Windows Explorer
window and paste it in the Open form. Select the package file, and click
Open.
Configuration Settings. This is the configuration file of your cloud service project with a .cscfg extension. Again, click Browse and select the configuration file from the Open form.
Operating System Settings.
This section allows you to configure the specific version of the
operating system you're using for this service. Leaving Upgrade Method
set to Automatic ensures that you get the latest security patches and
.NET upgrades automatically. You can also choose Manual and select the
desired system.
Service Deployment Name. Under Service Deployment Name, you need to enter a label for your service. Type TEST001, for example.
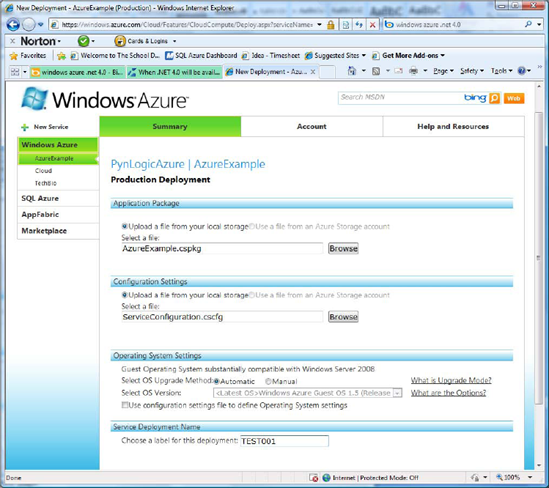
When the information provided looks like Figure 2,
click Deploy. Doing so first copies the appropriate files to the cloud
and creates the virtual machine in which your project will be deployed
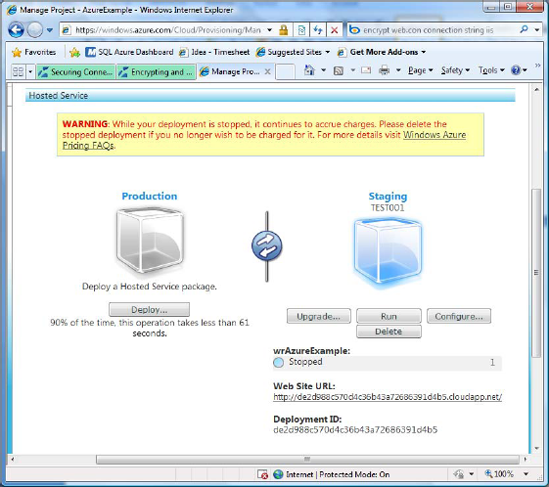
(see Figure 3). After it's deployed, your service isn't be running just yet; however, you start incurring charges immediately.
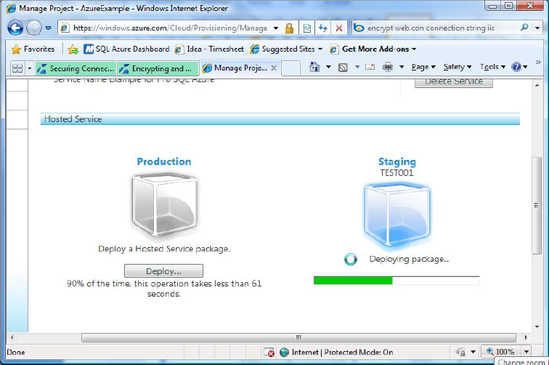
Your screen should now look like Figure 4.
To start your virtual machine, click Run under Staging. This operation
may take a few minutes. When the startup operation is completed, you see
the status of your service as Ready. At this point, you can test your
ASP.NET application in the cloud by clicking the Web Site URL link in
Staging. Notice that this isn't the URL you originally requested—the
public URL previously registered is reserved for production. Instead,
staging is given a deployment GUID that's also part of the web site's
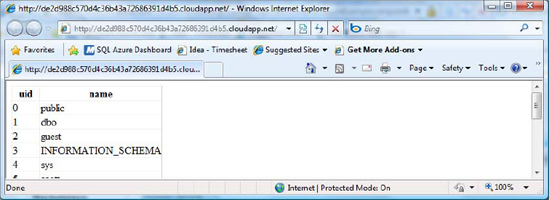
URL. In this case, the URL for the staging environment is http://de2d988c570d4c36b43a72686391d4b5.cloudapp.net/
Clicking the link opens another browser and runs your service in the cloud (see Figure 5).
NOTE
As mentioned
previously, you're now paying for this Windows Azure service. You must
first suspend your service (by clicking Suspend) if it's running;
however, that alone doesn't stop you from accruing charges. You must
also click the Delete button under both your staging and production
environments. On the same page is a Delete Service button; it releases
your service altogether and doesn't affect how you're billed.
Now that the code has been tested in staging, go back to the service management page (shown earlier in Figure 4) and click the center icon ( )
to promote your code to production. A confirmation message comes up.
This operation swaps both environments (production and staging); you can
expect to wait a few minutes while the swapping takes place. Once in
production, the URL you registered previously works.
)
to promote your code to production. A confirmation message comes up.
This operation swaps both environments (production and staging); you can
expect to wait a few minutes while the swapping takes place. Once in
production, the URL you registered previously works.
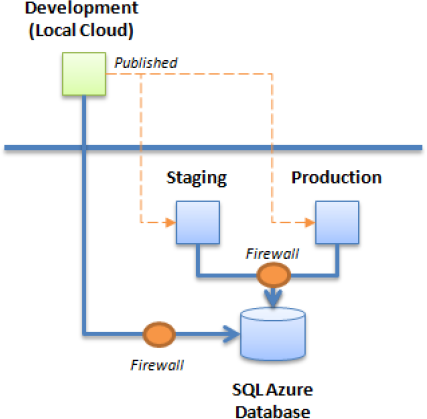
You may have noticed that you
haven't changed any database settings between staging and production.
Staging and production environments refer only to Windows Azure
services, not the SQL Azure database running behind the scenes.
As a result all versions
of your ASP.NET application (when run locally, in staging or in
production) point to the same SQL Azure database by default, unless you
specifically change your configuration settings in each environment (see
Figure 6).
You also need to make sure your firewall configuration is correctly
set, or you may have a surprise when publishing your web application in
the cloud.