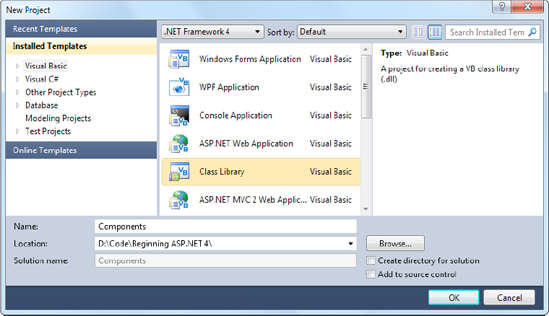
To create a component, you create a new class library project in Visual Studio. First, select File => New =>
Project to show the New Project dialog box. Then, choose the Visual
Basic group on the left (not the Web group), and choose the Class
Library project template (see Figure 1). You'll also need to specify a file location and a project name.
Rather than just choosing File => New =>
New Project to create the class library, you can add it to the same
solution as your website. This makes it easy to debug the code in your
component while you're testing it with a web page. (On its own, there's
no way to run a component, so there's no way to test it.) To create a
new class library in an existing web solution, start by opening your
website, and then choose File => Add => New Project. Specify the directory and project name in the Add New Project dialog box.
Figure 2
shows a solution with both a website and a class library named
Components. The website is in bold in the Solution Explorer to indicate
that it runs on start-up (when you click the Start button).

To make it easy to open this
solution, you might want to take a moment to save it. Click the solution
name (which is "Components" in Figure 2) in the Solution Explorer. Then choose File => Save [SolutionName] As. You can open this .sln file later to load both the website and class library project.
You can compile your class
library at any point by right-clicking the project in the Solution
Explorer and choosing Build. This creates a DLL assembly file
(Components.dll). You can't run this file directly, because it isn't an
application, and it doesn't provide any user interface.
1. Classes and Namespaces
Once you've created
your class library project, you're ready to add classes in a .vb file.
Class library projects begin with one file named Class1.vb, which you
can use, delete, or rename. You can also add more class files simply by
right-clicking the project in the Solution Explorer and choosing Add =>
Class. The only difference between class library projects and web
applications is that your class files won't be placed in an App_Code
subdirectory.
Here's an example that creates a class named SimpleTest:
Public Class SimpleTest
    ' (Code goes here, inside one or more methods.)
End Class
Remember, a component can
contain more than one class. You can create these other classes in the
same file, or you can use separate files for better organization. In
either case, all the classes and source code files are compiled together
into one assembly:
Public Class SimpleTest
    ' (Class code omitted.)
End Class

Public Class SimpleTest2
    ' (Class code omitted.)
End Class
The classes in
your component are automatically organized into a namespace that's named
after your project. This namespace is known as the root namespace.
For example, if you've created a project named Components, the
SimpleTest and SimpleTest2 classes will be in the Components namespace,
and their fully qualified names will be Components.SimpleTest and
Components.SimpleTest2. You need to know the fully qualified name in
order to use your classes in another application, because other
applications won't share the same namespace.
If you decide that you want to
change the root namespace, you can change it quite easily. First,
right-click the project in the Solution Explorer and choose Properties.
You'll see a multi-tabbed display of application settings. Choose the
Application tab and then edit the namespace in the Root Namespace text
box. You can also use the Assembly Name text box in this window to
configure the name that is given to the compiled assembly file.
If you have a complex
component, you might choose to subdivide it into nested namespaces. For
example, you might have a namespace named Components.Database and
another named Components.Validation. To create a nested namespace inside
the default project namespace, you use a Namespace block like this:
Namespace Database

    Public Class SimpleDatabaseTest
        ' (Class code omitted.)
    End Class

End Namespace
Now this class has the fully qualified name Components.Database.SimpleDatabaseTest.
|
The general rule for naming
namespaces is to use the company name followed by the technology name
and optionally followed by a feature-specific division, as in
CompanyName.TechnologyName.Feature. Example namespaces that follow this
syntax include Microsoft.Media and Microsoft.Media.Audio. These
namespace conventions dramatically reduce the possibility that more than
one company might release components in the same namespaces, which
would lead to naming conflicts. The only exception to the naming
guidelines is in the base assemblies that are part of .NET. They use
namespaces that begin with System.
|
|
2. Class Members
To add functionality to your
class, add public methods or properties. The web page code can then call
these members to retrieve information or perform a task.
The following example shows one
of the simplest possible components, which does nothing more than return
a string to the calling code:
Public Class SimpleTest

    Public Function GetInfo(ByVal param As String) As String
        Return "You invoked SimpleTest.GetInfo() with '" & _
          param & "'"
    End Function
End Class

Public Class SimpleTest2

    Public Function GetInfo(ByVal param As String) As String
        Return "You invoked SimpleTest2.GetInfo() with '" & _
          param & "'"
    End Function

End Class
3. Adding a Reference to the Component
Using the component in an
actual ASP.NET page is easy. Essentially, your website needs a copy of
your component in its Bin directory. ASP.NET automatically monitors this
directory and makes all of its classes available to any web page in the
application. To create this copy, you use a Visual Studio feature
called references.
Here's how it works: First, select your website in the Solution Explorer. Then, select Website =>
Add Reference from the menu. This brings you to the Add Reference
dialog box. (Don't choose Add Web Reference or Add Service Reference,
which are used to connect an application to a web service and have
little in common with the similarly named Add Reference command.)
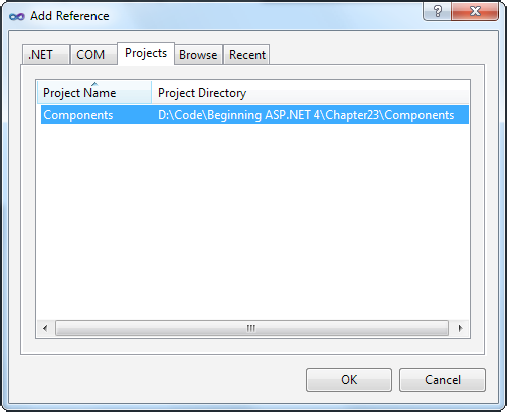
You can take one of two approaches in the Add Reference dialog box:
Add a project reference:
If your class library
project is in the same solution, use the Projects tab. This shows you a
list of all the class library projects in your current solution (see Figure 3). Select the class library, and click OK.
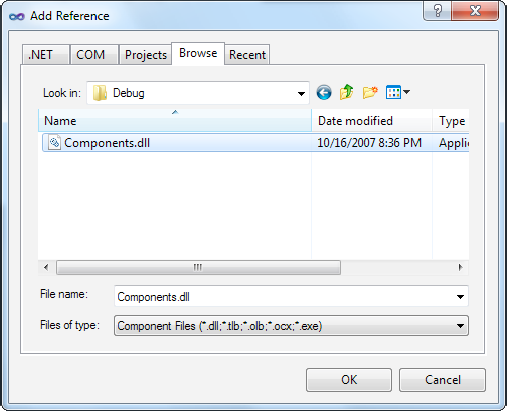
- Add an assembly reference:
If your class library is
in a different solution or you have the compiled DLL file only (perhaps
the component was created by another developer), use the Browse tab
(see Figure 4). Browse through your directories until you find the DLL file, select it, and click OK.
NOTE
If you're using an assembly reference, you need to compile your component first (choose Build => Build Solution from the Visual Studio menu) before you can add the reference.
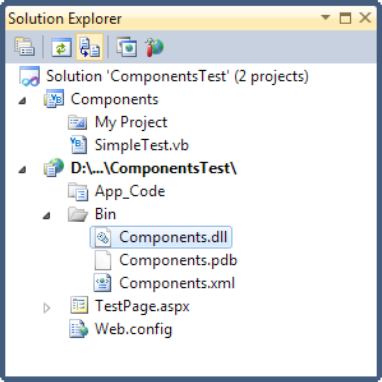
Either way, .NET copies the compiled DLL file to the Bin subdirectory of your web application (see Figure 5). You'll also see a .PDB file that contains debugging information for Visual Studio.
Visual Studio also takes
extra care to make sure that you keep using the most up-to-date version
of the component. If you change the component and recompile it, Visual
Studio will notice the change. The next time you run your web
application, Visual Studio will automatically copy the new component to
the Bin subdirectory.
If you're using a project
reference, Visual Studio goes one step further. Every time you run the
website project, Visual Studio checks for any changes in your
component's source code files. If any of these files have been changed,
Visual Studio automatically recompiles the component and copies the new
version to the Bin subdirectory in your web application.
When you add a reference to a
component, Visual Studio also allows you to use its classes in your code
with the usual syntax checking and IntelliSense. If you don't add the
reference, you won't be able to use the component classes (and if you
try, Visual Studio interprets your attempts to use the class as mistakes
and refuses to compile your code).
NOTE
Removing a reference is a bit
trickier. The easiest way is to right-click your web project and choose
Property Pages. Then, choose References from the list. You'll see a list
of all your references (including assembly and project references). To
remove one, select it and click Remove.
4. Using the Component
Once you've added the
reference, you can use the component by creating instances of the
SimpleTest or SimpleTest2 class, as shown here:
Imports Components

Public Partial Class TestPage
    Inherits System.Web.UI.Page

    Protected Sub Page_Load(ByVal sender As Object, _
      ByVal e As System.EventArgs) Handles Me.Load
        Dim testComponent As New SimpleTest()
        Dim testComponent2 As New SimpleTest2()
        lblResult.Text = testComponent.GetInfo("Hello") & "<br /><br />"
        lblResult.Text &= testComponent2.GetInfo("Bye")
    End Sub
End Class
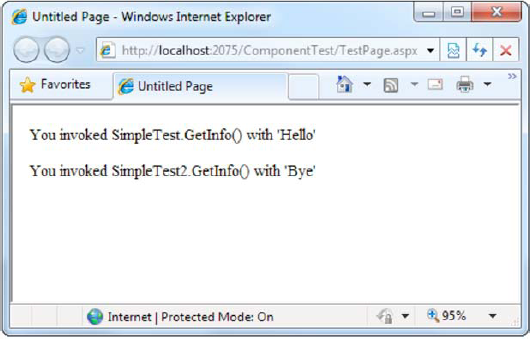
The output for this page, shown in Figure 6, combines the return value from both GetInfo() methods.
To make this code slightly
simpler, you can choose to use shared methods in the component class so
that you don't need to create an instance before using the methods. A
shared GetInfo() method looks like this:
Public Class SimpleTest

    Public Shared Function GetInfo(param As String) As String
        Return "You invoked SimpleTest.GetInfo() with '" & _
          param & "'"
    End Function

End Class
In this case, the web page accesses the shared GetInfo() method through the class name and doesn't need to create an object:
Protected Sub Page_Load(ByVal sender As Object, _
  ByVal e As System.EventArgs) Handles Me.Load

    lblResult.Text = SimpleTest.GetInfo("Hello")
End Sub
|
Remember, if you're using assembly references and your component and web application aren't
in the same solution, you won't see the effect of your changes right
away. Instead, you need to recompile your component assembly (choose
Build =>
Build Solution) and then rebuild your web application. If you're using
project references, this isn't necessary—Visual Studio notices every
change you make and recompiles your component automatically.
|
|
Deciding when to use
instance methods and when to use shared methods is part of the art of
object-oriented design, and it takes experience. Shared methods impose
additional considerations—namely, your class must be stateless
(a concept described in the following section), which means it can't
hold on to any additional information in member variables. If it does,
it risks a potential conflict if more than one piece of code uses the
component at the same time.
As a rule of thumb, use
instance methods if you need to be able to create several instances of
your class at the same time. For example, instance methods make sense
for the SqlConnection class, because you might choose to open a
connection to several different databases for one operation. Instance
methods are also the best choice if you want to configure an object once
and use it several times. For example, the SqlConnection class lets you
set the connection string and then open and close the connection as
much as needed. On the other hand, consider shared methods if your
methods perform a single, discrete task that doesn't require any
initialization. Examples include the calculations in the Math class and
the business tasks (such as registering a new customer) in a high-level
business component.