3. Publish the Form to a SharePoint Library
While we could publish it to a file share, we can
just as easily publish it to the library to which we are submitting the
data. The benefit of publishing the form to the library is that the
user can go to the same location to submit and view expense reports.
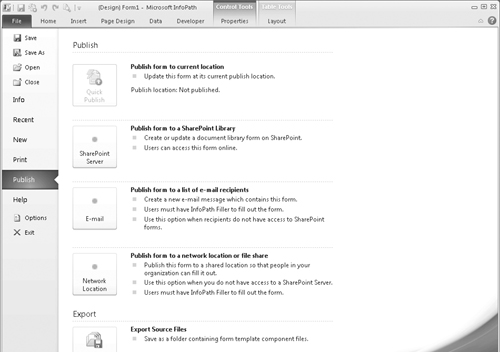
From InfoPath, open the File tab and click Publish your form to open the Publish page (Figure 6).
The publish page has many publishing options, one being to Publish form
to a SharePoint Library. This is the one we are going to select.
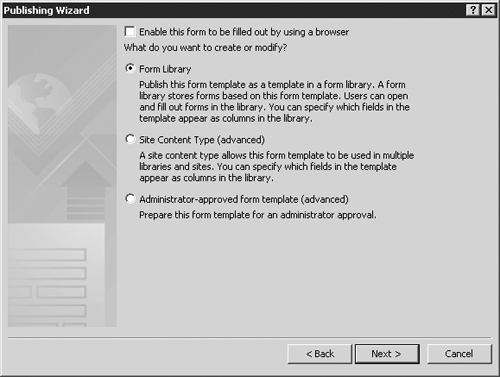
The Publishing wizard steps you though the process, asking you for the address of the SharePoint site you’re publishing to. Figure 7
shows where you can specify whether the form should be Web-enabled and
whether you are publishing directly to a library, Content Type, or form
template. While we are publishing directly to a library, it is very
useful to publish the form to a Content Type that can be used across
many libraries. We are going to clear the checkbox and not have the
form be Web-enabled. We revisit this later when we discuss Forms
Services.
The final steps in the wizard allow you to select
from an existing library or to create a new one. Because we have our
library already created, we can select it from the list. Once our form
has been published, it is now ready to be tested.
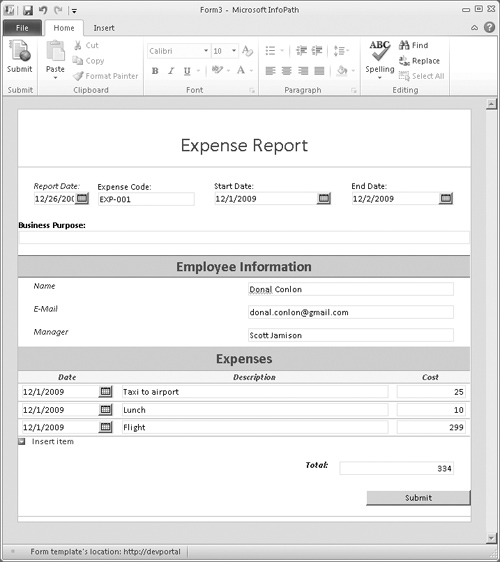
4. Testing the Published InfoPath Form
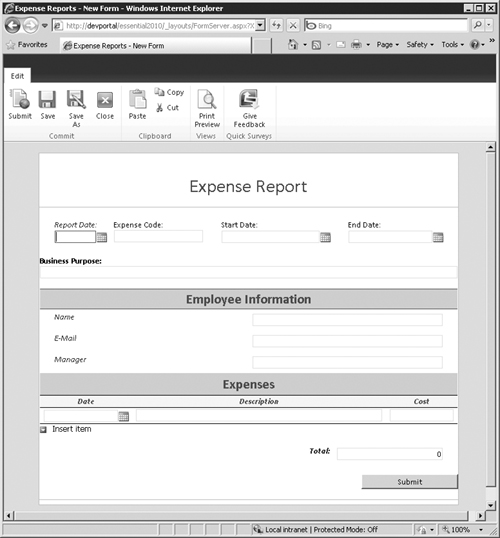
If we browse to our library and click the New button in the ribbon, our Expense Report form opens in the InfoPath client as in Figure 8. You can use the date picker to select dates and add several expenses using the repeating table in the expenses section.
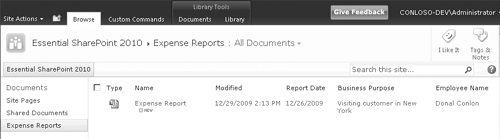
This submits the data results in a new entry in our Expense Reports library, as you can see in Figure 9. The fields we specified in Figure 3
are now extracted into SharePoint list Columns. This metadata allows
you to easily manage these items the same way you would any other item
with metadata.
The next step in our expense report application
would be to add a workflow and have the appropriate manager be notified
so they can review the report. This would follow exactly the same
process as we did with our expense request workflow earlier.
5. InfoPath Forms Services
SharePoint
Server 2010 and SharePoint Foundation Server 2010 both allow you to
create forms libraries and to publish directly to them from InfoPath,
but each user needs to have InfoPath installed on his or her computer
to work with the forms.
SharePoint Server 2010 Enterprise provides InfoPath
Forms Services, which can take a published form template and render it
as a Web page. This eliminates the need for the user to have the
InfoPath client installed.
Looking back to Figure 7,
when publishing our form to Share Point we chose not to enable form
rendering. Let’s revisit this, and this time enable form rendering by
checking the box Enable this form to be filled out using a browser.
Continuing the publication as before, now let’s open our form from the
Expense Reports library (see Figure 10).
The experience in the browser is exactly the same,
allowing you to pick dates using a date-picker and even add additional
rows for each expense line item.
Note
While InfoPath Forms Services can convert many form
elements from the client to the browser, it may have difficulty with
certain controls depending on how complicated your form is. For this
reason, InfoPath provides a Design Checker where you can check
compatibility.
The rendered form even includes a Ribbon with
standard actions. You will notice a Save icon. This allows users to
save the data directly to the library; however, they would be prompted
to provide a file name, which is why we choose to use a submit action
instead. InfoPath allows you to disable the ribbon for Web forms, which
is what we would do in this case in a production environment.
InfoPath 2010 gives the business user tremendous
power for creating forms quickly and relatively easily. Even developers
can take advantage of the advanced features such as data connections to
really bring the forms
to life. With the addition of Forms Services, the need for another
deployed client can be eliminated, which is always welcome by IT
departments.
Should we also mention the new InfoPath forms Web Control Parts in 2010 that can be used for composite applications and mashups?