Visio 2010 includes a new template for
creating SharePoint workflows. By using the Microsoft SharePoint
Workflow template, designed workflows can be exported from Visio into
SharePoint Designer for further configuration. Furthermore, regardless
of whether a workflow was created using Visio originally, SharePoint
Designer provides the facility to export the workflow in a format that
can be imported into Visio for refinement.
Note
It’s
not possible to create Visio Workflow Interchange files for Visual
Studio generated workflows. These workflows do not appear in the
Workflows list in SharePoint Designer.
1. Using the Microsoft SharePoint Workflow Template
Our scenario calls for three workflows: an
environmental control procedure, a publishing procedure, and an advert
promotion procedure. To demonstrate the creation of workflows using
Visio 2010, we’ll implement the publishing procedure.
To recap the procedure:
New products will be added by the sales department.
So that relevant technical information is available, details of the
product will be passed to the engineering department, which will update
the product record with appropriate details. With these details in
place, the marketing department will then be responsible for collating
and attaching the appropriate artwork before the product is sent for
final approval by the online sales manager.
Let’s look at how this can be modeled using Visio:
Open
Visio 2010. From the Flowchart template category, select the Microsoft
SharePoint Workflow template. Click Create to create a new document
based on the template.
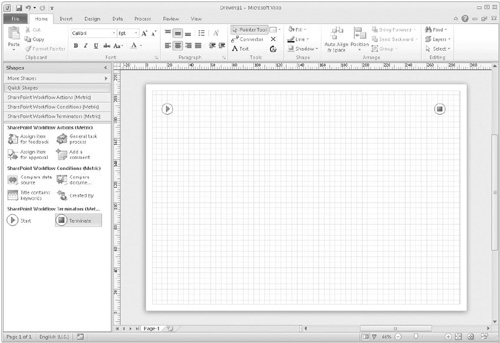
The
first thing we need to add are terminators that denote the start and
endpoints for our workflow. Drag Start and Terminate shapes onto the
page, as shown next:
Our
scenario specifies that the engineering department will provide
appropriate technical details for our product record. We want to create
a task requesting further information and assign that task to the
engineering department for completion. To model this, we can use the
Collect Data From A User shape. Click the SharePoint Workflow Actions
header, and then drag a Collect Data From A User shape onto the page.
Double-click the shape and type the description Collect Technical Details from Engineering Department.
The
next step in our process is to have the marketing department provide
artwork for our product record. Again we can model this using the
Collect Data From A User shape. This time type the description Collect Product Image from Marketing Department.
The
final step in our process is to assign the completed product record to
the online sales manager for approval. Since we don’t require any
content to be added this time, a more appropriate shape to model this
interaction is the Assign Item For Approval shape in the SharePoint
Workflow Actions stencil. Drop the shape on the page and type the
description Assign to Online Sales Manager for Approval.
Now
that we have the steps of our workflow laid out, our next step is to
connect them using the standard Visio Connector tool on the Home ribbon
in the Tools section. Use the connector tool to join up the steps of
the process. The completed workflow will look like this:

With
our Visio model complete, we can create a Visio Workflow Interchange
(.vwi) file that can be imported into SharePoint Designer. Select the
Process ribbon. Before exporting a workflow, we should check for any
errors. Click the Check Diagram button to validate our model. All being
well, a dialog will confirm that “No issues were found in the current
document.” We can then move on to create the interchange file by
clicking the Export button. Name the file by typing PublishingProcedure.vwi.
We’re done with Visio for now. Click the Save icon in the upper-left corner and save the document as PublishingProcedure.vsd.