Nearly 100 things you didn’t know
about your Mac
General OS X tips
1.
Use Screen Sharing
Screen Sharing is an often forgotten
feature of OS X that enables you to view and control another machine from your
Mac. This is particularly useful for grabbing work from another desktop, and
can be activated through the Sharing System Preferences panel, and accessed via
Finder’s sidebar. You can control the machine or drag and drop files between
Macs in seconds.

2.
Activate do not disturb mode
Pull Notification Center downwards with
your mouse and you will reveal a hidden setting at the top of the panel. This
switch enters a ‘Do Not Disturb’ mode, which stops notifications popping up for
24 hours in total.

3.
Declutter your dock
There are a couple of things you can do to
clear up your Dock. First, set applications to minimize into their app icons.
Secondly, set your stacks to Display As Folder and change the icon of the
folder to create a more professional, and tidy look.
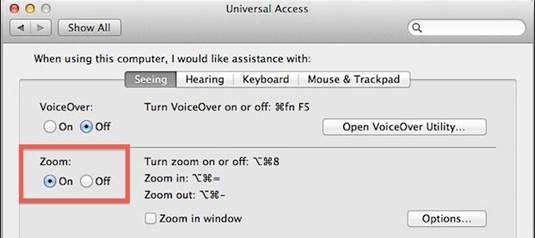
4.
Activate zooming
Open System Preferences, select
Accessibility and switch the Zoom option to on so you can focus in on parts of
the screen with a simple gesture.
5.
Master search tokens
You can use Finder’s search bar to search
for specific items using Search Tokens. Type in a file type, for example, and
you can filter results to just that type. Combine terms in the search bar like
file name and date and you can find a single file in a hard drive full of
thousands within a few seconds.
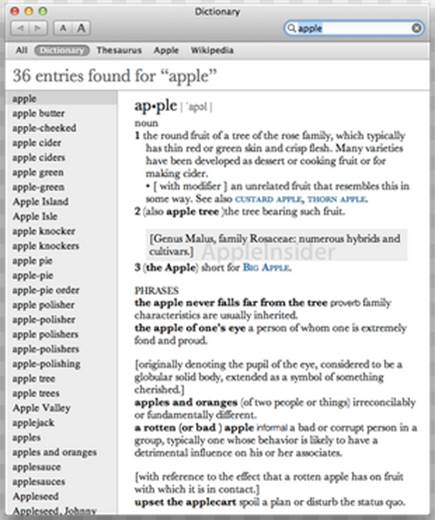
6.
Get dictionary definitions anywhere
If you want a quick definition of a word on
your screen, all you need to do is double-tap (not click, just tap) on your
track-pad as your mouse hovers over the word.
7.
Move menu bar icons around
Apple automatically adds icons to your menu
bar by default when you first switch on your Mac, but they don’t have to always
look the same. You can re-order the icons, add new ones and remove those you
don’t want with a simple keystroke. Hold the Cmd key while you click and drag
an icon and you can move it around. Drag an icon out of the bar in this mode
and it will be removed.

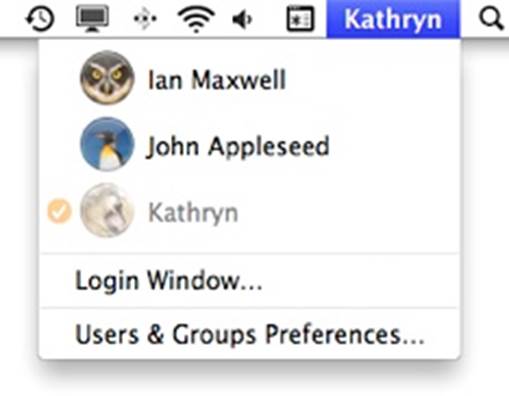
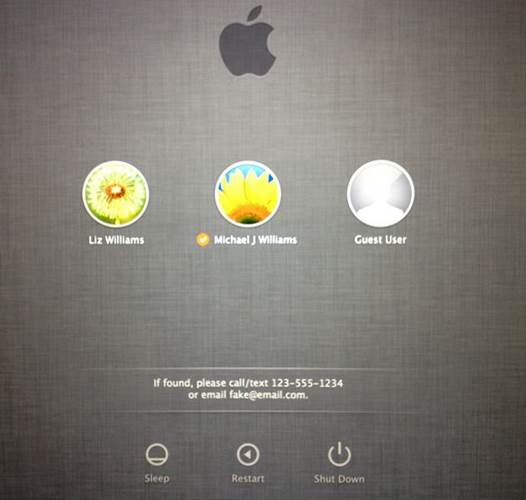
8.
Use fast user switching
Fast user switching was a feature added in
OS X Tiger (10.6), but it’s one that’s often forgotten. It enables you to
quickly change between different user accounts on a single Mac by simply
selecting a name from the menu bar. To activate it, open the Users & Groups
section of System Preferences and find it in Login Items.
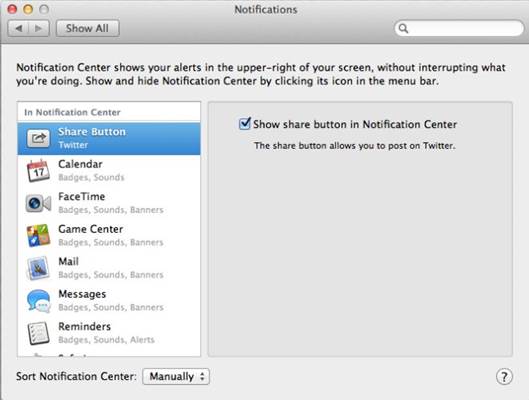
9.
Reorganize notification center
To change the order that apps appear in
Notification Center, drag them up and down the list in System
Preferences>Notifications.
10.
Turn off the empty trash prompt
Do you get annoyed when Trash keeps asking
whether you’re sure you want to empty it? To remove this prompt, select
Finder>Preferences from the menu bar. Choose the Advanced tab and uncheck
the box that says Show warning before emptying the Trash. Now your Trash will
empty as soon as you click the option, with no extra clicks.
11.
View advanced Wi-Fi and sound information
If you want more information about the
AirPort settings on your Mac, or if you want to change the sound output or
input devices, you can access these controls quickly through the menu bar. Hold
Alt as you click the icons and the drop-down boxes will show different results,
with more information and options.
Security tips
12.
Limit app downloads
In Mountain Lion, you can choose to allow
apps from anywhere to be installed, or, for more security, simply limit apps to
those downloaded from the Mac App Store.
13.
Set a lock screen security message
In System Preferences choose Security and
you can add a message for when your screen is locked after falling asleep. This
is great for adding contact details, just in case your beloved Mac is lost.
This
is great for adding contact details, just in case your beloved Mac is lost.
14.
Check your privacy settings
There is a new Privacy section in System
Preferences that helps you to keep track of all the apps that have used data
from your machine – check it regularly so you know who sees what.
15.
Disable automatic login
If you’re worried about losing your Mac for
whatever reason, disabling automatic login is an absolute necessity. Do it in
System Preferences to stop your Mac booting straight into your workspace.
16.
Make screensaver lock your screen
It’s not well known, but you can set your
screen to lock after the screensaver activates. If you’re worried about
security, doing this and setting a screensaver to appear after two minutes of
inactivity will help.
System shortcuts
17.
Adjust volume in increments

18.
Move to Trash

19.
New Folder with items

20.
Invert colors

21.
Activate Spotlight

22.
Force Quit applications

23.
Show or hide the Dock

24.
Switch between windows

25.
Slow motion animations

26.
Zoom in or out