Trying out Linux may sound like a
great idea, but just how do you do it? And where do you go to try it? David
Hayward explains
As you are most likely aware, there are
literarily hundreds of Linux distributions available to download and install.
It soon becomes a personal thing; one person prefers Ubuntu, another will swear
by Arch, while others will claim the likes of Fedora or OpenSUSE are the best
to install and use. By stating that one distro is best to begin with, over another,
you’ll soon find yourself with a flame war on your hands.
There
are literarily hundreds of Linux distributions available to download and
install
However, despite the claims made by the
many ‘experts’, it’s purely up to you and what you want to achieve. If, for
example, you’re just starting off in the world of Linux and you want to dip
your toe into the waters of this wonderful world, then your best bet would more
than likely be Linux Mint. If you wanted something to install on an older PC,
with little resources available, then something along the lines of Puppy Linux
may interest you. Perhaps you would rather go in, guns blazing, and decide that
the only way to solidly learn Linux is to create your own distro, from the
ground up, then Linux From Scratch would be your man. It’s personal.
In this instance we’re going to look at the
basics, and from the point of view of the novice. With that I mind, we’ll be
installing the latest Linux Mint, Mint 14: Nadia, and we’ll be using the
cinnamon desktop environment, as that represents the latest innovations, it’s
easy to navigate, and it looks nice too.
Get Mint, get ready
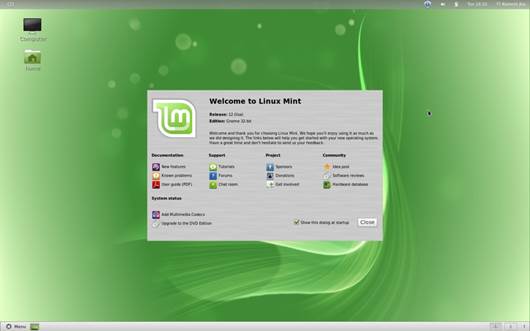
After
you install Linux Mint, take some time to get used to it
First, we need to make sure we have a few
items at hand a list of ingredients, if you will that will make our
installation of Linux Mint an easy affair. Let’s also suppose you’re using
VirtualBox to install and test this version of Linux, as we looked at in a
previous How To Basics. That way you can test to your heart’s content without
messing around with your actual PC. We’ll also have a quick look at how best to
get Linux onto your PC as the sole operating system.
Let’s start by navigating to the Linux Mint
website, and downloading the latest version of Mint 14 with Cinnamon. We’ll use
the 32-bit version for now, which can be downloaded from goo.gl/NIXzz. It’s
roughly 880MB in size, and comes down as an .iso image file names
‘linuxmint-14.1-cinnamon-dvd-32bit.iso’.
Once that’s down we’ll need to create a
blank, new virtual machine in VirtualBox, as we did in the previous How To, and
if it’s possible, give the virtual machine around 2GB of RAM with around 15 to
20GB of virtual hard drive space. This way you can be sure you’ll have enough
resources available as you take the time to play around with Linux.
If you now have the .iso in an
easy-to-recall location, and the virtual machine is ready to be powered on for
the first time, then click on the Start button to boot the virtual machine and
when asked for the Startup Disk, point to the downloaded .iso and click on the
Start button. This will now boot Linux Mint into the live session, where there
is a handy ‘Install Linux Mint’ shortcut already on the desktop.
Installing Mint
Once you double-click the ‘Install Linux
Mint’ icon, you’ll launch the Install Wizard, which is where you’ll provide all
the information that Linux Mint will require to boot into the new operating
system.
The first screen simply welcomes you can
asks which language to use. In our case, it will obviously be English, which is
highlighted by default. If you’re ready, then click the ‘Continue’ button.
Installing
Linux Mint is an easy affair, and a great place to start your Linux journey
The next screen is a quick check list,
asking if have at least 5.5GB of free space on the drive you’ll be installing
Linux Mint on (we created a 15GB virtual drive) and if you’re connected to the
internet, which is used during the install to download some updates and
language files. If everything is okay, then click on the ‘Continue’ button
again.
The next screen is where things start to
get interesting. Here you have the option to manually partition your hard drive
however you see fit – a bigger Home partition, or bigger swap partition and so
on. Basically, if you don’t know what these mean, and you’re installing Mint
onto a virtual hard drive safely within VirtualBox, then all you need to do is
make sure the top option ‘Erase disk and install Linux Mint’ is highlighted and
click ‘Continue’.
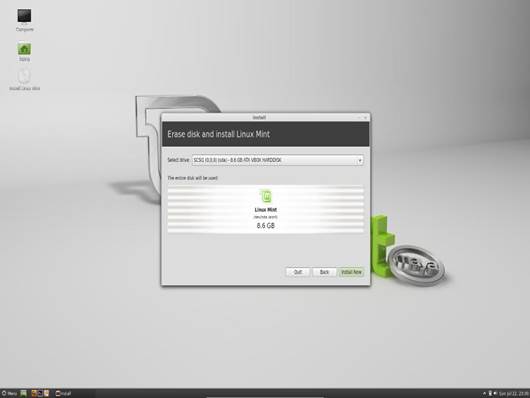
In this next screen, we get to select the
drive the installation of Linux Mint will inhabit in our case, it’s the ‘Vbox
Harddisk’ virtual drive. When you’re ready, click on ‘Install Now’.
Linux Mint will now start to install itself
onto the virtual machine hard drive, but in the meantime you’ll still be asked
a few more questions. The first of these is your current location and time
zone; for us it’s London, but choose your locale and click ‘Continue’.
The keyboard layout is nest, with English
UK being selected due to the selections we made earlier. You can tweak the
layout slightly, but we generally use the ‘English UK extended WinKeys’ which
best describes our layout. Click ‘Continue’ when you’re ready.
Finally, you’ll need to provide a little
information. Start with entering your name, which will automatically fill the
Computer name and username (you can change these if you want). Now enter a
decent password and confirm it by re-entering it, then you can decide whether
or not to log in automatically. In this instance, in a virtual machine on your
PC, it’s probably sound enough to enable auto-login, but if you’re installing
onto a PC, then you may want to consider leaving the ‘Require my passport to
log in’ option highlighted. If you’re done, click on the ‘Continue’ button.
The system will now finish off the
installation, creating the new user and downloading any extra language packs
and whatnots. Once everything is done, you’ll be presented with an
‘Installation Complete’ message, and the option to either continue with the
live session, reboot or restart into the new installation. Take the latter
Linux Mint installation as the virtual machine reboots itself.
Installing outside a virtual machine
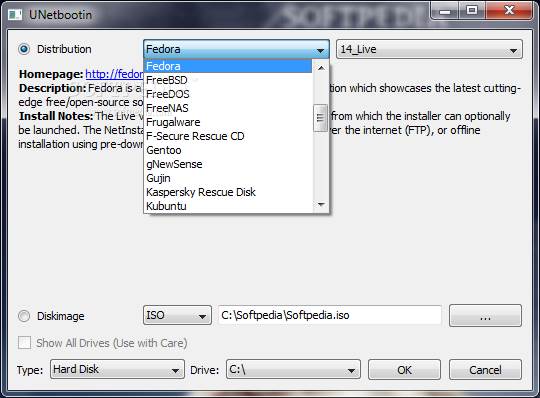
Unetbootin
is a great all-round tool for creating bootable USB drives
If you’re feeling up to installing Linux
Mint on an actual machine, not a virtual one, then the steps above will suffice
for the basic installation. Just make sure your PC hard drive has been detected
and is being used to install Mint onto. However, you’ll first need to boot into
the live environment.
There are a couple of ways of doing this:
the first is to burn the .iso onto a DVD and select ‘boot to CD/DVD’ from your
BIOS, or boot time menu. The second is to use a program such as UNetbootin,
which can be found here goo.gl/pjU9d, to transfer the .iso image onto the USB
stick, which can then the booted into.
Booting into a USB stick is considerably
faster than the optical approach, and more useful these days, but the choice is
yours. Either way, enjoy Linux.