The
basic membership features are a remarkable time-saver. They allow you
to concentrate on programming your web application, without worrying
about managing security and crafting the perfect database or user
information. Instead, you can use the higher-level Membership and
MembershipUser classes to do everything you need.
However, the ASP.NET
membership feature doesn't stop there. Not only does the Membership
class simplify common security tasks, it also standardizes them. As a
result, other components and controls can use the Membership class to
integrate themselves with the ASP.NET security model, without worrying
about the specifics of each web application. You can find the best
example of this new flexibility in ASP.NET's security controls. These
controls interact with the membership provider using the methods of the
Membership and MembershipUser classes to implement common bits of user
interfaces such as a login page, a set of user creation controls, and a
password recovery wizard.
Table 1
lists all the ASP.NET security controls that work with membership. In
Visual Studio, you can find these controls in the Login section of the
Toolbox.
Table 1. Security Controls
| Control | Description |
|---|
| Login | Displays the familiar user name and password text boxes, with a login button. |
| LoginStatus | Shows
a login button, if the user isn't already logged in, that redirects the
user to the configured login page. Otherwise, it displays a sign-out
button. You can choose the test used for the login and sign-out
buttons, but that's about it. |
| LoginName | Displays the user name of the logged-in user. |
| LoginView | Displays
different content depending on whether the user is logged in. You can
even use this control to show different content for different groups of
users, or roles. |
| PasswordRecovery | Allows
the user to request a password via e-mail or reset it. Typically, the
user must supply the answer to the security question to get the
password. |
| ChangePassword | Allows the user to set a new password (as long as the user can supply the current password). |
| CreateUserWizard | Allows a user to create a new record, complete with e-mail address and a password question and answer. |
There is a simple way and
a complex way to use most of these controls. At their simplest, you
merely drop the control on a page, without writing a line of code. (You
saw this approach with the CreateUserWizard control at the beginning of
this chapter.) You can also modify properties, handle events, and even
create templates to customize these controls.
In the following sections,
you'll take a closer look at the Login, PasswordRecovery, and
CreateUserWizard controls. And later, in the "Role-Based Security"
section, you'll put the LoginView control to work to show different
content to users in different roles.
1. The Login Control
So far, the secure
websites you've seen have used handmade login pages. In many websites
this is what you'll want—after all, it gives you complete control to
adjust the user interface exactly the way you want it. However, a login
page is standard, so it makes sense for ASP.NET to give developers some
extra shortcuts that can save them work.
Along these lines, ASP.NET
includes a Login control that pairs a user name and a password text box
with a login button. The Login control also adds a few features:
It includes
validator controls that prevent the page from being posted back until a
user name and password have been entered. These validators use
client-side validation if it's supported by the browser (with the help
of a bit of JavaScript) and server-side validation.
It
automatically handles the signing in and redirection process when the
user logs in successfully. If invalid login credentials are entered, it
shows an error message.
It
provides a Remember Me check box that, if selected, stores a persistent
cookie that remains indefinitely on the user's computer; therefore, the
user doesn't need to log back in at the beginning of each visit.
In other words, if the
basic Login control is right for your needs (it gives the user
interface you want), you won't need to write a line of code.
To try this, drop the Login
control onto a new page. Make sure this page is named Login.aspx so
it's used as the default login page for forms authentication (or edit
the <forms> tag to choose a different login page, as explained in
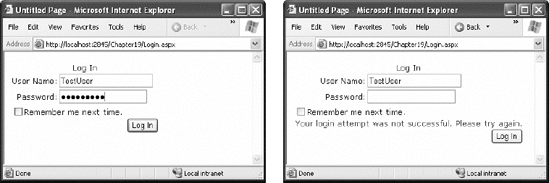
the previous chapter). Then, run the page. You'll see the basic
interface shown in Figure 1.
Although the Login control
takes care of the login process for you automatically, you can step in
with your own custom code. To do so, you must react to one of the Login
control events, as listed in Table 2.
Table 2. Events of the Login Control
| Event | Description |
|---|
| LoggingIn | Raised before the user is authenticated. |
| LoggedIn | Raised after the user has been authenticated by the control. |
| LoginError | Raised when the login attempt fails (for example, if the user enters the wrong password). |
| Authenticate | Raised
to authenticate the user. If you handle this event, it's up to you to
supply the login code—the Login control won't perform any action. |
The LoggingIn, LoggedIn, and
LoginError events are primarily useful if you want to update other
controls to display certain information based on the login process. For
example, after the first login failure, you might choose to show a link
that redirects the user to a password retrieval page:
Protected Sub Login1_LoginError(ByVal sender As Object,
  ByVal e As EventArgs) Handles Login1.LoginError

    lblStatus.Text = "Have you forgotten your password?"
    lnkRedirectToPasswordRetrieval.Visible = True
End Sub
The Authenticate event
is the most important event. It allows you to write your own
authentication logic, as you did in the previous chapter. This is
typically useful in two situations. First, you might want to supplement
the default checking in the Login control with other requirements (for
example, prevent any users from logging in at specific times of day,
allow users to log in only if they've entered information in another
control, and so on). The other reason you might handle the Authenticate
event is if you aren't using the membership provider at all. In this
case, you can still use the Login control, as long as you provide the
authentication logic.
In the Authenticate
event handler, you can check the user name and password using the
UserName and Password properties of the Login control. You then set the
Authenticated property of the AuthenticateEventArgs to True or False.
If True, the LoggedIn event is raised next, and then the user is
redirected to the Login.DestinationPageUrl (or the original page the
user came from if the DestinationPageUrl property is not set). If you
set Authenticated to False, the LoginError event is raised next, and
the control displays the error message defined by the Login.FailureText
property.
Here's an event handler for the Authenticated event that uses the membership classes directly:
Protected Sub Login1_Authenticate(ByVal sender As Object, _
  ByVal e As AuthenticateEventArgs) Handles Login1.Authenticate

    If Membership.ValidateUser(Login1.UserName, Login1.Password) Then
        e.Authenticated = True
    Else
        e.Authenticated = False
    End If
End Sub
That covers
everything you need to know about interacting with the Login control,
but you can tweak many properties to configure the appearance of the
Login control. There's even an Auto Format link you can choose from the
Properties window (or the smart tag) to give the Login control a
face-lift with a single click.
The most powerful formatting
properties for the Login control are style properties, which allow you
to tweak fonts, coloring, and alignment for individual parts of the
control. You've already seen styles at work with several other
controls, including the Calendar and the GridView , and they work in the same way with the security controls. Table 3 details the style properties of the Login control.
Table 3. Style Properties of the Login Control
| Style | Description |
|---|
| TitleTextStyle | Defines a style for the title text of the Login control. |
| LabelStyle | Defines the style for the Username and Password labels. |
| TextBoxStyle | Defines the style for the user name and password text boxes. |
| LoginButtonStyle | Defines the style for the login button. |
| FailureTextStyle | Defines the style for the text displayed if the login attempt fails. |
| CheckBoxStyle | Defines the style properties for the Remember Me check box. |
| ValidatorTextStyle | Defines
styles for RequiredFieldValidator controls that validate the user name
and password information. These style properties tweak how the error
text looks. (By default, the error text is simply an asterisk that
appears next to the empty text box.) |
| HyperLinkStyle | Configures
all the links that the Login control shows. This includes the links
that let you create a new user record, retrieve a password, and so on.
These links appear only if you've set the CreateUserUrl and
PasswordRecoveryUrl properties. |
| InstructionTextStyle | Formats
the Login.InstructionText, which is help instruction text you can add
under the Login control. By default, the Login control has no
instruction text. |
Of course, styles aren't
the only feature you can change in the Login control. You can adjust
several properties to change the text it uses and to add links. For
example, the following tag for the Login control adjusts the formatting
and uses the CreateUserUrl and PasswordRecoveryUrl properties to add
links to a page for registering a new user and another for recovering a
lost password. (Obviously, you'll need to create both of these pages in
order for the links to work.)
<asp:Login ID="Login1" runat="server" BackColor="#EFF3FB" BorderColor="#B5C7DE"
  BorderPadding="4" BorderStyle="Solid" BorderWidth="1px" Font-Names="Verdana"
  ForeColor="#333333" Height="256px" Width="368px"
  CreateUserText="Register for the first time"
  CreateUserUrl="Register.aspx"
  PasswordRecoveryText="Forgot your password?"
  PasswordRecoveryUrl="PasswordRecovery.aspx"
  InstructionText=
   "Please enter your username and password for logging into the system.">

    <TitleTextStyle BackColor="#507CD1" Font-Bold="True" Font-Size="Large"
      ForeColor="White" Height="35px" />
    <InstructionTextStyle Font-Italic="True" ForeColor="Black"  />
<LoginButtonStyle BackColor="White" BorderColor="#507CD1"
BorderStyle="Solid" BorderWidth="1px" Font-Names="Verdana"
ForeColor="#284E98" />

</asp:Login>
Figure 2 shows the revamped Login control. Table 4 explains the other properties of the Login control.
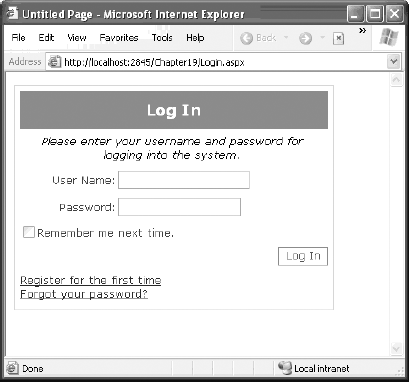
Table 4. Useful Properties of the Login Control
| Property | Description |
|---|
| TitleText | The text that's displayed in the heading of the control. |
| InstructionText | The
text that's displayed just below the heading but above the login
controls. By default, the Login control has no instruction text. |
| FailureText | The text that's displayed when a login attempt fails. |
| UserNameLabelText | The text that's displayed before the user name text box. |
| PasswordLabelText | The text that's displayed before the password text box. |
| UsernameRequiredErrorMessage | The
error message that's shown by the RequiredFieldValidator if the user
doesn't type in a user name. By default, this is simply an asterisk (*). |
| PasswordRequiredError Message | The
error message that's shown by the RequiredFieldValidator if the user
doesn't type in a password. By default, this is simply an asterisk (*). |
| LoginButtonText | The text displayed for the login button. |
| LoginButtonType | The type of button control that's used as the login button. It can be displayed as Link, Button, or Image. |
| LoginButtonImageUrl | The
URL that points to the image you want to display for the login button.
You must set the LoginButtonStyle property to Image to use this
property. |
| DestinationPageUrl | The
page to which the user is redirected if the login attempt is
successful. This property is blank by default, which means the Login
control uses the forms infrastructure and redirects the user to the
originally requested page (or to the defaultUrl configured in
web.config file). |
| DisplayRememberMe | Determines
whether the Remember Me check box will be shown. You may want to remove
this option to ensure stricter security, so malicious users can't gain
access to your website through another user's computer. |
| RememberMeSet | Sets
the default value for the Remember Me check box. By default, this
option is set to False, which means the check box is not checked
initially. |
| VisibleWhenLoggedIn | If
set to False, the Login control automatically hides itself if the user
is already logged in. If set to True (the default), the Login control
is displayed even if the user is already logged in. |
| CreateUserUrl | Supplies a URL to a user registration page. This property is used in conjunction with the CreateUserText. |
| CreateUserText | Sets
the text for a link to the user registration page. If this text is not
supplied, this link is not displayed in the Login control. |
| CreateUserIconUrl | Supplies a URL to an image that will be displayed alongside the CreateUserText for the user registration link. |
| HelpPageUrl | Supplies a URL to a page with help information. |
| HelpPageText | Sets the text for the link to the help page. If this text is not supplied, this link is not displayed in the Login control. |
| HelpPageIconUrl | Supplies a URL to an image that will be displayed alongside the HelpPageText for the help page link. |
| PasswordRecoveryUrl | Supplies a URL to a password recovery page. |
| PasswordRecoveryText | Sets
the text for the link to the password recovery page. If this text is
not supplied, this link is not displayed in the Login control. |
| PasswordRecoveryIcon Url | Supplies a URL to an image that will be displayed alongside the PasswordRecoveryText for the password recovery page link. |
To round out the example in Figure 20-8,
you must create the Register.aspx and PasswordRecovery.aspx pages. In
the next sections, you'll learn how you can do this easily using two
more of the ASP.NET security controls.
2. The CreateUserWizard Control
You already used the
CreateUserWizard control to create a basic user record at the beginning
of this chapter. Now that you've seen the flexibility of the Login
control, it should come as no surprise to learn that you have just as
many options for tweaking the appearance and behavior of the
CreateUserWizard control.
The
CreateUserWizard control operates in two steps. The first step collects
the user information that's needed to generate the user record. The
second step displays a confirmation message once the account is created.
Overall, the
CreateUserWizard provides a dizzying number of properties you can
adjust. However, it helps to understand that really only three types of
properties exist:
Style properties that format just a section of the control:
For example, TitleTextStyle configures how the text heading is formatted.
Properties that set the text for the control:
For example, you can
configure each label, the success text, and the messages shown under
different error conditions. You can also retrieve or set the values in
each text box.
Properties that hide or show a part of the control:
For example,
you can use DisplaySideBar, DisplayCancelButton, and RequireEmail to
show or hide the sidebar, cancel button, and e-mail text box,
respectively.
The CreateUserWizard
control also provides a familiar set of events, including CreatingUser,
CreatedUser, and CreateUserError. Once again, these events are handy
for synchronizing other controls on the page or for overriding the user
creation process if you decide not to use the membership features.
|
By default, newly created
users are automatically logged in. You can change this behavior by
setting the CreateUserWizard.LoginCreatedUser property to False. You
can also set the ContinueDestinationPageUrl property to set the URL
where the user should be redirected once the new record is created.
|
|
As a result, you can add as many extra steps as you want, just as you
can with the Wizard control. These steps might perform other tasks,
such as signing the user up to receive a regular newsletter. However,
the actual user creation process must always take place in a single
step.
For example, consider the markup for the basic CreateUserWizard:
<asp:CreateUserWizard ID="CreateUserWizard1" runat="server">
    <WizardSteps>
        <asp:CreateUserWizardStep runat="server">
        </asp:CreateUserWizardStep>
        <asp:CompleteWizardStep runat="server">
        </asp:CompleteWizardStep>
    </WizardSteps>
</asp:CreateUserWizard>
Essentially, the
CreateUserWizard is a Wizard control that supports two specialized step
types: a CreateUserWizardStep where the user information is collected
and the user record is created, and a CompleteWizardStep where the
confirmation message is shown.
The following example shows
how you can add an ordinary WizardStep into this sequence. In this
case, the extra step simply provides some additional options for the
newly created user (namely, the choice to subscribe to automatic e-mail
newsletters).
<asp:CreateUserWizard ID="CreateUserWizard1" runat="server"
 DisplaySideBar="True" ... >
    <WizardSteps>
        <asp:CreateUserWizardStep runat="server" Title="Create User">
        </asp:CreateUserWizardStep>

        <asp:WizardStep runat="server" Title="Subscribe">
            Would you like to sign up for the following newsletters?<br />
            <br />
            <asp:CheckBoxList ID="chkSubscription" runat="server">
                <asp:ListItem>MSN Today</asp:ListItem>
                <asp:ListItem>VB Planet</asp:ListItem>
                <asp:ListItem>The High-Tech Herald</asp:ListItem>
            </asp:CheckBoxList>
        </asp:WizardStep>

        <asp:CompleteWizardStep runat="server">
        </asp:CompleteWizardStep>
    </WizardSteps>
</asp:CreateUserWizard>
Figure 3
shows the first two steps. Notice that the sidebar appears (because the
CreateUserWizard.DisplaySidebar property is set to True) to show the
order of steps.

It's still up to you
to take the appropriate action in your code by reacting to one of the
CreateUserWizard events. In this case, you use the FinishButtonClick
event, because it occurs on the last step before the completion
message. If you place your step earlier in the sequence, you'll need to
react to NextButtonClick. In the current example, you might want to add
this information to the user's profile table. You'll learn how to use
profiles in the next chapter.
For complete layout and
formatting power, you can convert one of the CreateUserWizard steps
into a template. You're then free to rearrange the existing content and
add new controls and HTML content. However, be careful not to remove
any of the required elements. The CreateUserWizard will throw an
exception if you try to use it but you're missing one of the required
text boxes for account information.
The easiest way to convert a
step into a template is to use the smart tag links. First, select the
CreateUserControl on the design surface of your web page in Visual
Studio. Next, click the arrow icon that appears next to the top-right
corner to show the smart tag. Then, select the Customize Create User
Step link or the Customize Complete Step link, depending on which step
you want to modify. ASP.NET will then insert the controls into a
template in the CreateUserWizard control tag.
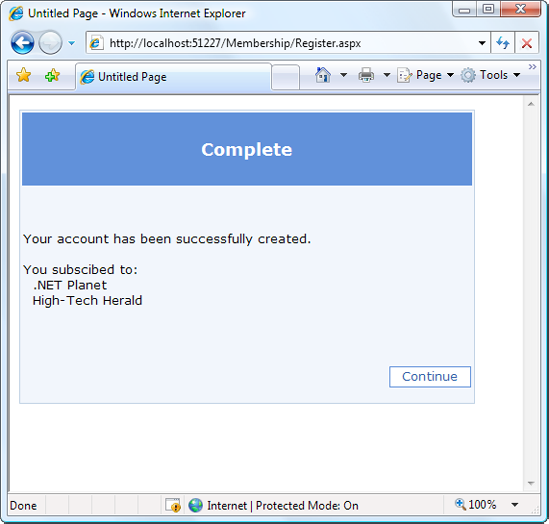
For example, imagine you
want to show the options the user selected in your custom step in the
final summary. In this case, you might want to add a new Label control,
as shown here:
<asp:CompleteWizardStep ID="CompleteWizardStep1" runat="server">
    <ContentTemplate>
        <table border="0" style="...">
            <tr>
                <td align="center" colspan="2" style="...">
                    Complete
                </td>
            </tr>
            <tr>
                <td>
                    Your account has been successfully created.<br /><br />
You subscribed to:
                    <asp:Label ID="lblSubscriptionList" runat="server">
                    </asp:Label>
                </td>
            </tr>
            <tr>
                <td align="right" colspan="2">
                    <asp:Button ID="ContinueButton" runat="server"
                     BackColor="White" BorderColor="#507CD1"
                     BorderStyle="Solid" BorderWidth="1px"
                     CausesValidation="False" CommandName="Continue"
                     Font-Names="Verdana" ForeColor="#284E98" Text="Continue"
                     ValidationGroup="CreateUserWizard1" />
                </td>
            </tr>
        </table>
    </ContentTemplate>
</asp:CompleteWizardStep>
Now, when the user moves to
the last step, you can fill in the label with the information from the
CheckBoxList control. However, because the Label and CheckBoxList
controls are placed inside a template, you can't access them directly
by name. Instead, you need to extract them from the CreateUserWizard
control. To get the label, you need to access the complete step, grab
the first control it contains (which is the content template), and then
use the FindControl() method to search for the label. To get the
CheckBoxList, you perform a similar operation, except you can use the
FindControl() method of the CreateWizardControl itself, which searches
all ordinary steps.
Here's the code that performs this task:
Protected Sub CreateUserWizard1_FinishButtonClick(ByVal sender As Object, _
  ByVal e As System.Web.UI.WebControls.WizardNavigationEventArgs) _
  Handles CreateUserWizard1.FinishButtonClick

    Dim lbl As Label
    lbl = CType(CreateUserWizard1.CompleteStep.Controls(0).FindControl( _
        "lblSubscriptionList"), Label)
    Dim chk As CheckBox
    chk = CType(CreateUserWizard1.FindControl("chkSubscription"), CheckBox)

    Dim selection As String = ""
    For Each item As ListItem in chk.Items
        If item.Selected Then
            selection &= "<br />" & item.Text
        End If
    Next
    lbl.Text = selection
End Sub
Figure 4 shows the final step.
3. The PasswordRecovery Control
The PasswordRecovery control
comes in handy when users forget their passwords. It allows them to
retrieve their password using a short wizard.
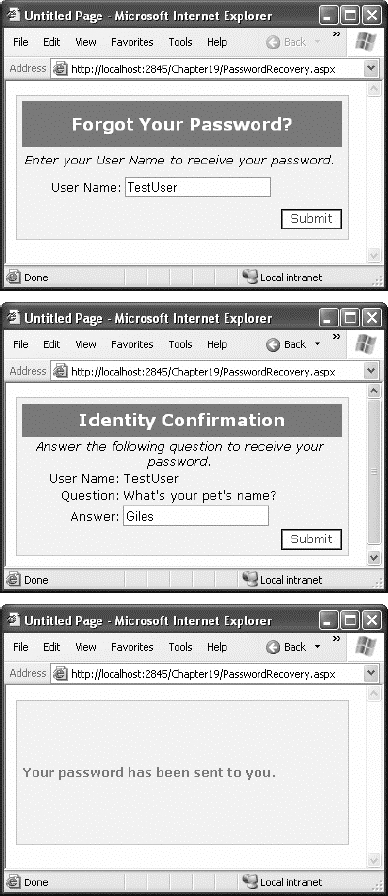
The PasswordRecovery control
leads the user through three steps. First, it requests the user name.
Next, it shows the security question and requests the answer (unless
you've set the requiresQuestionAndAnswer setting to false in the
web.config file, in which case the PasswordRecovery control skips this
step altogether). Finally, the PasswordRecovery control sends an e-mail
to the user's e-mail address. If you use a password format of Encrypted
or Clear ,
the e-mail contains the original password. If you are using the default
password format Hashed, a new random password is generated, and that
password is sent in the e-mail. Either way, the last step shows a
confirmation message informing you that the e-mail was sent. Figure 5 shows the PasswordRecovery control in action.
For the PasswordRecovery
control to do its work, your computer must have a correctly configured
SMTP server, and the user must have an e-mail address in the user
record.
NOTE
You can configure your
SMTP server by selecting the PasswordRecovery control and choosing
Administer Website from the smart tag. Then, choose the Application
tab, and click the Configure SMTP E-mail Settings link.
If your application doesn't
meet these two requirements—you can't send e-mail messages, or users
aren't guaranteed to have an e-mail address—you can display the new
password directly in the page. The easiest approach is to handle the
PasswordRecovery.SendingMail event. First, set the
MailMessageEventArgs.Cancel property to True to prevent the message
from being sent. Next, you can retrieve the message content from the
MailMessageEventArgs.Message object and display it on the page. Here's
an example:
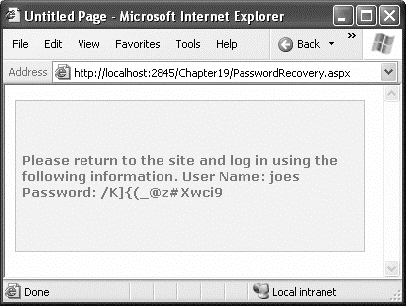
Protected Sub PasswordRecovery1_SendingMail(ByVal sender As Object, _
  ByVal e As System.Web.UI.WebControls.MailMessageEventArgs) _
  Handles PasswordRecovery1.SendingMail

    e.Cancel = True
    PasswordRecovery1.SuccessText = e.Message.Body
End Sub
When you use this event handler, you'll see a final step like the one shown in Figure 6.
Of course, for
complete flexibility you can create your own page that resets
passwords. You just need to use the methods of the Membership and
MembershipUser classes described earlier.