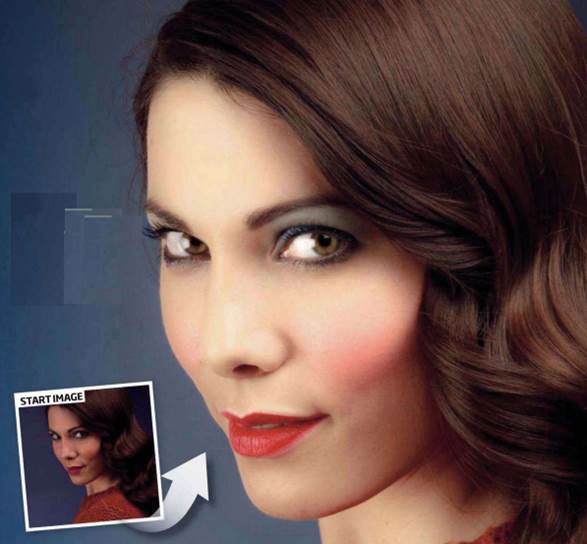
Use the powerful Adjustment Brush to give
your portrait a pro makeover
Enhancing portraits is all about making
selective adjustments to certain areas of the face. It can be helpful to think
of the face as a series of zones, each requiring a particular edit. You’ll
lighten the eyes, soften the skin, boost the lips and sharpen the lashes. You
might think the best place to make these changes is in Photoshop, but ACR also
has a few powerful retouching tools. In fact, using ACR, it’s possible to
perform a complete retouching workflow without even entering the main Photoshop
interface. What’s more, by making tweaks in ACR rather than in Photoshop,
you’ll ensure the best possible quality. And because ACR is so neatly
organized, easy to navigate, and totally non-destructive, you may find it’s the
ideal choice for enhancing your portraits.
Use
the powerful Adjustment Brush to give your portrait a pro makeover
Sharpen
the lashes
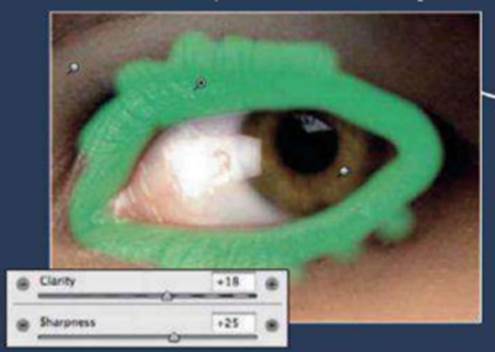
Paint over the lashes with the Adjustment
Brush, then use the sliders to sharpen and add Clarity.
Lighten
the whites
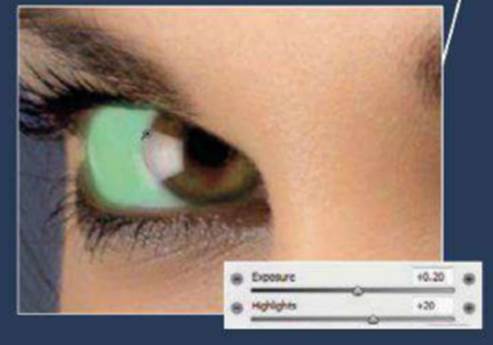
Carefully paint the whites of the eyes,
then increase Exposure and Highlights to lighten the whites.
Soften
the skin
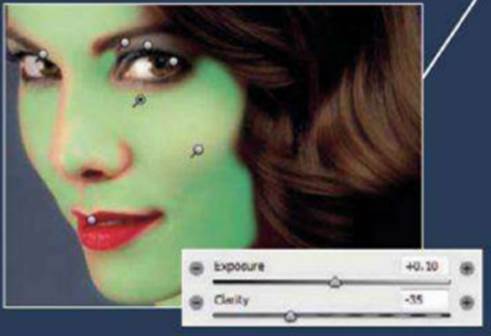
Drag the Clarity slider down to soften the
skin, and increase Exposure slightly to lift the tones.
Boost
the clothes
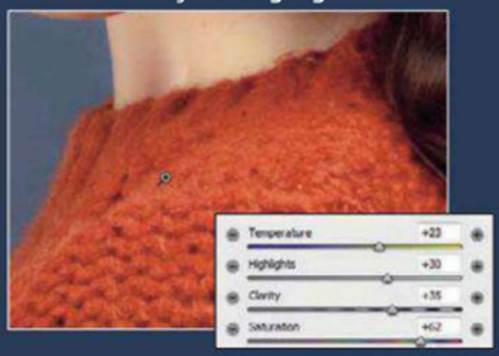
Use the temperature and Saturation sliders
to warm the hues in the jumper. Increase Clarity and Highlights.
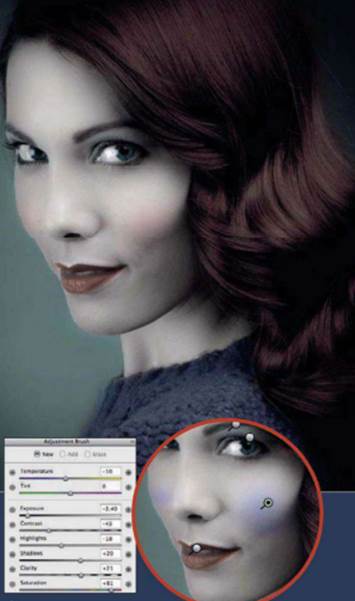
Add
make-up
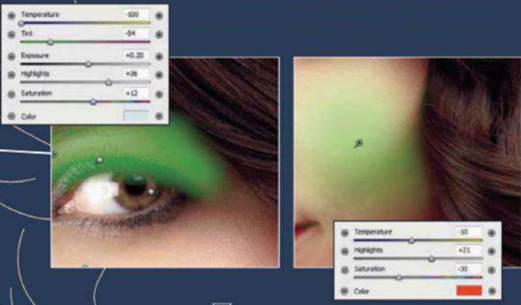
Paint a mask over the cheeks, then
introduce red with the Color Picker. Add blue to the eyes in the same way.
Enhance
the irises
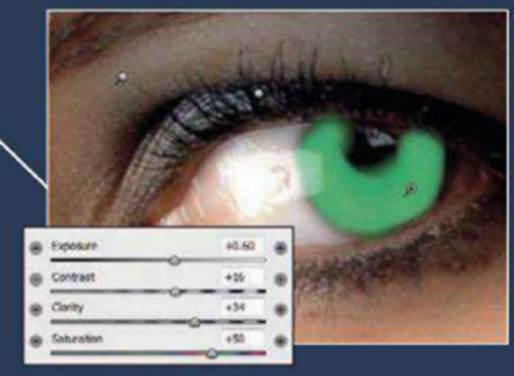
Boost the colour, contrast and detail in
the irises, but keep the circular edges dark.
Improve
the lips
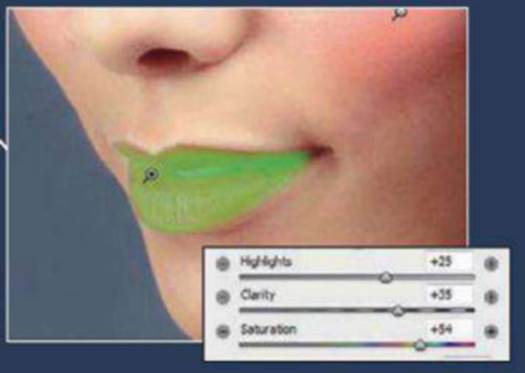
Boost the colour in the lips. Paint a
precise mask to cover them, then increase Saturation and Clarity.
“You can edit a mask’s settings at any
time”
How to paint a mask
Most retouching work in ACR is done with
the powerful Adjustment Brush. It allows you to paint a mask over an area, and
then apply changes to it, so it’s ideal for retouching a face. We’ve used it
here to soften the skin, boost the eyes, enhance the lips and skin, boost the
eyes, enhance the lips and even add digital blusher. The Adjustment Brush works
by setting pins, each of which represent a mask. To set a pin, click over the
part of the image you want to change, then paint over the rest of the area. It can
be helpful to check Show Mask while you’re painting, so you can see where the
mask is operating. It also helps to set an obvious mask colour – such as the
garish green we’ve used here – by clicking the colour picker next to the Show
Mask check box.
When painting, use the ] and [ keys to
resize your brush tip (hold down Shift and ) or [ to change the hardness]. To
erase parts of the mask, hold down Alt and paint. You can use the resizing
shortcuts for the Eraser, too. When you’re happy with your painted mask,
uncheck Show Mask, then make your adjustments using the sliders on the right.
To add more pins, check New at the top right. The tool remembers the last-used
settings, so be careful to reset the sliders each time you want to make a
different adjustment. You can edit any mask’s shape or settings at any time by
clicking the related pin.
RAW Smart objects
Get to grips with image blending
using one RAW file and Smart Objects
RAW file processed through ACR can be
opened into Photoshop as Smart Objects. This means that you have the option to
bring the image from Photoshop back into ACR at any time, simply by
double-clicking the Smart Object thumbnail in the Layers Panel.
Get
to grips with image blending using one RAW file and Smart Objects
There are several advantages to working
this way. First and foremost, it means you can change your mind about any edits
made in ACR, such as a crop or sharpening settings. But it also opens up more
creative possibilities. By duplicating the Smart Object layer, you can combine
different treatments made in ACR using Blend Modes. Don’t worry if this sounds
complicated, in practice it’s very easy. Within minutes you can transform a
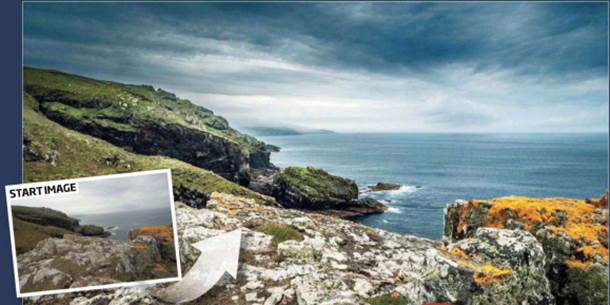
flat scene into a punchy, detailed landscape. Here’s how it’s done.
1.
Open start image
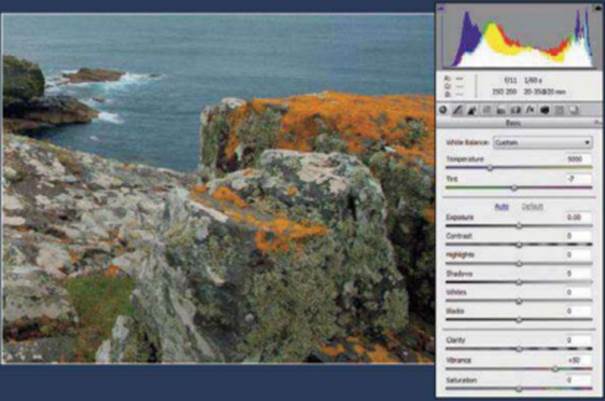
Open ‘coast_before.DNG’ from our project
files into ACR then set Temperature to 5000, Tint -7, Vibrance +50.
2.
Remove Chromatic Aberration
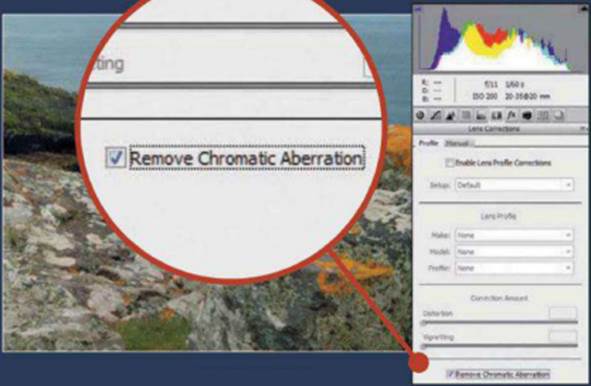
Go to the Lens Correction option in the
menu and then check ‘Remove Chromatic Aberration’.
3.
Graduated Filter
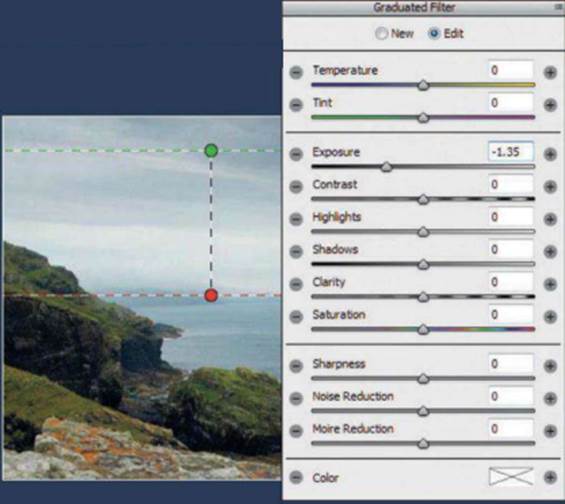
Click on Graduated Filter tool. Hold Shift
then drag a line from sky to land. Set Exposure to -1.35. Hold Shift and click
‘Open Object’.
4.
New Smart Object
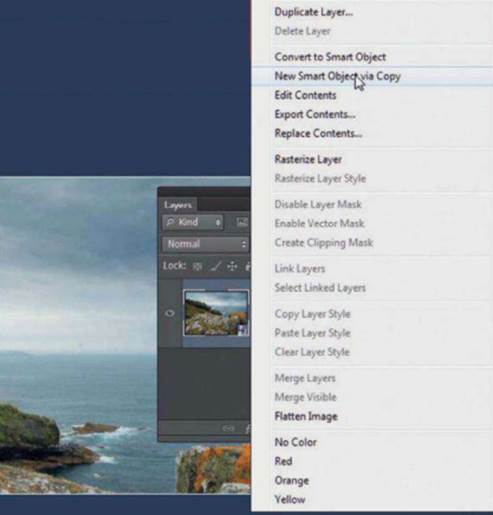
In the Layers Panel, right-click the layer
and choose New Smart Object via copy. Double-click copy’s thumbnail to go back
to ACR.
5.
Tonal tweaks
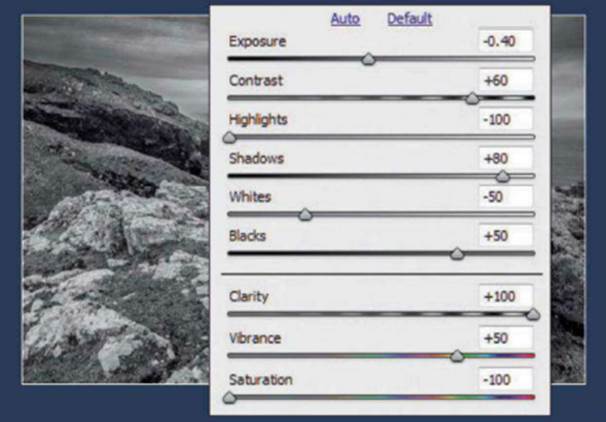
Set Exposure -0.40, Contrast +60,
Highlights -100, Shadows +80, Whites -50, Clarity +100, Saturation -100.
6.
Make tone Curve Panel adjustments
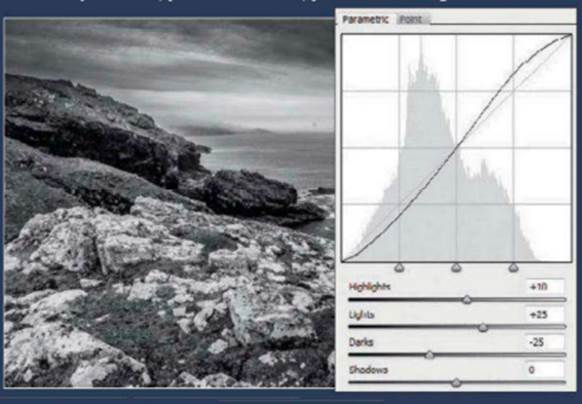
Go to the Tone Curve Panel. Under
Parametric, set Highlights +10, Lights +25, Darks -25. Click OK.
7.
Luminosity Blend Mode
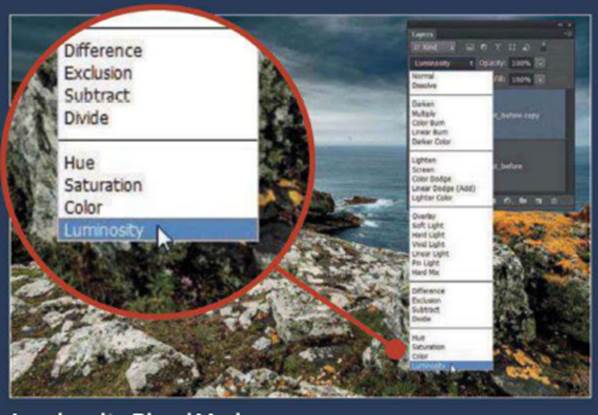
In the Layers Panel, click on the Blend
Mode drop-down and then choose Luminosity.
8.
Removing edge halos

To fix unwanted halos, press
Cmd/Ctrl+Shift+Alt+E to merge a copy of the layers, then grab the Burn tool. Set
Range: Highlights, Exposure 10%, and Brush carefully over the edge halos.
Five creative RAW effects
Learn how to add a variety of cool creative
effects using nothing more than the tools in Adobe Camera RAW
1.
Black and white
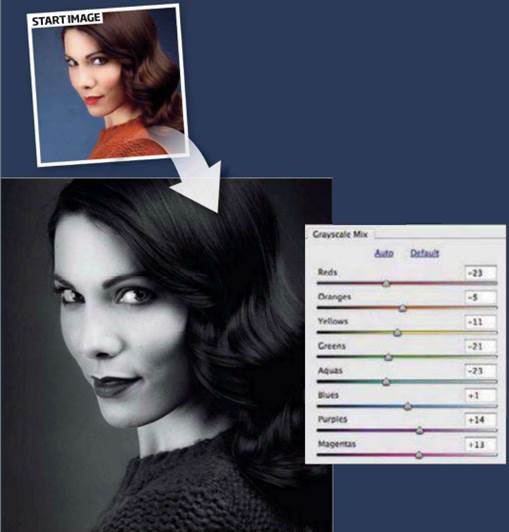
ACR is a great place to make your mono
conversions. It’s just like using a Black and White Adjustment Layer in
Photoshop.
Go to the HSL/Grayscale panel and check
Convert to Grayscale box. Use the colour sliders to tweak the tones and the
Adjustment Brush to simulate the Dodge and Burn tools.
2.
Solarised
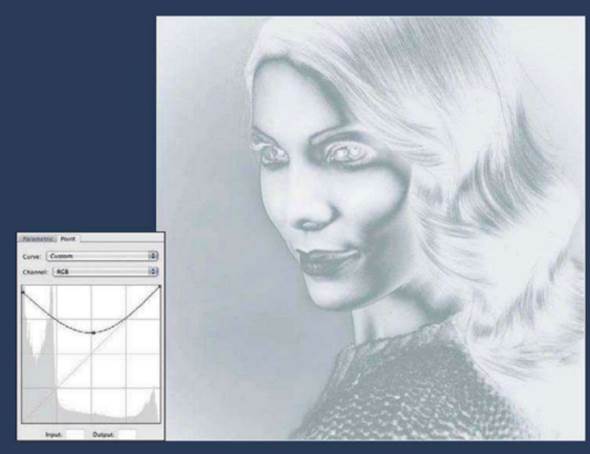
The inverted tones and haunting hues of a
solarised image were popularized be the surrealist photographer Man Ray in the
1920’s after a fortuitous darkroom mistake.
Go to the Tone Curve Panel and skew the
curve into an upside down U shape. It’s worth experimenting with the curve.
Push and pull it to extremes and see what happens.
3.
Cross process
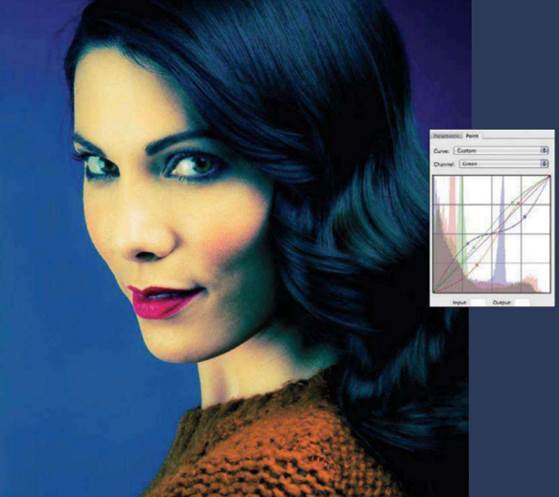
This popular technique references a
chemical process from the traditional darkroom with characteristically skewed
colours, saturation and contrast.
To replicate this in ACR, go to the Tone
Curve Panel and select the Point Curve window. Here you can tweak the
individual Red, Green and Blue channels. Once you’re happy, save the effect as
a preset.
4.
Split tone
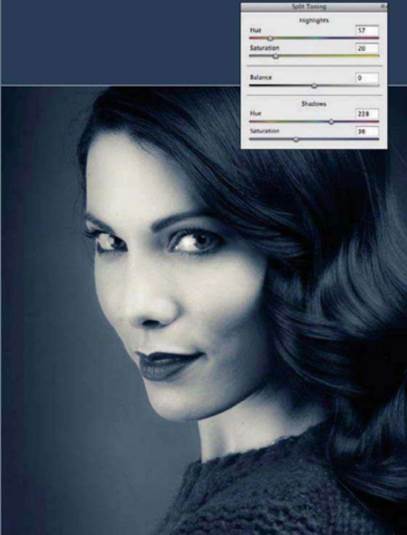
Adding a split tone is a great way to give
your mono images a creative twist by adding different colour tints to the
highlights and shadows.
In the Split Tone Panel, use the sliders to
target different colours and intensity for the shadows and highlights.
5.
Hand colour
It might be hard to believe, but it is
possible to replicate the look of a hand painted image in ACR.
You’ll need to make your image black and
white, but do this using the Saturation slider in the Basic Panel rather than
the HSL/Gray Panel. Next, select the Adjustment Brush and paint colour with a
low saturation onto the image.