Keep track of your eBook collection with a
single app
If you use your phone for reading, chances
are you'll have a number of books and publications scattered around your
device. If you're a keen hoarder of content, you might soon lose track of the
titles you have and where they are saved to. The Kobo app aims to help this
problem by being a simple, but effective, way to collect your various eBooks in
one organised place.
The
Kobo app
To help make it even easier to get all your
books in one place, the app uses an import feature that scans your phone for
all compatible and available content, from which you can select which ones to
import.
For any content that the autoimport feature
doesn't pick up, you can manually select files by accessing your phone's
internal storage.
In this tutorial we'll guide you through
the basics of using the Kobo app, as well as showing you how using the import
feature will help keep your eBook collection in good shape.
1.
Get the app
The Kobo app is a free download from the
Google Play store. Once downloaded and installed, open the application up. The
first time you use the app, you’ll be required to create a Kobo account. After
doing this, the app will automatically take you to the home screen.

The
Kobo app is a free download from the Google Play store
2.
Select Import Content
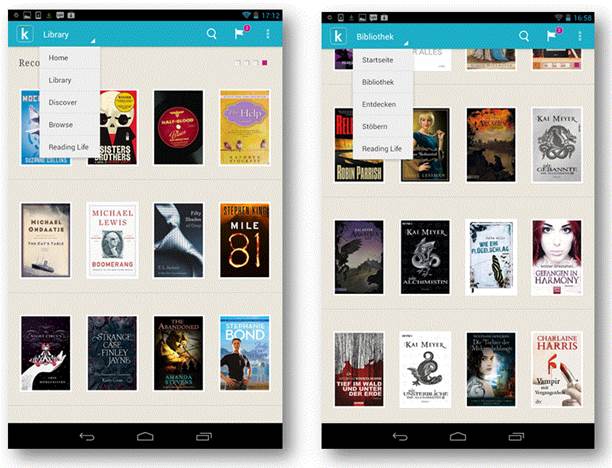
Your library will be empty to start with,
so to start importing, press on the options button in the top-right of the app.
From the drop-down menu that appears, select the Import Content option. Then
select the Start option to enable the app to scan for available content.
3.
What will you find?
Depending on the amount of files on your
Android device, or the size of your smartphone’s internal storage, the
importing process can take a while to complete. If you want to abort the search
you can press the Stop Search button at the bottom of the screen.
4.
View available content
Once your phone has finished scanning, all
the content the search found will appear on your screen. Although you have
imported the content, you’ll then need to download them to the app. By pressing
on a book cover the book will begin to add itself to the Kobo app.
5.
Did it import correctly?
From time-to-time you might find that
certain pages of an eBook won’t import properly, so make sure to open up every
eBook after importing to ensure all the pages are okay. If there’s a problem
with one of the pages restart the import process again.
6.
Manually import eBooks
If you have loose eBooks on your device
that weren’t picked up by the app, locate the eBook manually on your device by
going through your phone’s internal storage. You can then move It directly In
to the Kobo app folder where you should be able to Import it from.
Send info from Google Chrome to your phone
Send links, text and maps from a browser to
a phone using Google Chrome to Phone
Google
Chrome to your phone app
The web is undoubtedly one of the best
sources of information and entertainment currently available. Google Chrome to
Phone is a Google Chrome browser extension that helps to bring that information
to an Android phone.
The extension creates a link between the
browser and phone via a Google account. Users without a Google account will
need to set one up before the extension can be used. Alongside the extension,
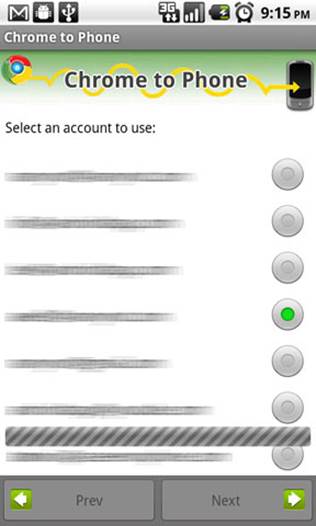
an Android app needs to be installed on a device. This will need to have the
same Google account details as used when signing into the browser extension.
Users get to select an account if there is more than one when setting up the app.
Sign in via the browser and it's time to
start sending info and links to a phone. Send a YouTube page and instantly
watch, send a phone number and call or send a Google Map and view. All links
and information are safely stored in the app's History feature ready to be used
again and again.
1.
Get Chrome
The Google Chrome to Phone app needs the
Chrome browser extension to be installed. Head to the Chrome web store
(https://chrome. google.com/webstore) and do a search for the extension. From
the search results click the Add to Chrome button to install the extension.
2.
Sign in
The installed extension will add an icon
next to the browser’s address bar. To start using the extension, users will
need to sign in with a Google account. Click the icon, select Sign in and do so
with your individual login credentials. Now grant access to the application.
3.
Install app
Head to the Google Play store on the
Android device you wish to use with the browser extension. Search for Google
Chrome to Phone and tap lnstall>Accept & download and open the app. Now
follow the onscreen instructions to set up the application.
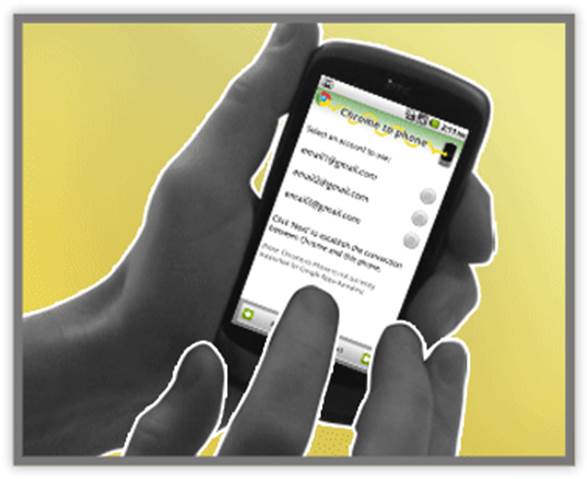
Search
for Google Chrome to Phone and tap lnstall>Accept & download and open
the app
4.
Link options
The last step in setting up the Chrome to
Phone app is the link action preference. By default, this is set to
automatically launch links. The alternative is to launch links manually. This
adds an alert notification in the Notifications panel. Users will need to drag
down and select the link.
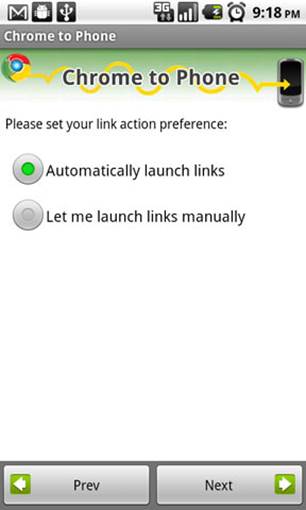
The
last step in setting up the Chrome to Phone app is the link action preference.
By default, this is set to automatically launch links.
5.
Change link preference
The link action preference can be changed
from automatic to manual, or vice versa, at any point you like. Open the
application, tap and hold the Menu button and select Settings. Simply select
the appropriate links option and head back to the app’s home screen.
6.
YouTube
With the links preference set to the
default option, sending a YouTube link will automatically launch the video. A
pop-up window will appear requesting which app to view with. Select YouTube If
it’s Installed on your device. Tick the Use by default option to action all the
time.
7.
Text snippet
Select text from the desired website and
hit the icon to send. This will cause the Complete action using window to open;
select a browser to continue. This will open the webpage, but the text is saved
on the clipboard. Open a text document, tap and hold and select Paste to add
text.
8.
Google Maps
Head to Google Maps on your desktop machine
and send a link. This could either be an area or directions. A Complete action
using window will ask the receiver to choose an application to open the link.
Select Maps to open the area or direction chosen originally.
9.
Phone number
Websites typically contain contact
information such as phone numbers. To send a number on a site simply select the
number and click the Chrome to Phone Icon. The number will appear, ready to
call. Tap the Save to People button and create a new contact If necessary.
10.
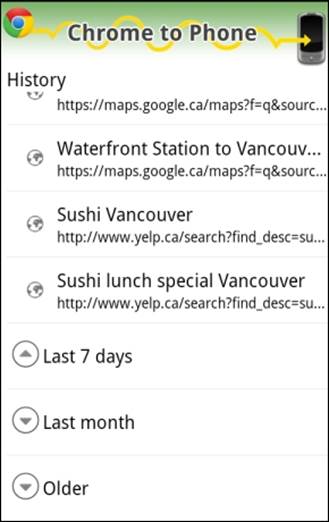
History
Opening the Google Chrome to Phone
application presents a straightforward History screen. This is divided into
four different categories: Today, Last 7 days, Last Month and Older. To view
the content in each section simply tap to open and tap again to close.
Opening
the Google Chrome to Phone application presents a straightforward History
screen.
11.
Open a link
Each link in the History has a number of
options than can be called into action. To view the options for a link, tap it.
To launch a link, hit Open. This will present a selection of pre-installed apps
to choose from eg Chrome, Internet, YouTube -depending on link type and apps
installed.
12.
Working with links
Alongside the option to Open a link there
is Add Bookmark, which adds a bookmark to the default option. Tap Share Link to
choose an option to share with, eg Dropbox, Google Drive or Bluetooth. To
delete a link from the list simply select Remove from history.
13.
Disconnect phone
After a phone has been set up it
automatically receives stuff from the connected browser. To stop receiving
links from the browser extension, the phone needs to be disconnected. Tap and
hold Menu and select Settings. Now tap the Disconnect Phone button.