BIOS functionality
We have discussed many times about Gigabyte
3D BIOS features and the default “3D Mode” in our last reviews of Gigabyte
mainboards. The schematic layout of the mainboard features highlighted key
knots which are very inviting to click on. These knots play the role of visual
hint for inexperienced users, helping them adjusting the settings their
processors, memory, voltage regulator, etc.
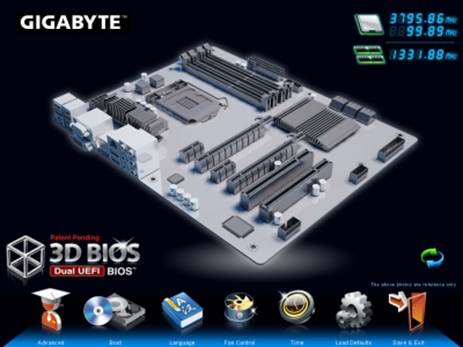
Gigabyte
3D BIOS
In some case, working with the visual “3D
Mode” is more convenient, but the “Advanced Mode” does provides greater number
of parameter, which we will revise briefly again here.
When switching to the “Advanced Mode”, you
would switch to the “M.I.T” section too (MB Intelligent Tweaker), which
contains every information about overclocking and optimizing the performance. All
sub-sections are listed on the main section’s screen and this screen is also
functioned of reporting the basic parameter of the system.
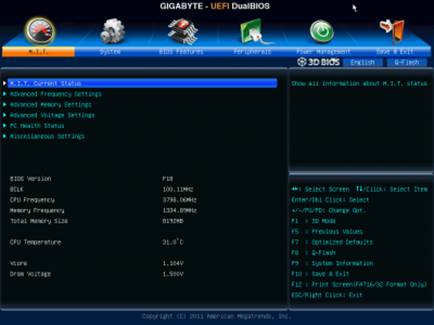
The
“M.I.T” section (MB Intelligent Tweaker)
After that, the “M.I.T Current Status” sub-section
is just simply for informing you about the operating parameters of the system.
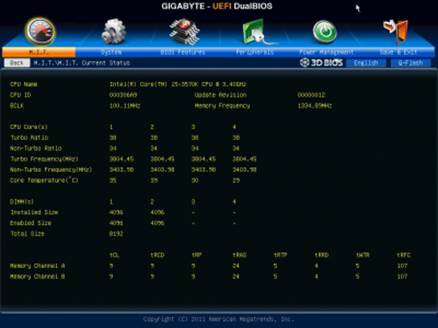
The
“M.I.T Current Status” sub-section
Adjusting frequencies and multipliers are
done in the “Advanced Frequency Settings” sub-section, and in this sub-section,
there are also special information that helps you posting what change you are
making.
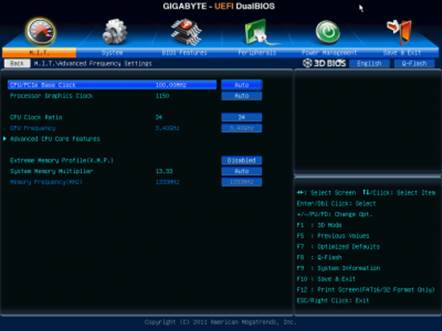
The
“Advanced Frequency Settings” sub-section
The “Advanced CPU Core Features” is a
separate page used to work with the micro-processing technology, detailed
adjusting of the CPU clock rate multiplier and the power saving mode.

The
“Advanced CPU Core Features”
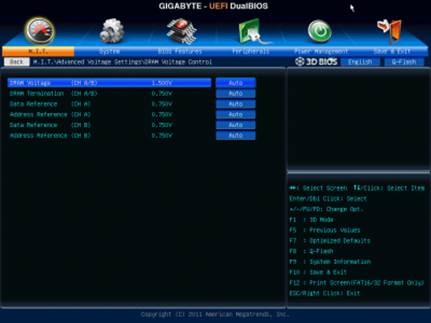
The “Advanced Memory Settings” sub-section lets
you control the sub-system’s memory.
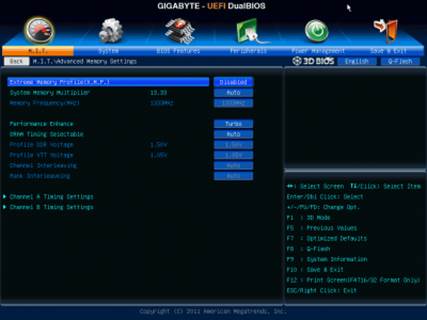
The
“Advanced Memory Settings” sub-section
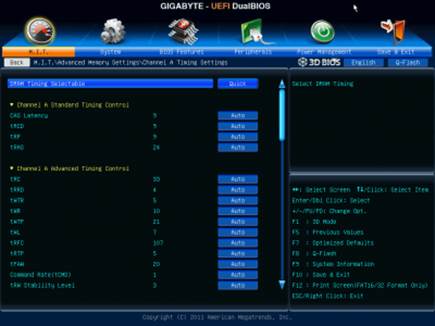
On the personal page, there are all
parameters relating to memory timing. Therefore, you can set up the
simultaneous timing for all memory channels or separately.
The
“Advanced Voltage Settings” sub-section are classified into four different
pages
The “Advanced Voltage Settings” enables you
to work with different voltage levels that are grouped into four different
pages.
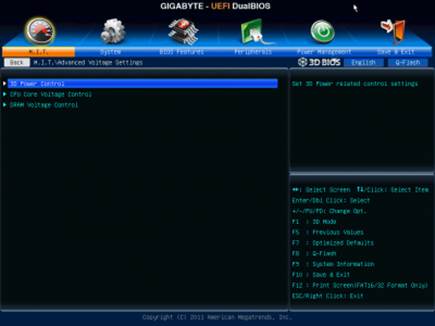
There
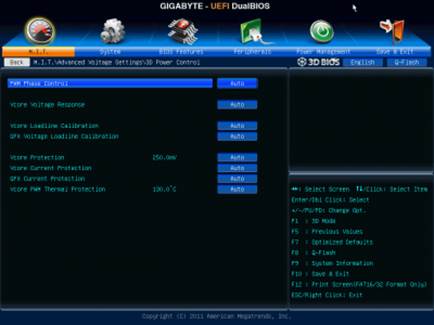
are some new parameters in the “3D Power Control” page
There are some new parameters in the “3D
Power Control” page, born due to the “3D Power” technology appearance. Now, it
is possible to set up the operational mode for the processor voltage regulator,
setting the level of Vdroop responsiveness under heavy loads and modify many of
other options right in the BIOS.
Setting
up the operational mode
“CPU Core Voltage Control” page is used to
adjust the voltages in different parts of the processor. CPU Vcore can be
locked at a particular value or another certain value can be added to the
nominal settings.
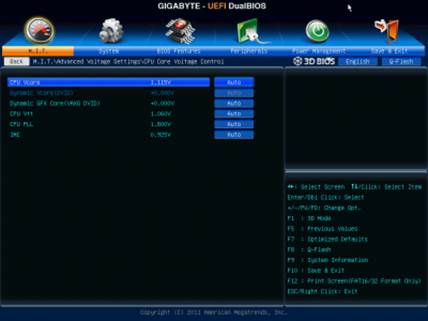
The
“CPU Core Voltage Control”
The voltage would not only increase, but it
also might decrease to the level below its nominal value, which can be
sometimes become a convenient characteristic. For example, when your CPU is
working at the lower frequency than nominal, you might find it useful, or in
case you are using low-voltage memory modules.
The
voltage would not only increase, but it also might decrease to the level below
its nominal value
The current voltage, temperature and fans
speed is reported in the “PC Health Status” sub-section. It is possible to
adjust the speed of four out of five fans. You can also modify the CPU fans’
speed and three system fans separately. You can choose either one of the two
preset settings – Normal or Silent – or manually adjust the settings of the fan
to your wanted levels. The fourth system fan’s speed can only be monitored, but
it is impossible to adjust it. Unfortunately, if a 3-pin fan is in used, only
the rotation speed of the processor’s fan and the first system case fan can be
lowered manually. Adjusting the speed of 3-pin fans is no longer supported by
other fan connectors.
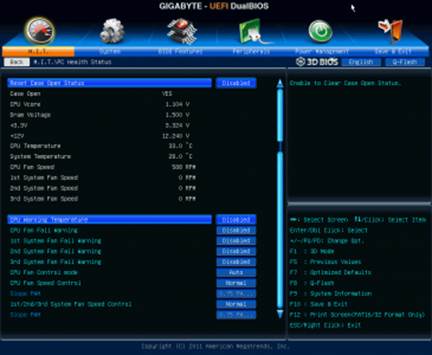
The
“PC Health Status” sub-section
The “Miscellaneous Setting” sub-section
appears empty or disappears thoroughly from the Gigabyte mainboard’s BIOS in
some cases. It turns out to be that this is where you can choose the
operational mode for your PCI Express 3.0/2.0 x16 and therefore improving
performances in particular tests is likely.
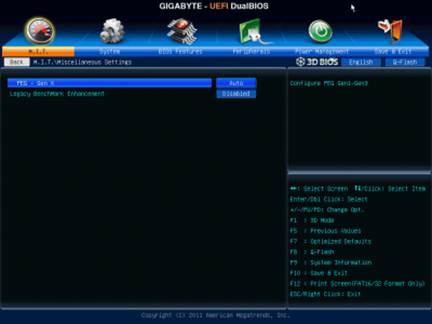
The
“Miscellaneous Setting” sub-section
The “System” section is similar to the
“Standard CMOS Features” section of the older BIOS. All information about the
basic system and the list of connected drives on the “ATA Port Information”
page will be displayed in this section. You can also change the language and
timing of the interface here.
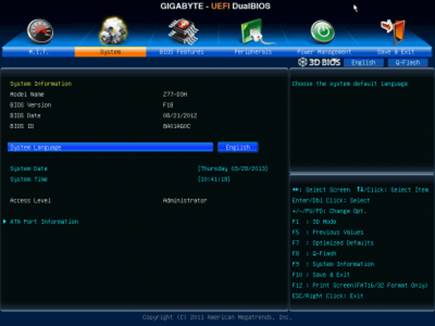
The
“System” section is similar to the “Standard CMOS Features” section of the
older BIOS
The “BIOS Features” section is where you
can determine the order of booting your system, activate the booting images,
adjusting parameters and other technology, for example virtualization and
define your log in password.
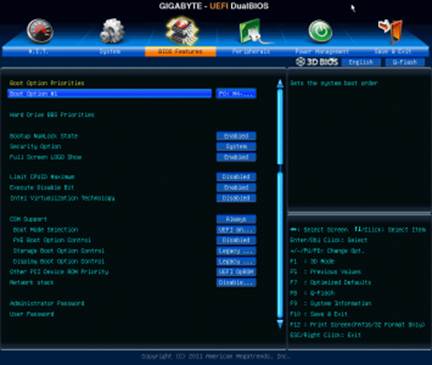
The
“BIOS Features” section
For the peripheral devices and additional
built-in controllers, there is the “Peripheral” section. Chipset technology,
like Intel Rapid Start or Intel Smart Connect to be specific, is also
configured here.
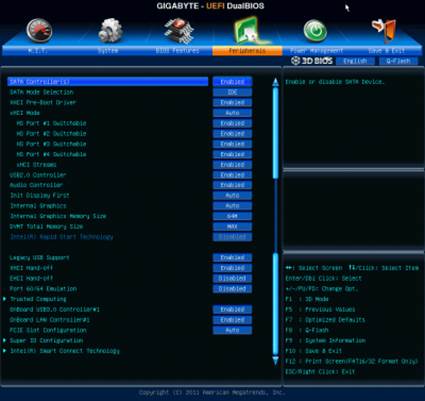
The
“Peripheral” section
Containing in the “Power Management”
section is regular parameters which relate to the mainboard’s power and
startup.
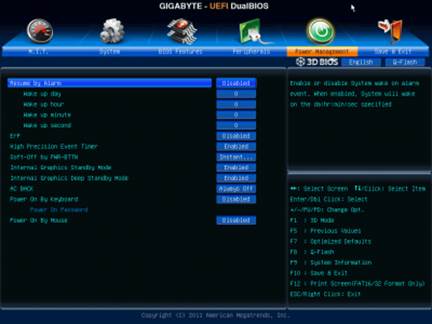
The
“Power Management” section
To apply or cancel your changes, your just
need to go to “Save & Exit” section, where you can also recover the default
settings. There are also two parameters for controlling the BIOS’s setting
configuration. You can save or load up to 8 BIOS profiles as well as label each
of them a specific name. The profile can also be saved on the external media
channels and you can also save other profile from those channels. Every time
you boot the system, the profile is also saved automatically.
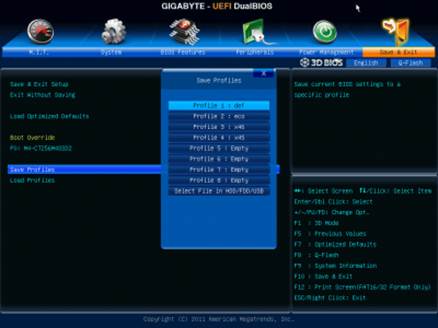
The
“Save & Exit” section
Some function keys still work in the same
way, so pressing the F9 key will lead you to the system information.
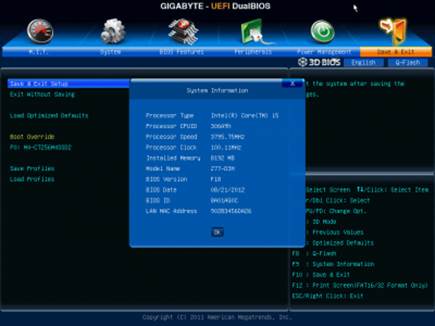
The
F9 key will bring you the system information
You can the Q-Flash utility integrated in
the BIOS update displayed in the screen by pressing the namesake button or the
hotkey F8. You will find it easier and more convenient to work with as it shows
not only the current BIOS version but also the new one that you are trying to
update to. But still, it cannot work with the NTFS disk and you can only save
the current BIOS version in the root folder, instead of the chosen folder like
before.
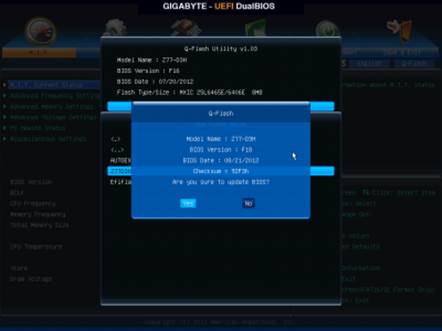
The
Q-Flash utility
Gigabyte software team, those who work on
the Gigabyte 3D BIOS, deserves our best respect and praise for their work. They
managed to bright about the transformation from the old Award BIOS to the new
AMI UEFI BIOS within a really short period of time. The configuration control
feature has been seriously limited at first, but it now appears with its full
and most complete form including working with the external media channels and
save the latest profile automatically after booting successfully. They make the
adjustment of the speed of the processor 3-pin fans possible again, although
only one system fan connector is able to lower the rotation rate of the 3-pin
system fan. It appears to be simple and convenient to choose the active BIOS
mode. If you have already been configuring your system in the 3D Mode, you
would see this mode displayed the next time you access into the BIOS Setup, and
if the Advanced Mode is the latest save, you will again get it back in the next
access. As the result, after some innovation and improvements, a full set of parameters
for optimizing performance, overclocking and comfortable in general for all
user experience has been provided by the new Gigabyte 3D BIOS.