We put Apple's latest storage option
through the paces to see if it's a good alternative to an SSD, and to look at
how the technology can improve your current Mac
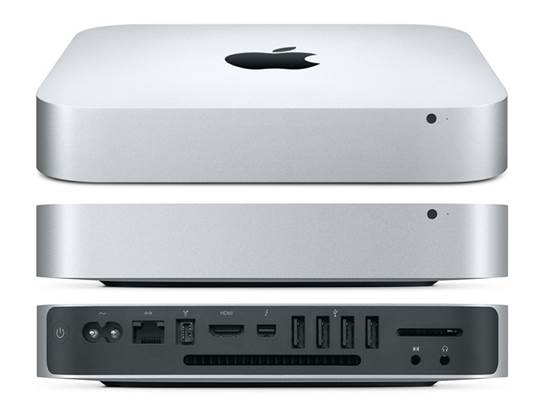
When Apple updated the iMac and Mac mini in
late 2012, it introduced a new storage option called Fusion Drive. Despite the
name, it’s actually two drives working in a special arrangement. It pairs 128GB
of flash storage with either a 1TB or 3TB hard drive. Apple bills it as
providing the high capacity of a hard drive with the performance of flash
storage, in a way that has no impact on how you work and store things.
Pure SSD configurations remain an option on
some Macs, but they’re still costly for their capacities. Replacing a Mac
mini’s 1TB hard drive with a 256GB SSD costs $300, and a 768GB SSD on the
27-inch iMac is an eye-watering $900. Hence Apple’s attempt to find a
compromise between speed and capacity. Fusion Drives cost $250 and $400 for the
1TB and 3TB versions, respectively, though the latter is only available on the
27-inch iMac. In fact, Apple sells Fusion Drive short by listing only the hard
drive component’s capacity and omitting that of the SSD.
Mac
mini’s 1TB hard drive
In terms of hardware, all that’s added is a
128GB SSD. A substantial amount of what you’re paying covers the fitting of the
SSD, and the configuration of the two drives to work together. There’s no setup
process on your part.
The two drives that make up a Fusion Drive
don’t operate like a striped RAID array to spread the load between them. Nor do
they work like hybrid drives, available on PCs for several years, despite their
similar makeup. A hybrid drive’s flash portion acts as a cache, but that’s all
it is: a cache. A copy of everything is on the hard drive.
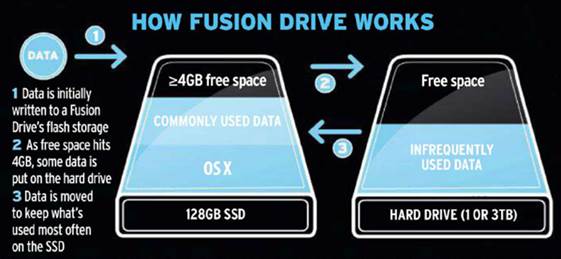
How does fusion drive work?
A Fusion Drive’s components appear as a
single volume in the Finder, with their capacities merged. No adjustment needs
to be made to how you work, as decisions about which of the two components is
used to store a given piece of information are made for you. Neither of the
drives holds a complete copy of everything.
When something needs to be stored, it’s
always first written to the flash storage. As long as plenty of free flash
storage is available, OS X doesn’t touch the hard drive, and the Mac will
operate solely from its flash storage.
Behind the scenes, OS X silently monitors
how your Mac is used. When free flash storage dwindles to only 4GB, OS X’s
long-term observations are used to decide what you’re least likely to need from
day to day, and it moves some of it to the hard drive. This keeps plenty of
flash storage available so that high performance is maintained.
Relegation to the hard drive isn’t one-way
or irreversible. OS X continues to monitor your activity, and if it discerns
you’re using something enough to warrant moving it back to the faster storage,
it will do so. Something else will end up relegated to the slower drive
instead. The operating system stays on the SSD, but pre-installed apps such as
iMovie and GarageBand don’t enjoy this privilege.
How
fusion drive works
Very large files, such as videos or an
iPhoto library aren’t treated as monolithic. That would be inefficient, so
Fusion Drive doesn’t have to shift the whole of a file. A developer, Patrick
Stein, has published blog posts examining the working of Apple’s technology. He
discovered Fusion Drive works at a lower level, instead moving the blocks that
make up files, and only some of them. Stein discovered if he read the first
megabyte of a large file enough to warrant storing it on the flash storage,
only that portion of the file was moved. The rest remained on the hard drive.
The effect of splitting data between two
drives is that both need to be connected to a Mac (which must be running OS X
10.8.2 or later) in order to read it. Under any circumstances, it’s wise to
keep an up-to-date backup of your Mac’s contents. OS X’s Time Machine feature
will back up a Fusion Drive just the same as it would a hard drive, and it’s a
good idea to use it because the contents are more susceptible to loss due to
the increased risk that either of the two pieces of hardware fails.
In our testing of two 21.5-inch iMacs – one
with a hard drive and the other with a Fusion Drive – OS X’s System Information
app revealed that the hard drives in both had the same model number and
rotational speed. The smaller iMac uses a 2.5-inch, 5400rpm drive. However,
Apple has stuck with 3.5-inch, 7200rpm drives in the 27-inch iMac, which are
capable of faster transfer rates. However, they fall far short of flash
storage’s capabilities, our benchmarks on the next page show the speeds reached
by a hard drive and a Fusion Drive in two 21.5-inch iMacs. The gap in their
performance is really quite significant.
Fusion Drive and boot camp
Since Fusion Drive depends on software
technology build into OS X, Windows doesn’t support it. This doesn’t mean
Windows can’t be installed on a Mac with A Fusion Drive, but Boot Camp
Assistant will only create a partition on the hard drive. However, there had
been an issue with installing on a 3TB drive, whether that’s a Fusion Drive or
a garden-variety hard drive. Apple seems to have come up with a solution with
an OS X update.
For those not willing or able to upgrade to
OS X 10.8.3, there is a workaround form the maker of WinClone, an app that
backs up Boot Camp partitions from within OS X. on the company’s blog, they
detail the reason for the issue and how to overcome it.
Some commenters on the blog entry report
stumbling at the final step, and even if it works for you, there’s a side
effect that might discourage you from trying of your Fusion Drive into three
partitions. OS X continues to see the first one as part of the Fusion Drive,
Windows can be installed on the second one, and the last 1TB of the drive
becomes a separate volume. It’s usable, but OS X no longer sees it as part of
the Fusion Drive, so it loses the ability to include that capacity in its
shifting around of data.
Make your own fusion drive
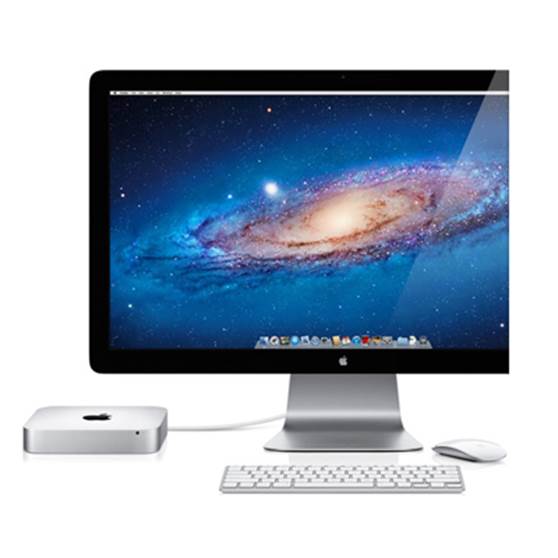
Adding a Fusion drive to a Thunderbolt
Mac isn’t cheap, but it’s less costly than replacing your existing Mac
Make
your own fusion drive
Among Patrick Stein’s posts about Fusion
Drive, he published instructions on how to use the command-line version of Disk
Utility to create your own Fusion Drive from any two drives connected to a Mac.
The Mac must support Mountain Lion, which is needed for Fusion Drive support.
Specifically, it requires the installer for OS X 10.8.2 from the Mac App Store.
There’s little reason to create your own
Fusion Drive unless one of the drives is capable of very fast transfer rates
though. That depends not just on the drive but also its connection to the Mac.
To get a real benefit requires, among other things, a Mac with Thunderbolt, a
Mac Pro with an SSD, or a willingness to make major internal changes to other
models.
For instance, on a MacBook Pro, you’ll need
to install a kit such as OWC’s Data Doubler ($45), which converts the bay
normally occupied by the SuperDrive to hold a 2.5-inch drive instead. The hard
drive needs to be moved there, since that bay typically uses a slower
connection that would impede an SSD’s performance. Even then, MacBook Pros
introduced prior to 2011 use a SATA-II connection, which impedes the transfer
rate of modern, SATA-III SSDs.
Apple doesn’t intent you to set up your own
Fusion Drive. The graphical version of Disk Utility doesn’t provide the
capability, but the command-line version accessed in Terminal does. On the next
page we’ll show you just what you need to roll your own Fusion Drive.
However, you won’t get all the benefits of
an Apple-provided Fusion Drive. TRIM is technology that prevents degradation in
an SSD’s performance over time as it’s repeatedly overwritten. It’s normally
enabled only for flash storage provided by Apple, but TRIM Enabler turns it on
for other drives. We installed TRIM Enabler on our Mac’s homemade Fusion Drive
and encountered no issues. However, doing so means you will be running OS X
with low-level modifications that take you further away from configurations
that are tested and approved by Apple.