Over the next couple of issues, this
series aims to make a novice well-versed with the Beaglebone. It will cover
various topics such as porting different OSs to the Beaglebone, a few tinkering
projects, etc. This first article gives a brief overview of the Beaglebone and
how to toggle a user LED on it.
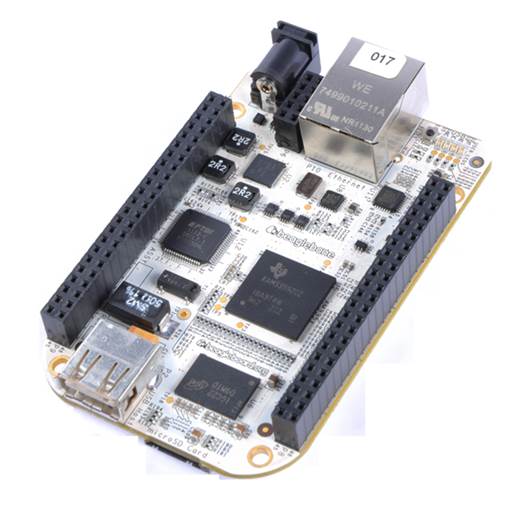
The Beaglebone is a low-cost
credit-card-sized Linux computer that runs software such as Android and Ubuntu.
With plenty of I/O and processing power for real-time analysis provided by the
TI Sitara AM335x ARM Cortex-A8 processor, Beaglebone can be complemented with a
cape, which is a plug-in board (similar to the Arduino ‘shield’), to augment
functionality. Here are some of its cool features:
§
720 MHz super-scalar ARM Cortex-A8 (ARMv7a)
processor
§
3D graphics accelerator
§
ARM Cortex-M3 for power management
§
2x Programmable Realtime Unit 32-bit RISC CPUs
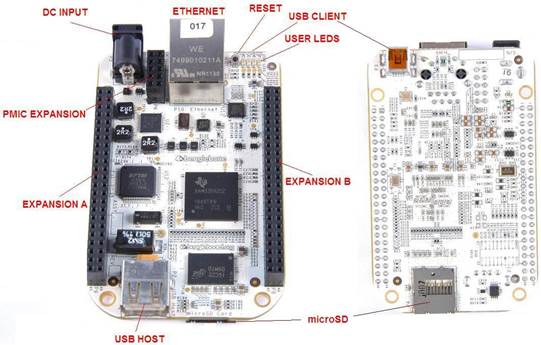
§
USB client: power, debug and device
§
USB host
§
Ethernet port
§
2x 46 pin headers
§
2x I2C, 5x UART, I2S, SPI, CAN, 66x 3.3V GPIO
and 7xADC
§
4 GB microSD card with Angstrom distribution
§
Cloud9 IDE on Node.JS with the Bonescript
library
§
Size: 8.6 cm x 5.3 cm (3.4” x 2.1”)
§
Single-cable development environment with
built-in
§
FTDI-based serial/JTAG and an on-board hub to
give the same cable simultaneous access to a USB device port on the target
processor.
§
Industry standard 3.3V I/Os on the expansion
headers, with easy-to-use 0.254 cm (0.1”) spacing.
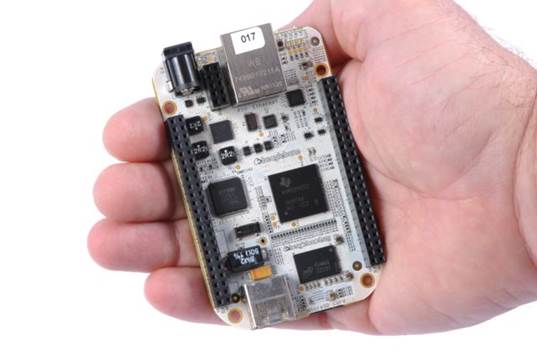
The
Beaglebone is a low-cost credit-card-sized Linux computer that runs software
such as Android and Ubuntu
Purchasing hardware and capes
Regarding buying a Beaglebone, there are a
lot of distributors; pick the one nearest to you from
http://beagleboard.org/buy. The cost of the Beaglebone is currently $89, for
which you get (in the box) the Beaglebone, a USB cable, and a 4 GB micro SD
card.
Currently, there are over 20 capes for
DVI-D, VGA, LCD, motor control, prototyping, the battery and more. These can be
purchased from http://BeagleBoneCapes.com/.
The
cost of the Beaglebone is currently $89, for which you get (in the box) the
Beaglebone, a USB cable, and a 4 GB micro SD card
OS support
Though the Beaglebone ships with a 4 GB SD
card with a working Angstrom image, it supports a wide variety of OS’ such as
Ubuntu, Debian, Android, Angstrom, Fedora, Arch Linux, Sabayon, etc., that you
can use as alternatives. You can also download the latest Angstrom image for the
Beaglebone from http://downloads.angstrom-distribution.org/demo/beaglebone/. At
the time of writing, the latest image available was
‘Angstrom-Cloud9-IDE-GNOMEeglibc- ipk-v2012.05-beaglebone-2012.11.22.img.xz’.
To update the image on the SD card, insert your SD card into the computer, but
make sure that it is not mounted. Now, identify the correct raw device name
(like /dev/sde – not the partition, such as /dev/sde1). You can do this by
opening the Ubuntu disk utility and clicking the SD card. Now, in the terminal,
navigate to the folder where you downloaded the image and run the following
command to write the image to the SD card:
Xz –dkc
Angstrom-Cloud9-IDE-GNOME-eglibc-ipk-v2012.05-beaglebone-2012.11.22.img.xz
>/dev/sdXsync
Here ‘sdX’ stands for the device file of
the SD card. This process will take some time and if it is successful, you will
see the cursor jump to the next line and text input will be available. Now
remove the SD card.
Here
‘sdX’ stands for the device file of the SD card. This process will take some
time and if it is successful, you will see the cursor jump to the next line and
text input will be available. Now remove the SD card
Booting the Beaglebone
Plug in the SD card into the Beaglebone. To
power it up, connect the Beaglebone to your computer via the USB cable
provided. Eject the Beaglebone via the Ubuntu disk utility program. I tried
ejecting it via the file manager, but that did not work for me. Upon every
boot, the Beaglebone is in ‘storage mode’ by default. Hence, this step is
required to switch it to ‘network mode’.
The next step is to set up the serial
console so that you can interact with the board. There are two possible ways:
either a serial console, or the Linux ‘screen’ command. For the first method,
install Minicom/Gtkterm (I prefer minicom, which you can install with sudo
apt-get install minicom and run with sudo minicom -s). Configure it by
selecting the correct USB port, set the baud rate to 115200 and software
control, and both the hardware controls to NONE. The other way uses the Linux
‘screen’ command, which is much easier – just run screen /dev/ttyUSB1 115200
(in most cases the virtual USB serial port is ttyUSB1; if it does not work, try
ttyUSB0). If all went well, you should be greeted with a familiar Angstrom
log-in in the terminal as shown in Figure 1. The username is ‘root’; for the
password, just hit ‘Enter’ and you should see the prompt root@beaglebone:~#
after that.
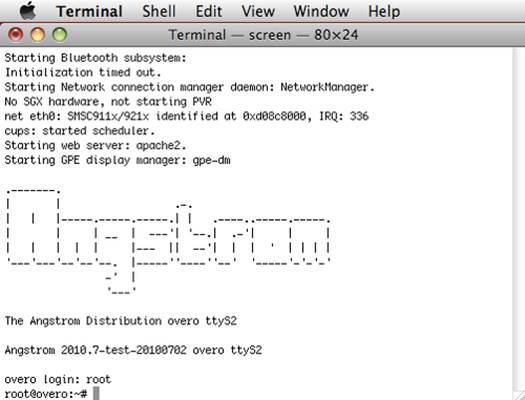
Figure
1: Angstrom login
Toggling the user LED on the Beaglebone
This is the fun part! First, make sure that
your kernel supports GPIO with the following commands in the terminal; the
resultant output should have ‘=y’ as shown:
$ grep
GPIOLIB /boot/config-`uname -r`
CONFIG_ARCH_REQUIRE_GPIOLIB=y
$ grep
GPIO_SYSFS /boot/config-`uname -r`
CONFIG_GPIO_SYSFS=y
There are four
user LEDs on the Beaglebone, accessible from user space on the file system at
the location /sys/class/led/. There is one directory per user LED, named as shown
below:
/sys/class/leds/beaglebone::usr0/
/sys/class/leds/beaglebone::usr1/
/sys/class/leds/beaglebone::usr2/
/sys/class/leds/beaglebone::usr3/
In each of these directories, there is a
file named ‘brightness’; writing a ‘1’ or a ‘0’ to this file controls the
status of that LED, toggling it ON or OFF. Note that since user LED 0 is
already used to indicate Ethernet activity, you should use the remaining LEDs
for your projects – so I’m going to target LED 3; the following commands will
turn it ON and OFF:
echo 1 >
/sys/class/leds/beaglebone::usr3/brightness
echo 0 >
/sys/class/leds/beaglebone::usr3/brightness
In the next article in this series, we will
do some tinkering and a few mini projects on the Beaglebone. Meanwhile, you can
take a look at some amazing hacks/ projects being done by fellow hackers,
developers and hobbyists around the world on the Beaglebone, at http://beagleboard.org/project/.