The
installation of the Exchange Server 2010 CAS role is a straightforward
task. This section covers the installation and configuration of a basic
system to illustrate the concepts.
The installation of the CAS
role assumes that Exchange Server 2010 is already installed on the
target server.
Memory and CPU maximum recommendations for the CAS role are shown in Table 1. Beyond these capacities, there will be diminishing returns. These are based on the Exchange Server product group testing.
Table 1. CAS Role Server Resources
| Configuration | Processor | Memory | Storage |
|---|
| Minimum | 2 cores | 2GB | 2GB |
| Maximum | 12 cores | 16GB | N/A |
| Recommended | 8 cores | 2GB per core | 32GB |
Installation of the
CAS role modifies the base installation of Exchange Server 2010 and is
done in what is termed Exchange Maintenance mode. The procedures in this
section step through the build of a basic Exchange Server 2010 CAS
system.
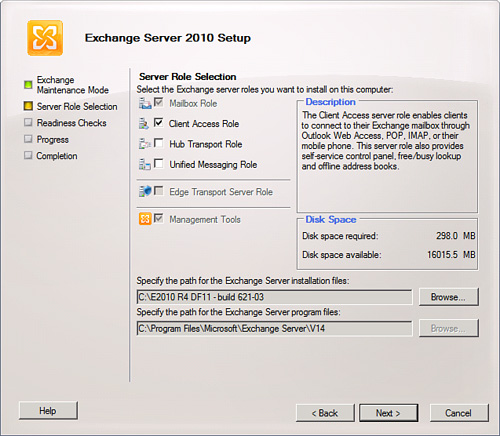
Installing the Client Access Server Role
This procedure assumes
that the Exchange Server 2010 server has already been installed. The
steps to add the CAS role are as follows:
1. | In the Control Panel, double-click Programs and Features.
|
2. | Select Microsoft Exchange Server 2010.
|
3. | Click Change to enter Exchange Maintenance mode.
|
4. | Click Next.
|
5. | Select the Client Access Role check box (shown in Figure 1), and click Next.
|
6. | If the CAS server will be Internet-facing, check the box and enter in the external FQDN of the CAS server. Click Next.
|
7. | The installer will conduct readiness checks. Remediate any findings, such as missing Web services features or configuring the Net. Tcp Port Sharing Service to start automatically.
|
8. | Click Install to install the CAS role.
|
9. | After the installation has successfully completed, click Finish.
|