5. Managing User and Mailbox Properties
Many of the user account properties that can be
managed through the Active Directory Users and Computers console can
now also be managed through the EMC or the EMS. Naturally, using the
EMC is a little easier than using the command line, but the EMS is much
more flexible and powerful once you learn how to use it. And with the
tips feature of the EMS that allows you to easily see the EMS cmdlet
and syntax necessary to update an object, learning the EMS is even
easier.
5.1. Using the EMC to Manage User and Mailbox Properties
Let's start with managing user and mailbox
properties using the EMC. We want to take a look at a few of the things
that you can do and some of the user property pages. We'll begin by
taking a look at the mailbox's General properties page, shown in Figure 16.
The General page has some interesting information on it, including the
user ID of the last person to access the mailbox, the mailbox size, and
the mailbox database name.
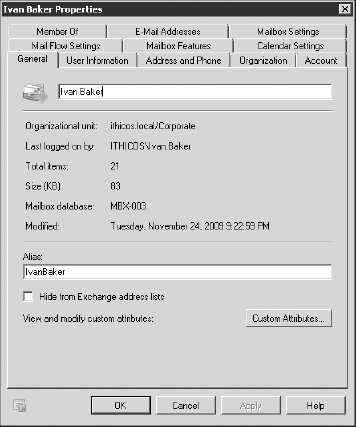
On the General page you'll notice the Hide From
Exchange Address Lists check box. This setting prevents the mailbox
from appearing in address lists such as the GAL. The General page also
includes a Custom Attributes button that allows you to access all 15
custom attributes (extension attributes).
The field that is not clearly labeled is the Display
Name field; this is the field that is next to the mailbox icon in the
upper-left corner of the General page. The display name is what users
see in the GAL.
The next page of interest is E-Mail Addresses, shown in Figure 17. Here you can manage the SMTP addresses (and other address types) that are assigned to this particular mailbox. Notice in Figure 17 that this user has multiple SMTP addresses that can be used to send messages to this mailbox.
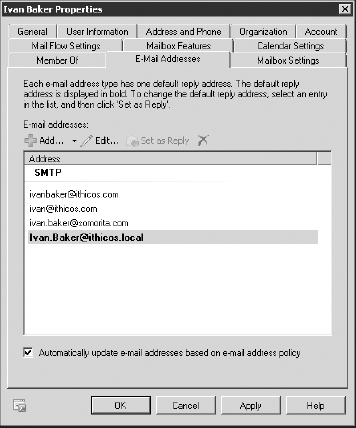
Regardless of how many email addresses are assigned
to this mailbox, when an Exchange user clicks the reply button to reply
to a message sent to any of these addresses, the Set As Reply address
is the one that is always used as the Reply To address. In Figure 17, this is the address shown in bold. This can be changed by selecting another address and clicking the Set As Reply button.
If an email address policy that affects this mailbox
is updated with new email address generation rules and then reapplied,
additional email addresses will be created. If a policy that affects
the default SMTP address is changed, the email address policy can
change a user's primary email address. However, the user will retain
the previous SMTP addresses.
If you clear the Automatically Update E-mail
Addresses Based On E-mail Address Policy check box, any changes to the
email address policy that affects this mailbox will not be made.
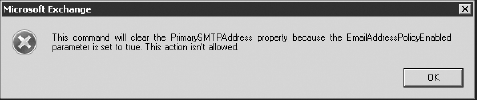
If you try to change the Reply To email address of
an address that is based on an email address policy by either selecting
a different Reply To address or editing the existing email address, you
must first clear the Automatically Update E-mail Addresses Based On
E-mail Address Policy check box. Otherwise, the Set As Reply button is
not available. You will receive an error if you try to update the Reply
To address, as shown in Figure 18.
Notice in Figure 17 that user Ivan Baker has multiple email addresses, including addresses from two different domains. He has an [email protected] and an [email protected]
address. All inbound email for both email addresses will be directed to
his mailbox; this is a useful feature for organizations that have more
than one domain; however, any email to which he replies will have the [email protected] address. Exchange does not allow a user to select which address will be used in the From field of a message.
On the Mailbox Settings property page, there are
four configuration items that are of interest depending on your
environment and the features of Exchange Server that you are using. The
first of these is Messaging Records Management, shown in Figure 19. Figure 19 shows that the user has been assigned a messaging records management (MRM) policy called Standard User Managed Folder Policy.

On the Messaging Records Management properties page
for each user you'll find an option to turn off the MRM feature for
some period of time. This is called enabling a retention hold, and can
be useful for times such as when the user has an extended period of
absence. Enabling this option will prevent action from being taken on
items that might ordinarily be deleted, archived, expired, or moved.
|
If you are using MRM only for features equivalent to
the Exchange 2000/2003 mailbox management features such as purging the
Deleted Items folder or deleting messages older than a certain number
of days, standard Exchange client access licenses (CALs) can be used.
However, if you use MRM to perform tasks such as management of custom
folders, you need an Exchange enterprise client access license (an
eCAL) for users who use those features. ECALs are required for each
mailbox that uses the personal archive mailbox, MRM, transport
journaling, advanced features of ActiveSync, and Unified Messaging
features.
|
The next Mailbox Settings property set is the
Federated Sharing feature; this is, of course, only useful if you have
configured the federated sharing features of Exchange 2010 to share
calendars and contacts across multiple Exchange 2010 organizations. Figure 20 shows the Federated Sharing properties for the user in question and the sharing policy that has been applied.
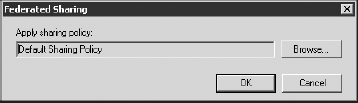
All users are automatically assigned the default
sharing policy, which enables users in a remote organization to view
the free and busy information for your users. Keep in mind, though,
that the remote organization must be first configured to allow for
sharing.
The next Mailbox Settings property set is for storage quotas. The Storage Quotas dialog is shown in Figure 21.
Storage quotas allow you to override mailbox database storage quotas
for individual users. This is helpful for VIPs who need more mailbox
storage than a typical user or for users who should have lower mailbox
quotas.
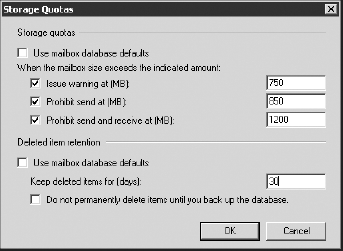
On the bottom of the Storage Quotas dialog is the
individual deleted item retention times. By default, each Exchange
mailbox database will keep a user's data that has been emptied from the
Deleted Items folder or "hard deleted" for 14 days. Although this does
somewhat increase the size of the mailbox database, it also greatly
helps reduce the necessity of restoring single items or folders that a
user may have accidentally deleted. If you have a user who is
frequently coming back to you after deleting something for more than
two weeks past and "has to have it restored right away," you could
increase their individual deleted item retention time.
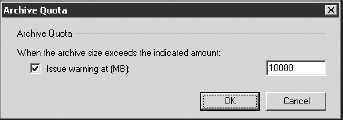
The final Mailbox Setting property set that you should note are the Archive Quota settings, shown in Figure 22.
These settings allow you to specify an archive size at which a warning
message will be generated; by default, the archive quota is not
configured.
Note that the Archive Quota properties will only be
available if the user has been configured with an archive mailbox. Each
mailbox that has Exchange 2010 archiving configured for it will require
an Exchange 2010 eCAL.
The Mail Flow Settings properties page for the
mailbox shows mailbox settings that most experienced Exchange
administrators will already be familiar with. They are now just located
in slightly different places. The properties found on the Mail Flow
Settings properties page are grouped into Delivery Options, Message
Size Restrictions, and Message Delivery Restrictions sections. You
merely need to highlight one of them and click the Properties button to
see them.
The Delivery Options properties (shown in Figure 23)
include a couple of important options. The first is the Send On Behalf
permission; this allows anyone who has been assigned this permission to
send a message on behalf of this user. For example, in Figure 23, users Grace Tanaka and John Rodriguez can now send a message on behalf of this mailbox.
For example, if John Rodriguez sends a message on
behalf of this mailbox, when the message arrives, it will say it is
from John Rodriguez on behalf of the specified mailbox. This implies,
at least, a tacit authorization on the part of the mailbox owner that
the message should have been sent by John Rodriguez. This is a bit
different than the Send As permission, which does not indicate that the
message was sent on behalf of a user.
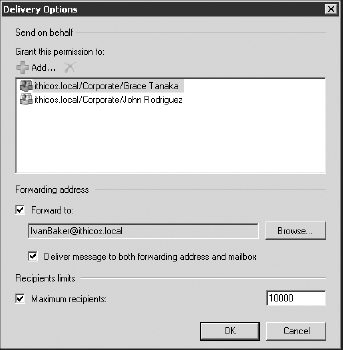
Also on the Delivery Options page is the option to
deliver messages to an alternate recipient (known as forwarding
address). The recipient that you specify must be a mailbox in your
organization or a mail-enabled contact that you find within your GAL.
If you select a mail-enabled contact that you have created in your
global address list, this would let you forward all of this user's mail
to an external mail system. That can be useful if someone has left the
organization and wants to keep getting his or her mail. It could also
be a disaster if that person has left your organization and gone to
work for a competitor, so use this feature with caution.
If the Deliver Message To Both Forwarding Address
And Mailbox check box is enabled, the message is delivered to both
places. This is useful when "the boss" wants her assistant to receive
all her mail but she wants to see the mail as well.
Finally, the bottom part of the Delivery Options
page allows you to specify the maximum number of recipients to which
this person can send a message. The global default is 5,000, but some
organizations want to reduce this figure and allow only the VIPs or
authorized users such as Human Resources users to send messages to
large numbers of users.
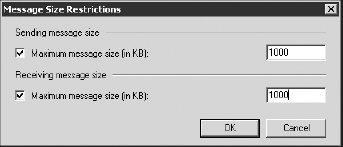
The Message Size Restrictions options (shown in Figure 24)
allow you to specify the maximum size of messages the user can send or
receive. If they are not specified, the user is limited by the global
defaults or the connector defaults.
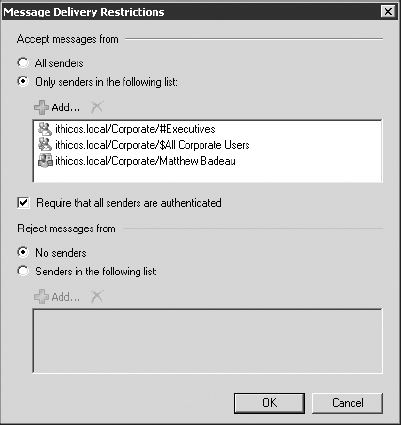
The final selection of settings found on the Mail
Flow Settings properties page is Message Delivery Restrictions. With
these options, you can restrict who is allowed to send mail to this
particular mailbox. For example, if this is a VIP, you might want to
restrict who can send to this mailbox to only a subset of users within
the organization. Conversely, you could configure a mailbox to reject
mail from a specific set of users. Figure 25
shows the Message Delivery Restrictions settings for a VIP's mailbox;
the VIP wants to receive mail only from the other members of the
#Executives group, the $All Corporate Users group, and user Matthew
Badeau.
If you select the Require That All Senders Are
Authenticated check box, this will cut down on the spam that mailbox
receives, but it also means that no anonymous Internet mail will be
received. By default, all mail received from the Internet is received
anonymously.
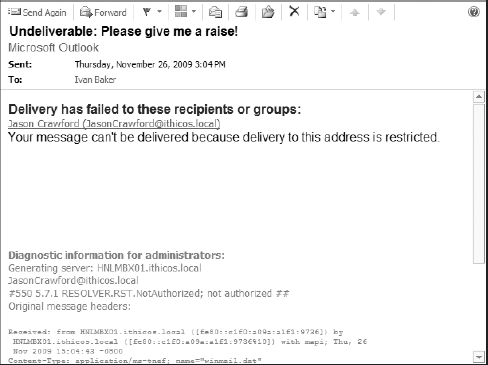
If you have spent a lot of time troubleshooting
nondelivery reports and error messages that your users have received in
the past, you will be happy to hear that the Exchange team has worked
hard to make the error messages more descriptive and helpful. When
users send a message to someone they are not allowed to send to, they
receive a nondelivery report (NDR) message in return. Figure 26
shows an example of an NDR message that a user received when they tried
to send to someone to which they were not authorized to send.
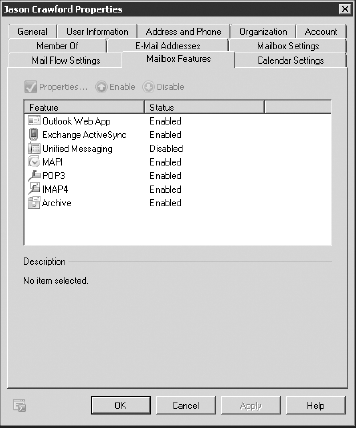
The next mailbox properties page of interest to email administrators is Mailbox Features (shown in Figure 27).
Here you can enable or disable additional features of the mailbox, such
as Outlook Web App, Exchange ActiveSync, Unified Messaging, MAPI
access, POP3, IMAP4, and Archive.
Some of these features can only be enabled or
disabled, whereas others (such as the POP3 and IMAP4 features) have
additional properties:
Outlook Web App allows you to specify an Outlook Web App mailbox policy.
The
Exchange ActiveSync selection has a Properties option that allows you
to configure the Exchange ActiveSync policy for this user.
You can now disable MAPI clients.
The
Unified Messaging option allows you to specify the user's Unified
Messaging properties if you have Unified Messaging server roles
installed.
The Archive option allows you to change the display name of the archive mailbox.
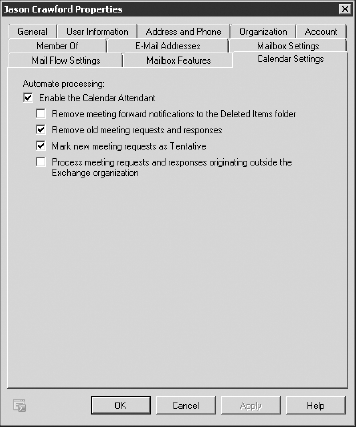
The final mailbox properties page that is
of interest to Exchange administrators is Calendar Settings. The
default calendar settings for an Exchange 2010 mailbox are shown in Figure 28.
Here you can configure how the server-based calendar attendant handles
meeting notifications, meeting requests, meeting responses, and
external requests.