Configuring the Server
After the server software has been installed,
OCS services are not started by default. Instead, the Deployment Wizard
encourages administrators to configure certain settings first before
doing so. To configure these settings, follow this procedure:
1. | From the Deployment Wizard, click Run under Step 3 (Configure Server).
|
2. | Click Next at the welcome screen.
|
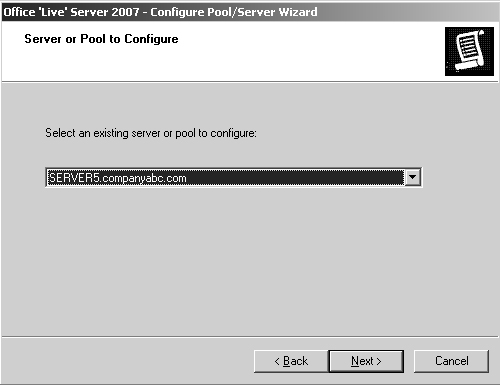
3. | Select the installed server from the drop-down list shown in Figure 13, and click Next to continue.
|
4. | If
any additional SIP domains are needed in the environment, enter them in
the subsequent dialog box. If not, accept the default of the domain
name (for example, companyabc.com), and click Next.
|
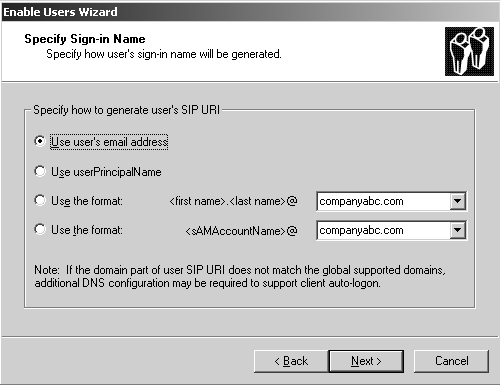
5. | Under Client Logon Settings, select that all clients will use DNS SRV records for auto logon, and click Next to continue.
|
6. | Check the domain or domains that will be used for SIP automatic logon, such as that shown in Figure 14, and click Next to continue.

|
7. | In
the External User Access Configuration dialog box, select to not
configure external user access now. External user access can be
configured at a later date from the Admin tool. Click Next to continue.
|
8. | Click Next at the Verification dialog box.
|
9. | Click Finish.
|
Configuring Certificates for OCS
Communications to and from the OCS server should
ideally be encrypted and the user should also be able to trust that
they are actually accessing the server that they expect. For this
reason, Microsoft made it part of the installation process to install
certificates onto the OCS server. To start the process of installing a
certificate on the server, perform the following steps:
1. | From the Deployment Wizard, click Run under Step 4 (Configure Certificate).
|
2. | Click Next at the welcome screen.
|
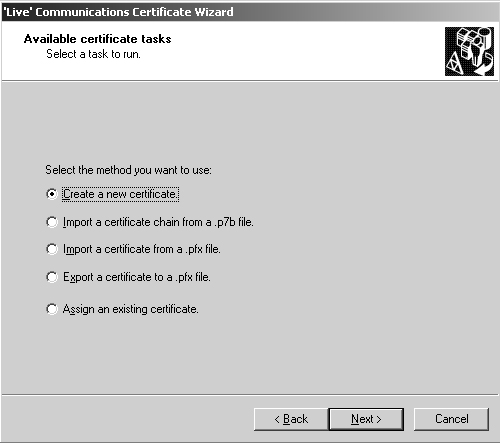
3. | From the list of available tasks, shown in Figure 15, select Create a New Certificate, and click Next.
|
4. | Select Send the Request Immediately to an Online Certification Authority, and click Next to continue.
Note
This step assumes that an internal Windows
certificate authority exists in the organization. If not, the request
must be sent off to a third-party CA, such as VeriSign or Thawte.
|
5. | Type
a descriptive name for the certificate, leave the bit length at 1024
and the certificate as exportable, and click Next to continue.
|
6. | Enter the organization and OU of your organization. It should exactly match what is on file with the CA. Click Next to continue.
|
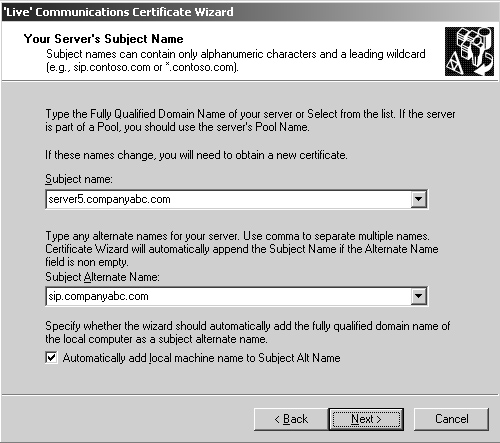
7. | At
the Your Server’s Subject Name dialog box, enter the subject name of
the server (FQDN in which it will be accessed), such as that shown in Figure 16.
Enter any subject alternate names as well. It is recommended to check
Automatically Add Local Machine Name to Subject Alt Name check box.
Click Next to continue.
|
8. | Enter
the appropriate country, state, and city information into the
Geographical Information dialog box, bearing in mind that abbreviations
cannot be used. Click Next to continue.
|
9. | Select the local CA from the drop-down list, and click Next to continue.
|
10. | Click Next at the Verification dialog box.
|
11. | In the Success dialog box, click Assign.
|
12. | Click OK to acknowledge that the settings were applied.
|
13. | Click Finish to exit the wizard.
|
After the certificate is installed, check to make sure that the changes have replicated.
Starting the OCS Services on the Server
After the certificate has been installed, the
services for OCS can be started via the Deployment Wizard via the
following process:
1. | From the Deployment Wizard, click Run under Start Services.
|
2. | On the wizard welcome screen, click Next.
|
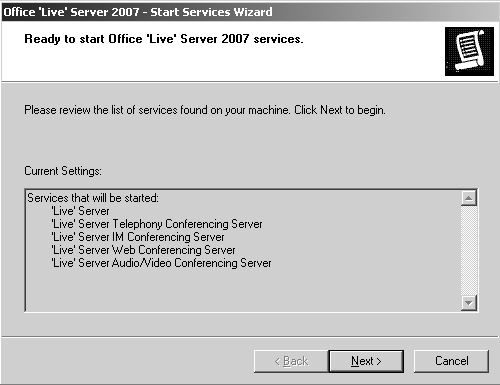
3. | Review the list of services to be started, as shown in Figure 17. Click Next to continue.
|
4. | Click Finish when the wizard is complete.
|
Validating Server Functionality
The Deployment Wizard contains a useful
mechanism for running a series of tests against the server to ensure
that everything was set up properly. To run this wizard, do the
following:
1. | From the Deployment Wizard, click Run under Step 7 (Validate Server Functionality).
|
2. | Click Next at the welcome screen for the Validation Wizard.
|
3. | Select the check boxes to validate the local server configuration, connectivity, and SIP logon, and click Next to continue.
|
4. | Enter an account for testing logon functionality, as shown in Figure 18. Click Next to continue.
|
5. | Enter a second user account to test two-party IM functionality, and click Next when you are ready.
|
6. | On the subsequent Federation dialog box, select whether to test federation, if it is enabled. Click Next to continue.
|
7. | Click Finish and review the logs for any errors.
|
Installing the Admin Tools
Administrative tools for OCS 2007 can be
installed on a separate server from the OCS server itself. The system in
question need only be either Windows Server 2003 SP1 or R2 edition, or
Windows XP Professional XP2. To install Admin tools on a different
system, do the following:
1. | From the initial Deployment Wizard screen, click the Administrative Tools link.
|
2. | Click Next at the welcome screen.
|
3. | Select I Accept for the license terms, and click Next.
|
4. | Click Next to start the installation.
|
5. | After installation, click Close to exit. |