OCS 2007 has a surprisingly
complex installation process at first glance. What Microsoft has done,
however, has been to divide up the installation process into multiple
sections, providing for checks along the way so that there is less room
for error. Because the installation requires an Active Directory schema
upgrade, it is important that the process run smoothly, so it is good
that this process is designed the way it is.
Extending the Active Directory (AD) Schema
OCS 2007 integrates deep into an existing AD
environment. It integrates so deeply, in fact, that an extension of the
underlying AD schema is required before the product can be installed. AD
schema upgrades are no small thing, of course, so it is wise to become
familiar with the consequences of extending the schema and to make sure
that a backup of the domain takes place first. To start the installation
process, perform the following steps:
1. | Run the OCS 2007 setup program from the media. Click on the deploy.exe file.
|
2. | From the Deployment Wizard, click the Deploy Standard Edition Server link.
|
3. | Review the steps on the subsequent dialog box for the Deployment Wizard, shown in Figure 1. Click Prepare Active Directory.
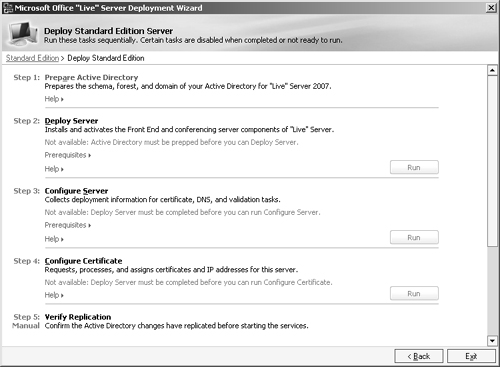
Caution
Installation
of Office Communications Server 2007 requires an AD schema upgrade to
the AD forest. It is important to fully understand the consequences of a
schema upgrade in advance, as an upgrade will replicate to all domain
controllers in a forest.
|
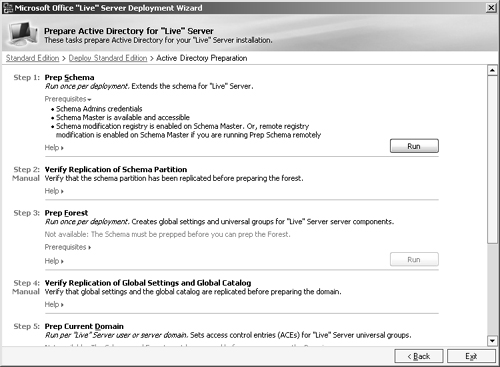
4. | In the subsequent dialog box, shown in Figure 2, click Run to start the schema upgrade process.
|
5. | At the Schema Preparation Wizard welcome screen, click Next to begin the process.
|
6. | In the Schema File Location dialog box, leave the default location selected, and click Next.
|
7. | At
the review screen, review the settings and, keeping in mind the caution
previously given about schema upgrades, click Next to continue.
|
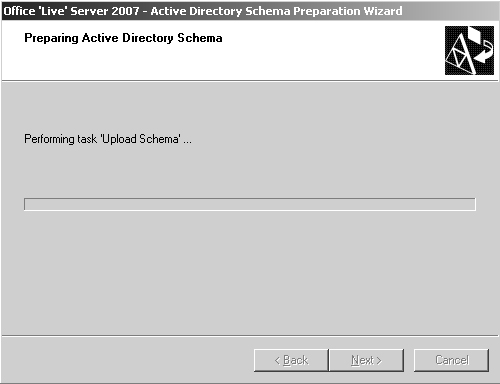
8. | The schema upgrade process will begin, as shown in the dialog box in Figure 3. When it is complete, click Finish.
|
After the schema update has run, be sure you
wait until the new schema extensions have replicated to all domain
controllers in the forest. After this has been verified, return to the
Deployment Wizard to continue.
Preparing the AD Forest
After the schema extension is complete, perform the following steps:
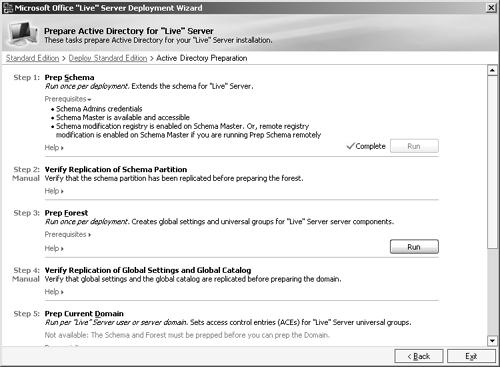
1. | Return to the Deployment Wizard and click Run under Step 3: Prep Forest, as shown in Figure 4.
|
2. | Click Next at the welcome screen of the Forest Preparation Wizard.
|
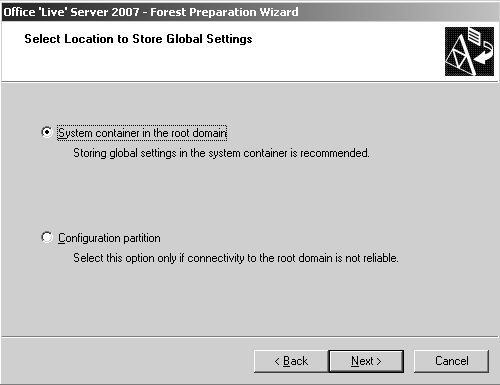
3. | The subsequent dialog box, shown in Figure 5,
gives you the option to choose between storing the global settings in
the root domain, or in the configuration partition. In most cases,
install in the root domain.
|
4. | Under
Domain, choose the domain where OCS will create the groups used by the
server. This is typically the main resource domain where the servers are
installed into. Click Next to continue.
|
5. | At the review screen, click Next to continue.
|
6. | Click Finish.
|
After
this step is complete, ensure that replication of the newly created
objects has occurred on all domain controllers in the forest and proceed
to the next step.
Prepping the Domain
The following procedure must be run on each domain in the forest where OCS will be installed:
1. | Click Run under the Prep Current Domain listing in the Deployment Wizard.
|
2. | From the Domain Preparation Wizard, click Next to continue.
|
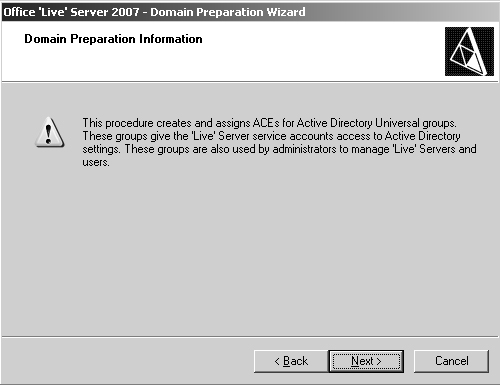
3. | From the Domain Preparation Information dialog box, review the warning illustrated in Figure 6, and click Next to continue.
|
4. | Click Next at the review dialog box.
|
5. | Click Finish.
|
Once again, make sure replication takes place before advancing to the next step in the installation process.