programming4us
programming4us
DESKTOP

Windows 7 : ADDING UAC SUPPORT TO YOUR APPLICATION (part 2) - Creating a Manifest - Compiling the Manifest into the Application

- Free product key for windows 10
- Free Product Key for Microsoft office 365
- Malwarebytes Premium 3.7.1 Serial Keys (LifeTime) 2019
1.4. Compiling the Manifest into the Application

In most cases, you won't use a separate manifest file . The only exception is when you're absolutely certain the administrator will need to make changes to the application manifest at some point (and even then, using a separate manifest is a dangerous proposition). Compiling the manifest into the application prevents anyone from modifying (at least with any ease). In addition, compiling the manifest into the application means that the manifest won't get lost. To compile the manifest into the application, you use MT.EXE, a utility that comes with the Windows 7 SDK.

You need to add a special command to the project before Visual Studio will compile the manifest file for you. Use these steps to configure the application to compile the manifest into the executable:

  1. Right-click the project entry in Solution Explorer and choose Properties from the Context menu. You'll see the Audit Activity properties window.

    Figure 1. Add a special command line to compile the manifest file.
  2. Select the Build Events tab.

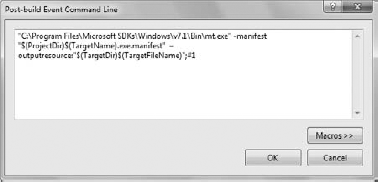
  3. Click Edit Post-build to display the Post-build Event Command Line dialog box shown in Figure 1.

  4. Type the following command in the dialog box (as a single line, rather than on multiple lines as shown in the book):

    "C:\Program Files\Microsoft SDKs\Windows\v7.1\Bin\MT.EXE" 

    -manifest "$(ProjectDir)$(TargetName).exe.manifest"

    –outputresource:"$(TargetDir)$(TargetFileName)";#1

    You need to provide the actual path to MT.EXE as part of the command. The –manifest command line switch tells the Manifest Tool (MT) utility where to locate the manifest file you want to compile, which is normally the same folder as the source code for your application. The $(ProjectDir) macro points to this location, while the $(TargetName) macro provides the name of the application. The –outputresource command line switch provides the location of the executable that should receive the manifest. The $(TargetDir) macro provides the location of the executable (including whether the output is in the Release or Debug folder), and the $(TargetFileName) macro provides the name of the executable file.

    Figure 2. The Build Events tab contains pre-build and post-build command lines.
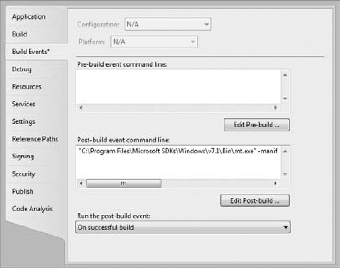
  5. Click OK. The Build Events tab should now contain a command like the one shown in Figure 2.

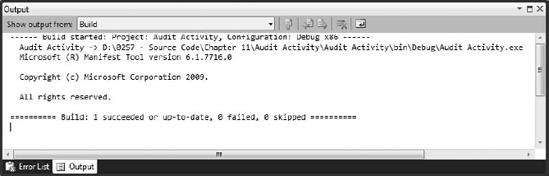
  6. Choose Build => Build Solution. The application will build as normal. You should see a successful MT utility entry, as shown in Figure 3, in the Output window.

    Figure 3. Make sure that the MT utility is successful in adding the manifest file to your executable.
1.5. Executing the Application

The result of compiling the manifest into the executable is no different from working with the manifest file 
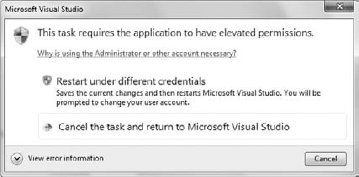
separately. When you start to debug the application, you'll still see the Visual Studio notification shown in Figure 4. The debugger will still start the application as normal and you'll still see a UAC dialog box. Everything will work as before. The only difference is that the manifest file is contained within the executable, rather than appearing as a separate file.

Figure 4. Visual Studio presents a notification when it needs to elevate your privileges.
Other  
  •  Parallels Desktop 9 For Mac - The Best Of Both Worlds
  •  Windows Server 2008 and Windows Vista : Benefits of Group Policy Preferences (part 2) - Working with Any Organizational Unit Design
  •  Windows Server 2008 and Windows Vista : Benefits of Group Policy Preferences (part 1) - User-Friendly Interface
  •  Windows Server 2008 and Windows Vista : Creating Custom ADMX and ADML Files (part 4) - Using ADMX File Language
  •  Windows Server 2008 and Windows Vista : Creating Custom ADMX and ADML Files (part 3) - Core ADMX File Concepts
  •  Windows Server 2008 and Windows Vista : Creating Custom ADMX and ADML Files (part 2) - Core ADMX File Concepts
  •  Windows Server 2008 and Windows Vista : Creating Custom ADMX and ADML Files (part 1) - ADMX Schema , ADMX File Structure , ADML File Structure
  •  Windows 7 : Custom Libraries and Saved Searches (part 2) - Using Saved Searches
  •  Windows 7 : Custom Libraries and Saved Searches (part 1) - Creating Custom Libraries
  •  Windows 7 : Visualization and Organization - How to Make the Windows Shell Work for You - The Organizational Advantage of Libraries
  •  
    Top 10
    Free Mobile And Desktop Apps For Accessing Restricted Websites
    MASERATI QUATTROPORTE; DIESEL : Lure of Italian limos
    TOYOTA CAMRY 2; 2.5 : Camry now more comely
    KIA SORENTO 2.2CRDi : Fuel-sipping slugger
    How To Setup, Password Protect & Encrypt Wireless Internet Connection
    Emulate And Run iPad Apps On Windows, Mac OS X & Linux With iPadian
    Backup & Restore Game Progress From Any Game With SaveGameProgress
    Generate A Facebook Timeline Cover Using A Free App
    New App for Women ‘Remix’ Offers Fashion Advice & Style Tips
    SG50 Ferrari F12berlinetta : Prancing Horse for Lion City's 50th
    - Messages forwarded by Outlook rule go nowhere
    - Create and Deploy Windows 7 Image
    - How do I check to see if my exchange 2003 is an open relay? (not using a open relay tester tool online, but on the console)
    - Creating and using an unencrypted cookie in ASP.NET
    - Directories
    - Poor Performance on Sharepoint 2010 Server
    - SBS 2008 ~ The e-mail alias already exists...
    - Public to Private IP - DNS Changes
    - Send Email from Winform application
    - How to create a .mdb file from ms sql server database.......
    programming4us programming4us
    programming4us
     
     
    programming4us