2. Using Saved Searches
While Libraries are awesome for specific projects,
sometimes you just want to search for certain kinds of files,
regardless of where they're located, and then save this search for
later use. This functionality is called Search Folders.
These folders are built using Windows's indexing engine and stored in
an XML file format that developers can easily access, modify, and
extend. For users, they can be accessed at any time, like a regular
folder.
There are two types of saved searches:
We've already spent a lot of time on Libraries, so now we want to take a look at custom saved searches.
Saved searches are dynamic, meaning that they can
change every time you open them (and cause their underlying search
query to run). For example, if you create a saved search that looks for
all Microsoft Word (*.doc and *.docx) files (which,
admittedly, wouldn't be hugely useful), you may produce a search result
containing 125 matches; but if you add a new Word document to your My
Documents folder and re-open the saved search, you'll see that you now
have 126 matches. The point here is that saved searches aren't static,
and they don't cease being relevant after they're created. Because they
literally re-query the file system every time they're run—that is, when
the folder is opened—saved searches will always return the most
up-to-date possible results.
2.1. Searching for Files
To create a saved search, you must first search your
hard drive for some kind of information. In a simple example, you might
simply look for any files on your hard drive that contain your full
name. To do so, open a Search window by tapping WinKey+F. If you don't
have a Windows key on your keyboard, open the Start menu and tap the F3
key. This displays the Search tool, as shown in Figure 4.
NOTE
Searching is context sensitive. If you bring up
the Search tool as described here, Windows 7 will search the most
common locations where documents might be stored in the file system.
(These locations are called Indexed Locations
in Windows: They are the locations in the file system that are indexed,
or kept track of, by the Windows Search indexer.) However, if you use
the search box in any Explorer window, Windows 7 will search only the
current folder (and its subfolders).
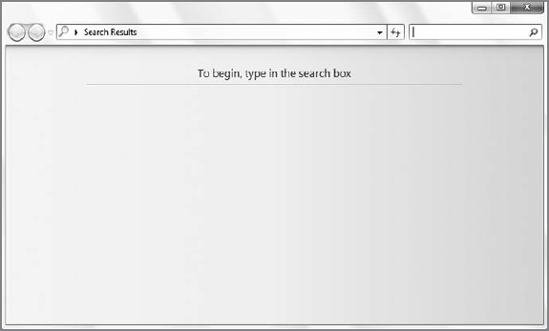
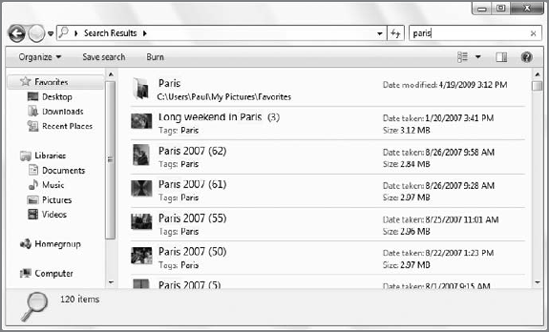
In the Search window, select the search box in the
upper-right corner of the window (it should be selected by default) and
begin typing your search query. As you type, Windows Search queries the
index of files contained on your hard drive and returns the results of
your in-progress search in real time, as shown in Figure 5.
NOTE
In the original shipping version of Windows
Vista, Microsoft included a Search entry on the right side of the Start
menu. This entry is missing in Windows 7 (it was first removed with the
release of Service Pack 1) and it cannot be added back via the Taskbar
and Start Menu Properties interface, as you may expect. That's because
Microsoft has bowed to pressure from its competitors—specifically
Internet search giant Google—which complained that the integrated
search functionality in Windows made it too difficult to sell competing
desktop search solutions like Google Desktop Search. To appease Google
and avoid a lengthy and potentially costly antitrust investigation,
Microsoft agreed to make some changes, essentially treating search like
other so-called Windows "middleware" that can be replaced by users.
There are several components to this change, but the obvious visual
change is that the Start menu's Search entry is now missing in action.
(This change does not affect Start Menu Search, however, which is
denoted by the "Start Search" box in the lower-left corner of the Start
menu.)
|
If you want the absolute best performance, consider
moving the index to your fastest hard drive. To do this, open Indexing
and Search Options and click the Advanced button.
|
|
NOTE
Not surprisingly, you can change the locations
that Windows indexes by default. Equally unsurprisingly, finding the
user interface for this requires a bit of spelunking. Fortunately,
we've done the dirty work for you: just open the Start menu and type indexing options
(you should see it appear after just ind) and tap Enter to display the
Indexing Options control panel. A word of caution: you don't actually
want to add too many file system locations to the Included locations
list, and certainly not the whole hard drive, because doing so could
adversely affect your PC's performance. The only reason to change this
setting is if you regularly keep your document files in a nonstandard
location (for example, not the Documents, Music, or Pictures Libraries,
or other logical locations). To add a location to the Included
locations, click the Modify button, and then the Show all locations
button in the Indexed Locations dialog that appears. In the next
window, you can expand the locations—like Local Disk (C:)—that appear
in the Change selected locations list. As you expand the tree view, you
can place a check next to those folders you'd like indexed.
This feature is called as-you-type-search or word-wheeling.
Contrast this with most search tools, whereby you type a search query
and then press Enter or a user interface button in order to instantiate
the actual search. The reason Windows Search performs search queries as
you type is that the information it's looking for is instantly
available because it is indexed: on a typical PC, there's no
performance penalty.
As Windows Search displays the search results, a
green progress bar will throb through the Search window's address bar.
When the query has completed, the progress bar will disappear.
NOTE
Although you're probably familiar with file and
folder searching using the Find function in previous Windows version or
a third-party tool like Google Desktop or MSN Desktop Search, you may
not be familiar with some commonly used wildcard characters, which can
help fine-tune your searches. For example, the character * stands for
one or more letters, whereas the ? character is used to represent any
one letter.
2.2. Filtering the Search Results
A search query as general as your name can result in
hundreds or thousands of hits, so it's more useful to filter the search
results down a bit to make the search more specific. You do this by
using the special search filter drop-down that's available from the
search box. To make it appear, click anywhere in the search box, as
shown in Figure 6.
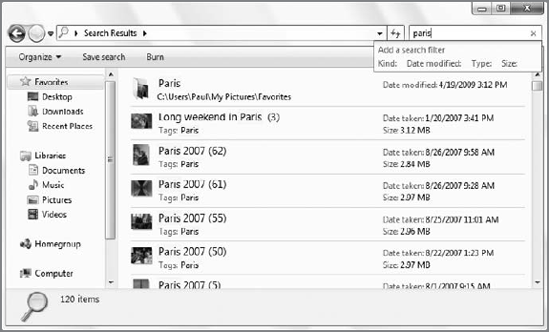
You can filter by kind, date modified, type, or
size. To select one of these criteria, click the appropriate link. When
you do so, Windows Search provides an appropriate drop-down list of
options. The date modified option is particularly nice, providing a
calendar control for picking the date, as shown in Figure 7.

You can, of course, mix and match filters too. That
is, you can specify multiple filters until you have exactly the search
query you're looking for.
2.3. Saving a Search
After you've created a search, especially a fairly
complicated one that you may need to repeat later, it's a good idea to
save it. The easiest way is to use the Save Search button on the
toolbar. Alternately, tap Alt to bring up the Classic Menu, and then
select Save Search from the File menu. This displays a standard Save As
dialog box, where you can provide a name for your saved search. By
default, saved searches are saved, naturally enough, to your Searches
folder (found under your user's Home folder), but you can change the
location if you'd rather save a search to your desktop, the My
Documents folder, or another location. You can also drag any saved
search over to the Favorite Links section of the Navigation pane in
Windows Explorer so you can access it easily later.
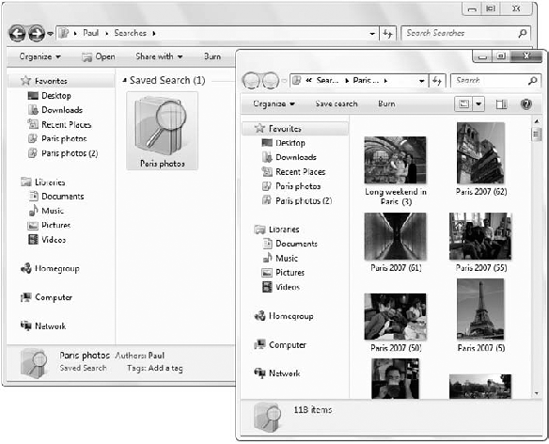
Saved searches use the blue "stacks" icon that
debuted in Windows Vista; and because they're treated like Libraries,
you get the header area and resulting Arrange by options, so you can
view your search results via organizational stacks, as shown in Figure 8.
NOTE
When you save a search it is automatically added
to the Favorites list in the Explorer Navigation pane as well.
Apparently, Microsoft feels that if you went to all that trouble, then
you must really intend to keep using this saved search.
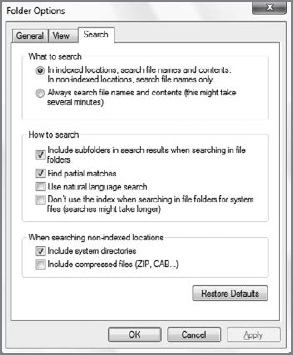
2.4. Configuring Search
In Windows 7, Windows Search options have been added
to the classic Folder Options window. To access these options, open
Folder Options—the fastest way is by typing folder options into Start Menu Search—and navigate to the new Search tab, shown in Figure 9.