2.2. Managing Content in the Pictures Library
The Pictures library works like other libraries and
most other shell locations in Windows Explorer and provides the
standard Address bar, Search box, toolbar, Navigation bar, and Details
pane. It also includes a number of features that are specific to
pictures. For example, while all libraries include Organize, Share
with, Burn, and New folder toolbar buttons, Pictures also includes a
Slide Show button that enables you to trigger a full-screen picture
slideshow.
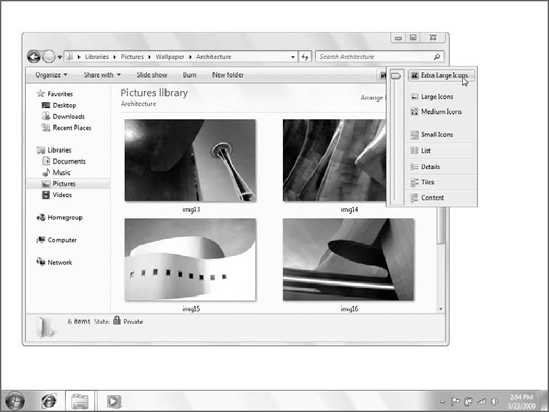
You can organize photos and other pictures in
various ways in the Pictures library. The Change your view toolbar
button enables you to cycle through various shell view styles,
including some, such as Extra Large Icons and Large Icons, which are
particularly nice for viewing a folder full of pictures, as shown in Figure 3.
NOTE
You can access Extra Large Icons only by
clicking the More options arrow next to the Change your views button
and selecting Extra Large Icons from the list. If you simply toggle
through the various views with the button, Extra Large Icons will never
come up.
|
In Windows 7, like Windows Vista, you can view
picture thumbnails on the desktop. (This wasn't possible in Windows
XP.) Previously, this functionality was available only in traditional
folder windows. That said, the Windows desktop is still limited to
three view styles only: Large, Medium, and Small Icons. In Windows
Vista, Small Icons is called Classic Icons.
|
|
Additionally, you can use the organizational
capabilities of Windows 7 to view picture thumbnails in a wide variety
of interesting ways. As with Windows Vista, Windows 7 includes file
organizational features such as Stacks and Groups, which can be quite
handy when used in conjunction with Picture files.
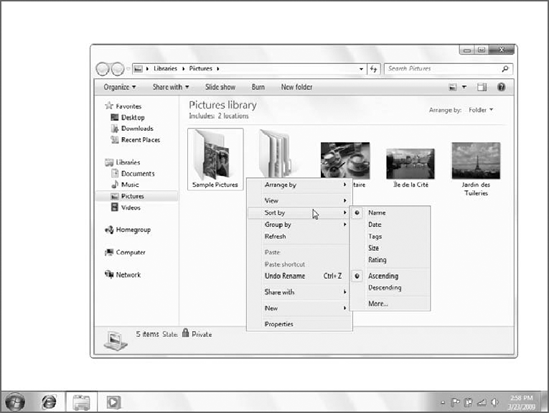
To sort the Pictures library or any folder full of
pictures, right-click a blank area of an open folder and choose Sort
by. This triggers the submenu shown in Figure 4,
enabling you to choose from a variety of sorting options, including
Name, Date (modified), Type, Size, and others.
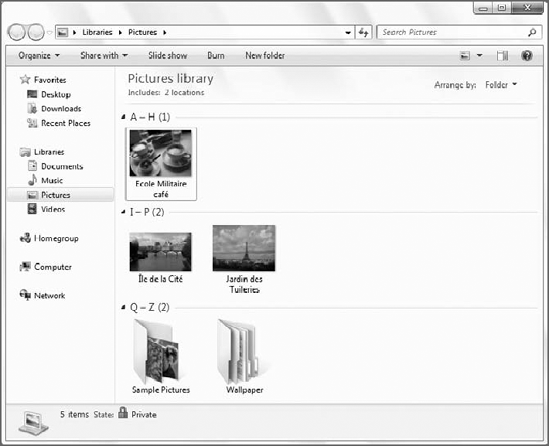
The Group By and Arrange By options are somewhat
more impressive. In the same popup menu described above, you can choose
Group By and then Name, Date (modified), Type, Size, Tags, or Date, and
choose whether to group in ascending or descending order. For example,
you might choose to group by name, which would alphabetize the list of
pictures and segregate them into groups such as A–H, I–P, and Q–Z by
default, as shown in Figure 5. If you check the Descending option, the list will sort in reverse order.
|
You may have noticed there's also a More option in
the Sort By and Group By sub-menus. If you click this option, you'll be
treated to a Choose Details dialog that actually enables you to choose
which items will appear in that submenu. That means you can remove some
of the default options and choose from dozens of other related options.
The lists are quite extensive, but of course many of the options apply
only to non-picture files. Furthermore, this list can be customized on
a folder-by-folder basis.
|
|
NOTE
To remove an applied Group By view, right-click
as you did above and simply choose the new (None) option that appears
in the context menu. This option isn't available to Sort By, however.
It's unclear why there isn't a simple (None) option in the Group By
submenu. However, the default is Name.
Windows Vista included a little-known and thus
little-used user interface element called Stacks. This enabled you to
organize files by category as if they were virtual stacks of paper, and
it was heavily promoted in that version. It's no longer included in
Windows 7, but its successor, Arrange By, carries on in the same
tradition. There's just one caveat: arrange By is not available in any
folder. It is only available in a library view like Pictures.
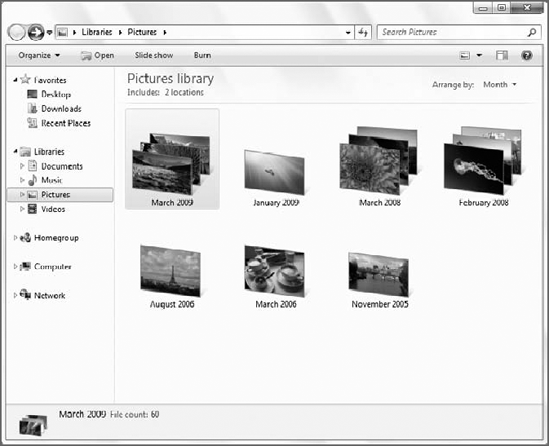
To access Arrange By, open the Pictures library.
You'll see an Arrange By link near the top right corner of the window.
By default, the Arrange By view is Folder, which displays the contents
of the library in a normal, Explorer-style view. But there are four
other options here: Month, Day, Rating, and Tag. Clicking one causes
the library to change into a dramatic new view, whereby the contents of
the library are sorted into stacks of pictures organized by the
criteria you chose. This is shown in Figure 6.
If you're familiar with the virtual folder
capabilities in Windows 7, you'll recognize the Arrange By displays as
in-place searches that can be optionally saved for later use. That is, you can save these views as saved searches
and access them later whenever you want. Saving an Arrange By view
isn't obvious at all: to do so, tap Alt to display the hidden menu,
choose File, and then Save Search. You'll see a standard Save As dialog
appear, and you can save the search to the Searches folder associated
with your user account or any other location in the file system. You
might use this feature to create a virtual folder called "Favorite
Pictures" that is populated only with photos that have been rated with
four or five stars, for example.
NOTE
Windows 7 saved searches use the blue Stacks icon from Windows Vista.