In Windows 7, Microsoft has finally come
through with the virtual folder technologies it only tepidly started
with Windows Vista. In this version of Windows, special shell folders
like Pictures (My Pictures in XP) and Music (My Music in XP) have been
replaced in the Start menu with new virtual folders called Libraries
that each aggregate content from a variety of physical folders. The
Library for photos is called, logically enough, Pictures.
The old physical folders still exist, of course.
Here, confusingly, Microsoft has gone back to the old "My" naming
scheme for physical folders. In the context of digital photos and other
picture-related folders, this means that each user account gets its own
pictures folder, which is named "My Pictures" when that user is logged
on, or "[Username]'s Pictures" when
accessed from a different account. (For example, if you logged on to my
PC with a different user account, or accessed it from the network, my
pictures folder would be named "Paul's Pictures.")
Additionally, there is always a universally
available public folder structure, and the pictures-oriented folder
there is called "Public Pictures."
|
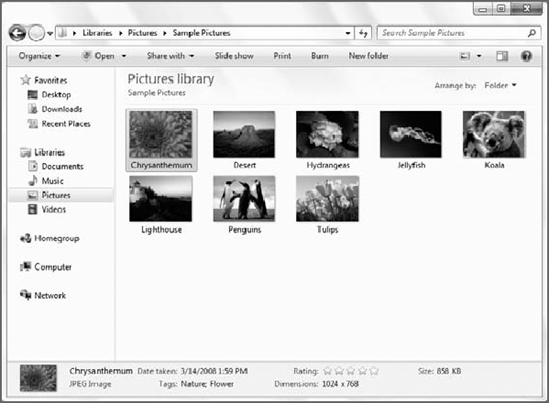
The availability of a Public Pictures folder is
interesting for a couple of reasons, but one of the top reasons is that
Microsoft provides a number of sample pictures in Windows 7, which are
accessible through the Public Pictures folder. To find them, access the
Sample Pictures shortcut in your Pictures folder, which points to
C:\Users\Public\Public Picture\Sample Pictures. As shown in Figure 1, this folder contains a number of beautiful background images that are suitable for your desktop or enjoying in other ways.
|
|
NOTE
Oddly enough, these aren't the only sample
pictures found in Windows 7. Microsoft also provides a wide range of
other high-quality, high-resolution images, which it intends for you to
use as desktop backgrounds. But if you know where to find them, you can
make copies in the Public Pictures folder (or any other folder) and
access them more directly. There are two places to look.
The first is the Wallpapers folder. To find it,
navigate to C:\Windows\Web\. You'll notice that there is a folder
called Wallpaper here, with various subfolders inside. Each contains
stunning high-res Windows wallpapers.
The second is the regional wallpapers folder. This
is found in a hidden location: C:\Windows\Globalization\MCT. To find
it, select Search from the Start menu, type in that address, and tap
Enter. A new shell folder will open with that location displayed.
Inside, you will see a variety of folders with names like MCT-xx where
xx represents a region of the world.
To copy pictures from these locations to Public
Folders, right-click the folder and choose Copy. Then, navigate to
Public Folders, right-click a blank area of the window, and choose
Paste. Voila! Lots of gorgeous pictures to play with.
The big change in Windows 7, of course, is a new
Libraries infrastructure. When you click on Documents, Pictures, or
Music in the Start menu, you do not open My Documents, My Pictures, or
My Music (respectively). Instead, what you're opening is a virtual
folder, called a Library, that displays content from a number of
different physical folders. In the case of the Pictures link in the
Start menu, what you're opening when you click on that is the Pictures
library, which is shown in Figure 2.
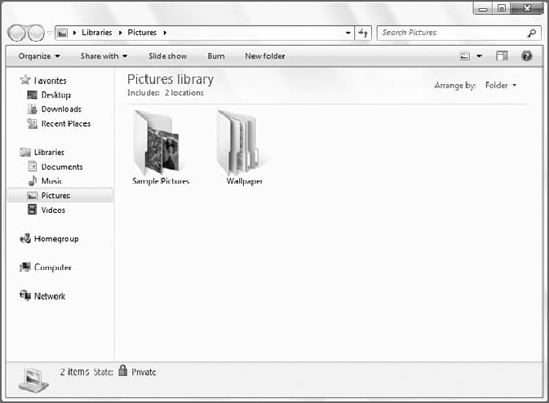
By default, the Pictures library aggregates, or
"includes," content from both My Pictures (that is, your own physical
pictures folder) as well as the globally available Public Pictures
folder. For the first-time Windows 7 user, the change isn't really all
that profound, however. Most people simply copy photos and other
pictures into their My Pictures folder anyway, so for a good number of
users, the Pictures library and the My Pictures folder can be used
interchangeably.
NOTE
Indeed, this brings up an interesting point.
What happens when you "copy" or "move" content into the Pictures
library? After all, it's not a real location on the hard drive, but a
view of two other locations (by default), mixed together. As it turns
out, each Library has a default save location. For Pictures, that
location is your My Pictures folder, so any content that you copy or
move to Pictures actually ends up in My Pictures. See below for
information about changing the default save location.
Of course, you may be wondering at this point
whether there are any picture management capabilities left in the
Windows 7 shell. It's a valid question with a complicated answer. Yes,
you can still manage digital photos in Windows 7's Explorer shell, but
many things have changed, depending on whether you're coming from
Windows XP or Vista. We'll take a closer look at these changes.
1. Where Is It Now?
Table 1
summarizes some of the picture-related changes you can expect to see in
the Windows shell, and how to find similar features in Windows 7.
Table 1. Where Common Picture-Related Features Are in the Windows 7 Shell
| Windows XP feature | Windows Vista feature | Where it is in Windows 7 |
|---|
| Web Publishing Wizard (accessed via Publish this folder/picture to the Web option in the folder task area) | Removed. Users were expected to utilize Microsoft's blogging service, Windows Live Spaces, to publish photos online. | Now, Microsoft has created a new picture-centric Windows Live Photos service. |
| Share this folder | Share toolbar button | New "Share with" toolbar button that integrates with Windows 7 homegroups |
| Get pictures from camera or scanner | Missing. Users were expected to utilize the AutoPlay dialog and acquire pictures with Windows Photo Gallery. | Still missing, but the responsibility for photo acquisition has moved to Windows Live Photo Gallery |
| View as a slide show | Replaced
by the Slide Show toolbar button. Windows Vista offers dramatically
better Explorer-based photo slide shows than does either Windows XP
or—gasp!—Windows 7. | Also
includes a Slide Show toolbar button, but Windows 7's slide shows are
far more basic than those in Windows Vista, and do not include such
things as slide show themes or onscreen controls |
| Order prints online | You must launch Windows Photo Gallery to access this functionality. | You must now launch Windows Photo Live Gallery to access this functionality. |
| Print this picture/print the selected pictures | Replaced by a new Print toolbar button | Works as it does in Windows Vista |
| Set as desktop background | You
could launch Windows Photo Gallery to access this functionality.
Alternatively, you could still right-click a picture and choose Set As
Desktop Background from the menu that appears. | Works as it does in Windows Vista |
| E-mail this file/e-mail the selected items | Replaced by a new E-mail toolbar button | Works as it does in Windows Vista |
| Preview picture | Replaced
by a new Open toolbar button, which offers enhanced functionality
thanks to an attached drop-down menu that enables you to choose which
application to use to preview the selected image | Works as it does in Windows Vista |
| Edit picture | Missing,
but if you select an application from the new menu attached to the Open
button, which includes editing functionality (for example, Paint or
Windows Photo Gallery), you can edit the picture that way. | Works as it does in Windows Vista |
| Shell-based photo and photo folder views | Mostly
missing. You can use Windows Photo Gallery and its organizational view
styles to view your photo collection in a variety of different ways. | Works
as it does in Windows Vista. Windows 7 does add one new folder view
style (Content) but it's not particularly applicable to photos. |