The deployment share (DS) is the shared
folder your MDT clients (target machines) will connect to and download
images from. The deployment share can reside on the deployment server
or across the network on another server. In fact, you could store
everything needed to deploy an image to a target machine on a single
DVD or even a USB stick (depending on the size of your image). This
type of deployment is referred to as a media deployment.
The cool thing about a media deployment is that you can deploy an image
with no network connectivity at all .
In this section, we'll show you how to create a deployment share using
the default settings. Don't worry too much about using the default
settings when you create a deployment share; there are plenty of places
later where you can override any default setting.
1. Creating a Deployment Share
You will almost certainly need two deployment shares. The first one (the lab share) is where you create reference images and the other one (the production share)
is where you create real deployment shares. Although you could combine
both of these onto a single share, in most cases it is easier to have
two separate deployment shares. The lab deployment share would only
contain the operating system, packages, and applications that are
supposed to be in the reference image. The production deployment share
would contain the captured reference image, applications that are not
inside the reference image, drivers, and in some cases, packages and
patches. One other reason to use two shares is that there is normally a
big difference in the way you customize the settings; the settings for
creating reference images are not the same as for creating production
deployment. Now, let's create a deployment share that handles both
reference images and production deployment.
When you have done this and you get a better
understanding of how MDT works and what you can do, you should create a
separate deployment share. Just repeat the steps and use another name
and folder, such as MDTPrd (short for MDT Production). When you've
finished, you can copy the sequences, the captured operating systems,
applications, and drivers using copy and paste between these two
deployment shares. Now you have a clean one for production and one that
will be a bit "not so clean" where you can play around and test. The
following steps will guide you through the process of creating a
Deployment Share:
Create
a deployment share from within the Deployment Workbench by
right-clicking the Deployment Shares node and choosing New Deployment
Share. This launches the New Deployment Share Wizard's Path page, shown
in Figure 1.
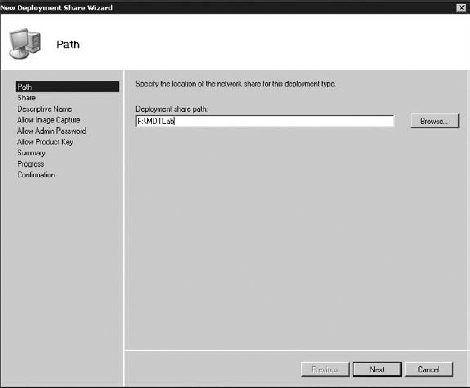
Choose
the drive and folder where you would like your deployment share
created. You can either browse to a folder or simply type over the
existing path. No need to create the folder first—MDT will do that for
you. Then click Next.
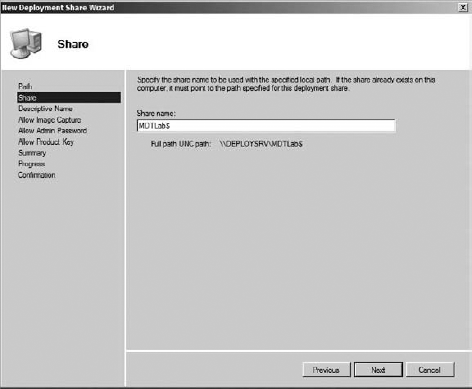
The next page of the New Deployment Share Wizard is the Share page shown in Figure 2. Type the name you would like to share the folder as in the Share Name field and click Next.
|
Putting a $ at the end of the share name makes this
a hidden share. So when users browse the shared folders on the
deployment server, they won't see this folder. For those users who like
to poke around network shares just to see what's out there, this shared
folder will not be easily found.
|
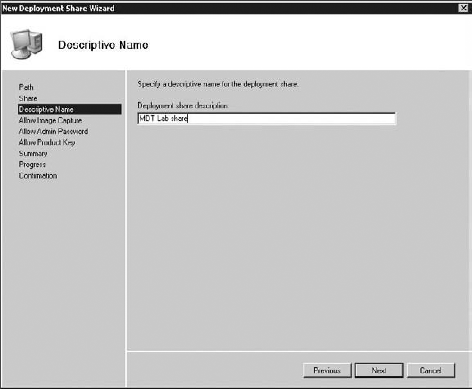
The Descriptive Name page shown in Figure 3
allows you to give your shared folder a description, which appears with
the shared folder name when you view the shared folders for that
server. To quickly view the shared folders of a server, open a command
prompt and type the following:
net share
The results are shown in Table 1. Once you've chosen your description, click Next.
Table 1. Shared folders information
| Share name | Resource | Default descriptive name |
|---|
| C$ | C:\ | Default share |
| MDTLab$ | F:\MDTLab | MDT Lab share |
| F$ | F:\ | Default share |
| IPC$ | | Remote IPC |
| ADMIN$ | C:\Windows | RemoteAdmin |
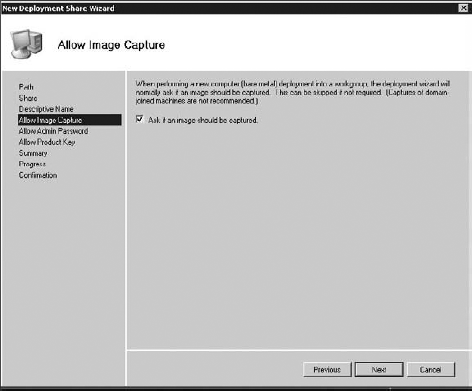
The Allow Image Capture page shown in Figure 4
by default is configured to ask if an image of the target machine
should be captured. Capturing is used when you want to create a
reference image, and since this deployment share is going to be able to
handle both reference images and deployment images we need to be able
to capture an image. If you later create a new deployment share for
production only, you should answer that question with a no instead.
You
should only use the capture feature when the purpose is to create a
reference image and not for backup (if you need a backup when doing a
refresh, replace, or upgrade, the deployment wizard will ask you when
deploying the new OS). Accept the default setting or remove the check
mark and click Next.
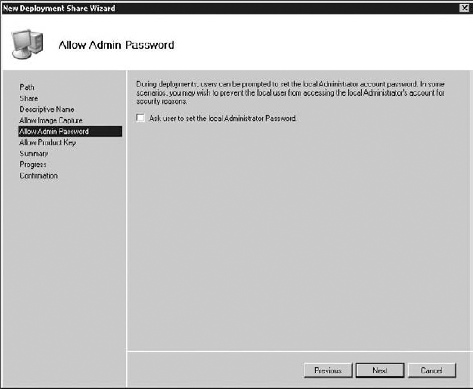
The next page is the Allow Admin Password page shown in Figure 5. The default is to not
ask users to set the local administrator password. Okay, wait a
minute—in what corporate environment do you let users set the local
administrator password? None that we've ever worked in. We think what
they mean is the technician who is
performing the installation would be able to set the local admin
password (when prompted). But in most environments this is a
predetermined password that can be set in an unattended answer file so
there would be no need to prompt for the admin password during
deployment. One reason you might use this setting is if you have branch
offices with a local IT staff that requires different admin passwords
on their workstations. Barring that, leave it unchecked. When you've
finished with this page, click Next.

The Allow Product Key page shown in Figure 6
allows you to prompt during installation for a product key. If you're
an Enterprise customer, there's no need to worry about product keys;
only non-Enterprise clients need to enter a product key. Choose the option that is correct for you, and then click Next to go to the Summary page.
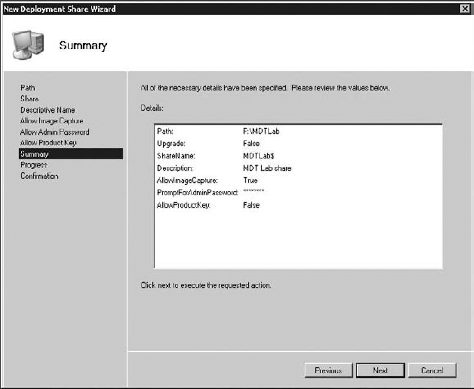
The Summary page shown in Figure 7
displays the choices you have made in the New Deployment Share Wizard.
If you would like to make changes, click the Previous button until you
are on the page you'd like to change. Click Next on this page to kick
off the creation of the deployment share, which is displayed on the
Progress page (this is pretty quick). Then the Confirmation page
appears, as shown in Figure 8.
There
are three buttons on the Confirmation page, two of which are new with
MDT 2010. The View Script button reveals the PowerShell commands that
were run to create the deployment share. The PowerShell commands to
create a deployment share look like this:
Add-PSSnapIn Microsoft.BDD.PSSnapIn
new-PSDrive -Name "DS001" -PSProvider "MDTProvider" -Root
"F:\MDTLab" -Description "MDT Lab share"
-NetworkPath "\\Dep1oySrv\MDTLab$" -Verbose
 | add-MDTPersistentDrive -Verbose
When building your own scripts, you can copy from
this page (on any MDT wizard) and paste into a Notepad text file to
combine commands.
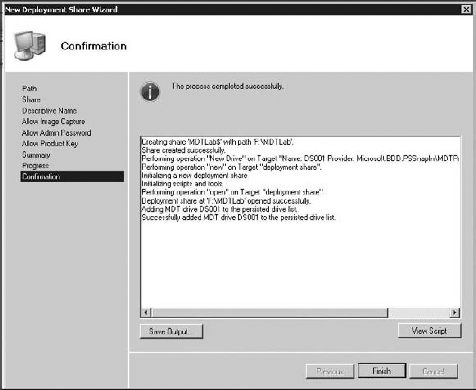
The Save Output button will dump everything you see
on the Confirmation page into a text file. Click the Finish button to
complete the New Deployment Share Wizard.
Microsoft did an awesome job keeping the
wizards of MDT consistent. The Summary, Progress, and Confirmation
pages all work the same on each wizard.