1. Creating Your First Image
When imaging computers, you'll have different computers that you'll work with, as you can see in Figure 1.
You'll install tools such as the WAIK on the
technician's computer, and you can then manipulate images and image
files from that computer. The reference computer starts as a clean
installation of Windows 7, and you make any configuration changes or
add applications as desired. Once the reference computer is ready, you
run Sysprep on the reference computer and capture the image. You can
then deploy this image to the destination computers.
Because of a quirk, you need to consider the
architecture of the target computers when choosing your technician's
computer. Specifically, WSIM fails to create catalogs for an x86-based
image if you run it from an x64-based computer. WSIM can create
catalogs from both x86- and x64-based images on an x86-based computer,
though.
Here are the high-level steps you'll take to manually capture an image:
Install
the Windows Automated Installation Kit. You install it on a computer
you're using for administrative purposes. In other words, don't install
it on the computer you are imaging. The WAIK includes several tools
you'll use during this process.
Create
bootable media that includes ImageX. You can create either a bootable
CD or bootable USB drive to boot into WinPE. You add the ImageX program
before creating the bootable media so that it is available to you when
you boot into WinPE.
Configure
the reference computer. Install a clean installation of Windows 7 and
configure it for your end users. You can configure any settings you
want as well as install any applications you want your end users to
have available to them when they receive the image.
Prepare
the reference computer with Sysprep. The computer must be prepared with
Sysprep. Sysprep will generalize any settings that must be generalized,
such as the computer name, SID, and removal of the license key. Once
Sysprep completes, the computer shuts down and should not be restarted
normally until after the image is captured.
Boot
to WinPE with your bootable media. Boot the reference computer to the
WinPE. You can boot into the WinPE using multiple methods, including
using bootable media you've created.
Capture the image with ImageX. After booting into WinPE, you can access the command prompt to capture the image using the ImageX command. You can then store the image on any media that will be accessible to the destination computers.
2. Using the Windows Automated Installation Kit
The Windows Automated Installation Kit (WAIK) is a
group of tools you can use on the technician's computer to help with
the deployment of Windows 7.
These tools include the following:
Deployment Tools Command Prompt
You can use this prompt to run commands such as dism, oscdimg, and imagex. When you launch it, the prompt temporarily modifies the path to include the path to these tools and starts in the C:\Program Fi1es\Windows AIK\Too1s\PETools folder.
Windows System Image Manager
You can use this tool to create answer files.
Documentation Folder
The Documentation folder includes
access to several links. It includes a link to an HTML file that
includes step-by-step instructions, links to three separate help files,
and an additional folder named SDK (Software Deployment Kit) for software developers.
VAMT 1.2 Folder
This folder includes Volume Activation
Management Tool (VAMT) version 1.2 help files and tools, which you can
use for managing activation. You can also download VAMT version 2.0 as
a separate download.
You can use these tools to capture or deploy an
image, and perform offline maintenance of images. Offline maintenance
means that you aren't booted into the operating system; instead, you
are modifying the contents of the WIM file. You can use the WAIK tools
to expand the contents of a WIM file into files and folders on the
technician's computer. You can modify the files and folders as desired,
and then restore them into the image.
The WAIK is available as a free download from Microsoft. You can get it by going to Microsoft's download site (www.microsoft.com/downloads/) and entering WAIK in the Search All Download Center text box. The Windows AIK for Windows 7 download (KB3AIK_EN.iso)
file should be listed on the first page. It's about 1.7 GB in size so
will take a little time to download even with a high-bandwidth
connection.
After you download the ISO image, you can burn it to
a DVD using Windows 7's built-in feature. Simply place a writable DVD
into your DVD burner, right-click the ISO file, and select Burn Disc
Image.
Once you have the DVD, you can use the following steps to install it:
Place
the DVD into your DVD drive. If Autoplay doesn't start automatically,
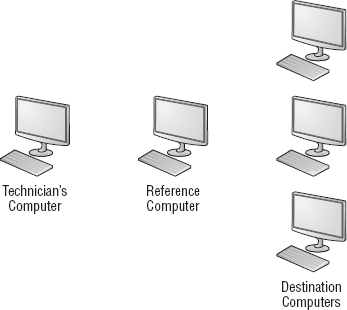
use Windows Explorer to browse to the drive and double-click StartCD.exe. If prompted by User Account Control (UAC), click Yes to continue. You'll see a screen similar to Figure 2.
When the welcome page appears, click Next.
Review the license terms and select I Agree. Click Next.
Accept the default installation folder of C:\Program Fi1es\Windows AIK\ and click Next.
On the Confirm Installation page, click Next to start the installation.
When installation completes, click Close.
Click Start => All Programs => Microsoft Windows AIK. You'll see all the WAIK tools within this Start menu folder.