Desktop & Dock
5 ways to take a screenshot
If you want to show someone what’s on your
screen (perhaps in order to give or receive technical support), there are many
ways to capture an image that shows all or part of your screen, for sharing
with others. Here are five practical methods for grabbing a screenshot.
- Full screen To capture an image of your entire screen, simply press z-<Shift>-3.
- Selected area To capture a selected area of the screen, press z-<Shift>-4,
and then drag the rectangular marquee around the area that you want to
include in the screenshot.

Most
screen-grab utilities let you capture a whole window or all or part of the
screen
- Window or object To capture a window, a menu, an icon, or any other on-screen
object (along with its drop shadow, if there is one), press z-<Shift>-4,
press the spacebar, and then click the object that you want to obtain a
screenshot of. The preceding three commands (for full-screen,
selected-area, and window or object screenshots), save the captured image
as a file on your desktop. If you would prefer to copy the image to your
Clipboard, add the <Control> key to the shortcuts listed above.
- Grab For
more capture options – including a time-delay feature, the ability to
choose how the cursor appears, and the option to have your system emit a
confirmation sound when you make a capture – use the Grab app that comes
built in to OS X (in /Applications/Utilities).
- Third-party utilities If you need more capabilities than OS X’s Grab can provide –
for example, the ability to specify file formats on the fly, or to scale a
screenshot’s size – you have many screen capture utilities to choose from.
Among the most popular of these are Ambrosia’s Snaps Pro X ($69, go.macworld.com/snapzprox),
Realmac Software’s LittleSnapper ($40, go.macworld.com/littlesnapper),
and Skitch (free, plus account, $20/year, go.macworld.com/skitch).
Create a motion capture of your Mac’s
screen
Create
a motion capture of your Mac’s screen
- Launch QuickTime Player and choose File
ð New Screen Recording. In the
Screen Recording window that appears at this point, click the downward-pointing
triangle; then choose whether to record with sound or without sound, and
whether to capture medium or high-quality video. You can also opt to show
mouse clicks in your recording. To commence the capture, click the red Record
button. To record the entire screen, click anywhere on the screen. To
record a portion of the screen, click and drag to make your selection and
then click within the selection. To end your recording, simply click the Stop
button.
2 ways to share screen
If
your Mac is set up on the same local network as the Mac that you wish to
control remotely, you just need to ensure that Screen Sharing is enabled on
both Macs
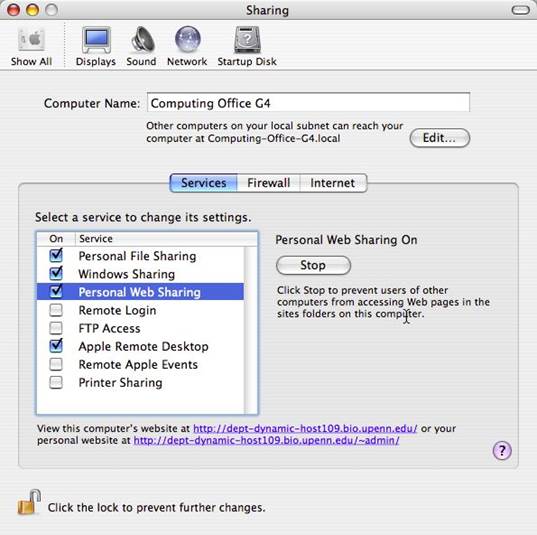
- If your Mac is set up on the same local
network as the Mac that you wish to control remotely, you just need to
ensure that Screen Sharing is enabled on both Macs (System Preferences ð Sharing
ð Screen Sharing). In a Finder
window’s sidebar, select the Mac you wish to control or view, and then
click Share Screen. Enter a username and password for the Mac that
you intend to control (or choose to log in with an Apple ID supported by
that Mac). You should be screen-sharing in to time.
- Remotely
If you want to control a Mac that isn’t on your Mac’s local network, sign
up for a free AIM account (www.aim.com)
on each system, using a different account for each. On each computer,
launch the Messages application; in its Accounts preference, click the
plus (+) button and configure your AIM account. Click the Video
menu, and select Screen Sharing Enabled on both Macs. Now, when
each Mac has Messages running, you can select the other Mac and choose to
share its screen. Alternatively, you can sign up for a free LogMeIn (www.secure.logmein.com) account.
Install the free LogMeIn server application on any Mac you wish to
screen-share with, and you can access and control that Mac through a Web
browser.
System
2 ways to make a clean migration to a
new Mac
When you get a new Mac, you may want to
transfer some of the apps and data from your old Mac, but leave behind all the
useless Cruft and clutter.
Unfortunately, you have no clean way to
transfer only the specify applications and data you want while still guaranteeing
that all necessary components and files are preserved. That’s because many OS X
apps not self-contained. Instead, they store pieces in a variety of folders and
sometimes these pieces are invisible or have hard-to-identify names.
Reinstall
your critical apps by downloading them again or using fresh copies
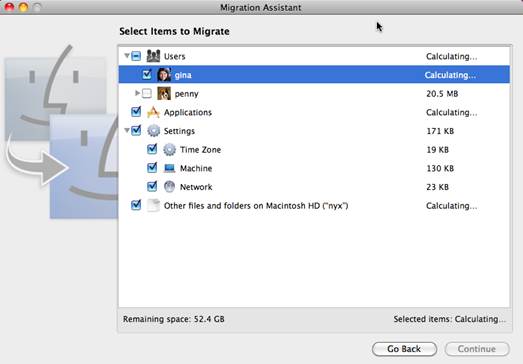
- Use Migration Assistant The easiest and most reliable way to move stuff to your new
Mac is to connect the two Macs with a FireWire or Ethernet cable and use
Migration Assistant. You’ll find this utility located in
/Applications/Utilities; it’s built into the Setup Assistant that runs
automatically the first time that you turn on a new Mac.
Regrettably,
Migration Assistant lets you select or deselect only board categories of things
to move; you can’t, for example, choose some apps but not others, or only a few
subfolders within your Documents folder.
- Reinstall apps As a compromise, I suggest that when running Migration
Assistant, you deselect Applications and Other files and folders
on [Volume Name], but leave Settings and all its subcategories
selected along with all the user accounts and their corresponding
subfolders. Finish starting OS X and then log in.
Now you can
reinstall all your critical apps in two ways: You can either download them from
the Mac App Store, or use fresh copies that you obtained directly from the
developers.
This process may
take a while, but it will lead to much less clutter, and it will allow you to
enjoy the latest, most up-to-date apps.
In case you are
not able to install an application from scratch for some reason, you can run
the Migration Assistant utility a second time. This round, select only Applications
and let the utility copy everything (including all the extra clutter).
6 ways to troubleshoot a Web Connection
If you can’t get to a webpage, try the
following steps.
- Check your internet connection The first thing to do is to confirm whether you can access
other websites. If you can, your connection is fine.
- Check the Wi-Fi menu This is to make sure your Mac hasn’t dropped its connection;
if it has, try reconnecting.
- Try another device If another Mac, an iPhone, or an iPad on the same network can
connect to the website that you are having trouble with, then restart your
Mac and try again.
If this doesn’t
work by restarting your DSL or cable modem followed by your AirPort base
station or other Wi-Fi router, if any. If you do all that and your connection
is still down, it’s time to call your Internet service provider.
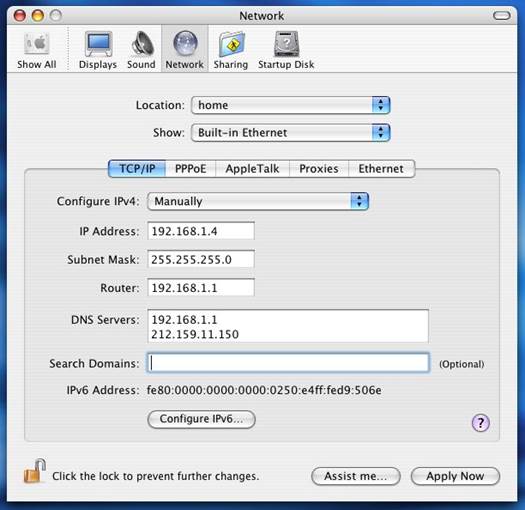
Change
your DNS settings