Thermaltake Level 10 GTS
Level 10 GTS is a simple version of the
Level 10 series I have review before.
The special features of the Level 10 model
(having the compartments that are separate with the individual ventilation
system) can’t be found here. Level 10 GTS looks pretty normal considering its
interior design. The only reference point from the unique Level 10 here is the
disk racks, which can be approached from the outside.

Product
image
In contrast to the initial Level 10 model,
the HDD slots don’t have their own ventilation system. The front 200mm fan will
be in charge of that task.
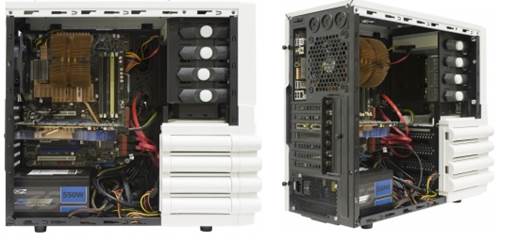
We can note that the back, the mounting
plates to mount the motherboard and the 5.25-inch slot has the shapes in the
way of improving the overall stiffness of the chassis. |
Made from the thicker metal plates than
those from Commander MS model, Level 10 GTS is indeed pretty powerful.
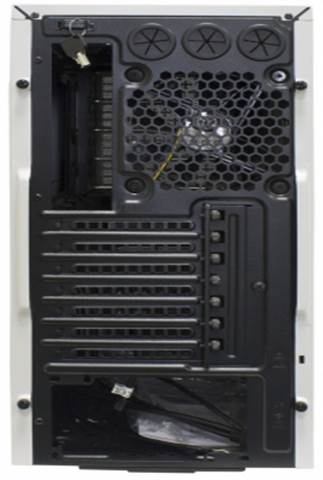
The
back panel of the product
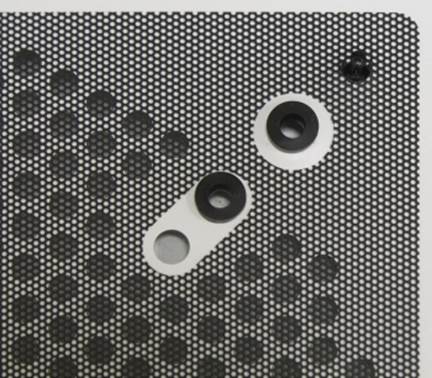
Here’s a cover plate on the frame of the
expansion slots, just like Commander MS-I. There are 3 rubber holes for the
pipes of the liquid cooling system on the top of the case.
The upper art of the case has a dust filter
(a perforated piece of plastic), below which you can install the different sets
of fans or heatsinks of the liquid cooling system.
The accessories are the same as those of Commander
MS-II and MS-III except for some screws and a key for the HDD slots. There’s
only 1 key here, so you must be careful not to lose it.
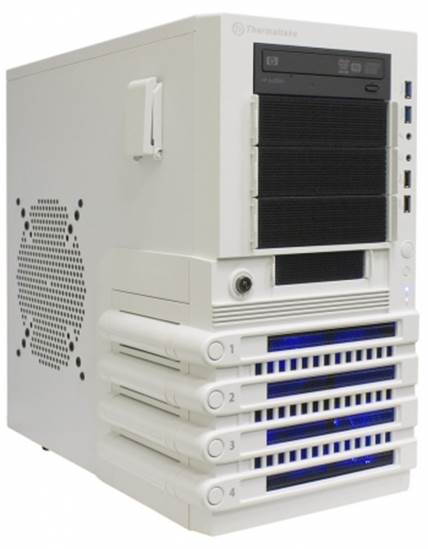
HDD
slots
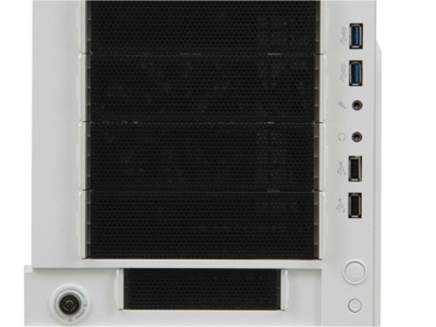
The case containing the I/O connector
offers twice the number of the available USB ports with the Commander MS models:
2 USB 3.0 and USB 2.0 ports, connected to the header of the motherboard. The microphone
and headphone jacks are placed between the USB 3.0 and USB 2.0.
Below them, there’re Power and Reset button.
The latter buttons are getting smaller but you can easily press it with your
finger. A little lower, there’re indicator for voltage and sockets. They’re not
too bright and won’t be dazzling. By this way, the position of the connectors,
controls and indicators along the right edge of the front cover will be another
reference from the original Level 10 model.
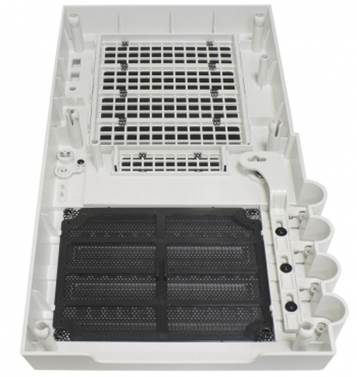
Dust
filter
The front panel is secured by 6 plastic
clips that ensure more secure fastening than the petal-shape screws on the Commander
MS model, but of course plastic itself is less reliable than metal.
You can only reach for the dust filter of
the front fan by removing the front cover, so you can’t avoid performing this
operation and leading to the risk of damaging the plastic clips.
Despite not a primary product, Level 10 GTS
lets out some details showing the intention of cutting cost on its design.
The hard plastic stand is a proof for that.
We expect something better from a 100USD computer case.
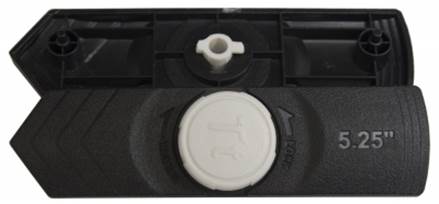
External
5.25-inch slot
The cheap-price quick-fastening screws of
the external 5.25-inch slots are identical, except for the colors, compared to Commander
MS-II and MS-III. Of course the manufacturer can announce that he uses the
materials of the mainstream product series from his primary products, but the
quality of the screws doesn’t depend on the product classification.
Also by this way, the website of the maker
points out some different and better types of screws such as those which have
been used in the Armor Revo products. We will discuss about them right below.
That’s all our comments related to the intention
of using the cost-cutting methods but there’s also a problem concerning the
product function.
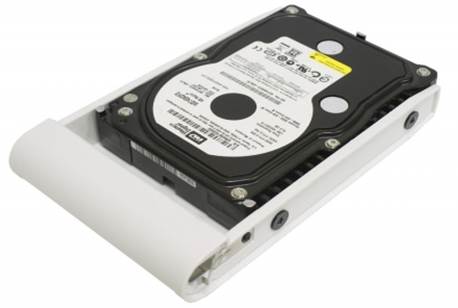
The
bay and hard drive
The ventilation is not the focus at the
design of the disk bays, thus, each hard drive is covered from all sides. It
can only receive a little air from above. We actually doubt whether built-in
200mm fan on the front of the case can ensure efficient cooling for the HDDs in
such conditions.
Otherwise, the drive slots are very useful.
They are compatible to the 3.5-inch and 2.5-inch devices and the mounting points
on the sides are fastened with the rubber pads to absorb the vibrations. It’s
easy to adhere to the slots when taking it out. To do this, you need to unlock
the front cover, press a proper button on the front cover and pull a slot out.
This doesn’t sound simple, but its disadvantages are the bays that can’t be
able to slip out suddenly.
Anyhow, we won’t consider that as a perfect
swapping feature. You need to work with your screwdriver to replace a hard
drive by twist out (and then fasten it back) 4 non-standard screws.
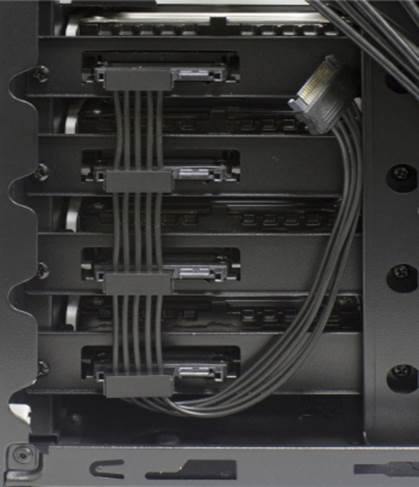
The
position of the hard drive slots
However, it’s much easier than usual to
connect the installed HDD together. All the power cables of HDD are connected
through an adaptor to a mono SATA power connector if PSU. So you just need to
plug in the power cables that go through the SATA cables.
Of course, here we have some
simplifications compared to the initial original Level 10 version. The slots
are made from plastic instead of metal (and no individual cooler support for
each) while the SATA cables are not pre-connected closely to the HDDs so that
you just need to plug them into the connector of the motherboard. On the other
hand, Level 10 GTS still surpass any computer case product having the same
price considering their HDD connections.
The
slots inside the chassis
Besides 4 disk slots described above,
there’s a slot inside the chassis. Sitting between the main disk rack and the
exterior 3.5-inch slot, it’s cooled by the front fan but not easy to pull out.
The small holes mounted here show that this
slot is compatible to 2.5-inch and 3.5-inch devices.
It lacks connection utilities for 4 main
HDD slots but in that way it’s better cooled.
The unique HDD slots require the side panel
not to be similar to the standards, it needs to have cut-out part for them. The
side part has a lot of mounting points on the top and bottom, which is a
special trait for the cheap computer case. We have seen this similar solution
at Commander MS-II and MS-III which was discussed above.
There’s a bracket which looks like a
headset that can upturn on the side panel. We don’t think that it will be
useful even when you don’t pay attention to its frailty. You won’t be able to
reach this bracket if the computer case sits in a desk niche. And it won’t be
much convenient in case it stands on the floor.
Anyhow, the sides of the case are easy to
install. Level GTS 10 has a deep cable compartment and the cover at the
compartment also bulges a little for tolerance. As a result, the cables don’t
have pressing impact against the case, helping you close it more easily.
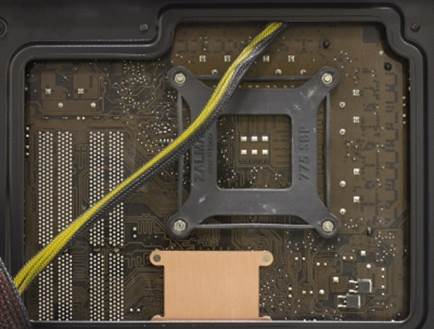
The
position of the CPU cooler
The cut-out part for the CPU cooler is wide
and you can use it to route the CPU power cables to the back of the motherboard
(of course this thing can be performed before fastening the mother board into
the computer case).
The
installing process inside the case
It’s easy to fit our configuration into
this computer case (some of the disadvantages have been recorded above).
Here’s 315 mm of free space for the
expansion cards, a little less than the max space offered by the Commander MS
models. However, this number doesn’t depend on where you mount your hard drive
and you won’t have any problem during the process of installing a long graphics
card along with putting the hard drives into the available slots.
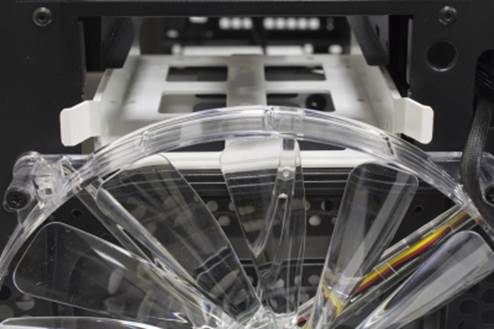
The ventilation system consists of 2
default fans: an 200mm intake fan with prominent blue on the front and a 120mm
exhaust fan on the back. At silent mode of the motherboard, the 120mm fan works
at 850 RPM and the 200mm one works at 550 RPM.
As the primary products discussed above,
Level 10 GTS lets you fit more fans. It supports the fans with larger size
format and each fan has a dust filter (except for the built-in fan on the
back).
A 120mm and a 120/140mm fans can be
installed under the top of the chassis. Or you can use this position for a
200mm fan or a heatsink of the liquid cooling system.
Large
dust filter for the 120mm fan
A 120mm fan, 140mm fan or 200mm fan can be
placed on either side panels. There are available rubber pads to absorb the
vibrations for the latter fans. As the fan which is placed on the top of the
case, at this position, the fan is also protected by a perforated dust filter.
And finally, a 120mm fan can be placed at
the bottom of the chassis (along with PSU fan, it’s protected from the dust by
a large removable grille filter in a plastic frame on the bottom of the case).
Image
of a successfully installed product
The installing method of Level 10 GTS looks
pretty unusual due to the unique configuration of the hard drive supports with
the ability to approach from the outside..
|
Advantages
·
Strange-looking but stunning appearance
·
Easy to install
·
Good dust resistant ability
·
The HDD can be swapped quickly without
removing the sides of the case.
·
USB 3.0 supporting
Disadvantages
·
Unwanted sound from the front fans
·
The rack design of the HDD is inefficient in
ventilation respect.
Thermaltake Level 10 GTS’s technical standard
·
Dimension, mm: 233x462x510
·
Compatibility: ATX, microATX, Mini-ITX
·
Exterior slots: 4x5.25”
·
Interior slots: 5x3.5”/2.5”
·
External ports: 2x USB
3.0; 2x USB 2.0; 2 audio jacks
·
Fan: 1x200 mm; 1x120
mm
|