Setting up DNS zones
Hosting a domain on a DNS Server requires setting up the zone for that domain. To set up a new DNS zone, perform the following:
1. | Open Server Manager from Start | Administrative Tools | Server Manager.
|
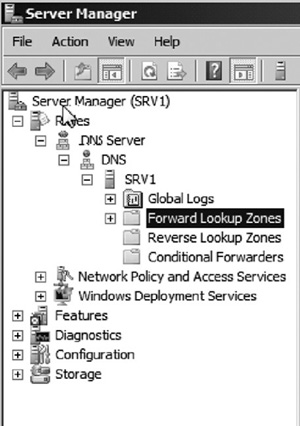
2. | Select the Forward Lookup Zones node from Roles | DNS Server | DNS | <your DNS Server name> (see Figure 7).
|
3. | Right
click the Forward Lookup Zones node and select New Zone. The New Zone
wizard will launch. Click Next to begin creating a new DNS zone.
|
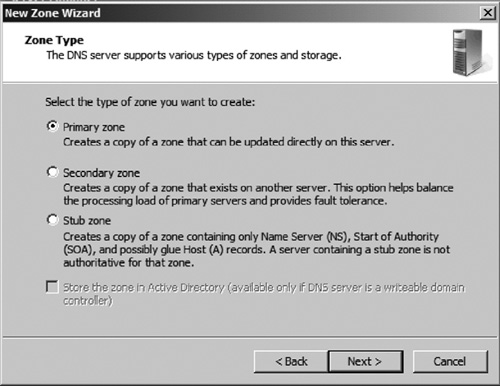
4. | Select the zone type (see Figure 8). If this is the first copy of the zone, you will want to select the Primary zone option. Then click Next.
|
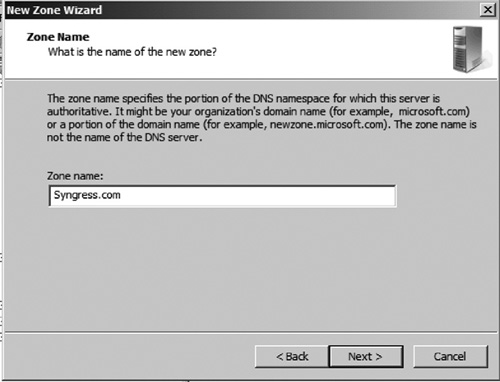
5. | Enter
the Zone Name. This is the namespace for which this server will be
authoritative. For example, if the server is hosting Syngress.com, enter
that into the Zone Name field as seen in Figure 9. Then click Next.

|
6. | If
this is a new zone, enter a name for the DNS file. If the zone was
previously set up on another server, such as a lab, you can use an
existing DNS file to prepopulate the zone on this server. Click Next to
continue.
|
7. | Select whether you want to allow dynamic updates or not. By default dynamic updates are disabled. Click Next to continue.
|
8. | Verify your settings on the summary page, and then click Finish to create the zone.
|
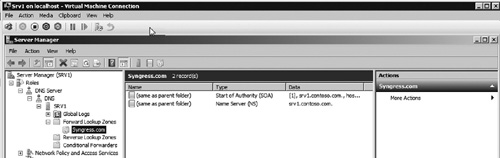
9. | You will see the zone now listed in Server Manager as seen in Figure 10.
You can select the zone to see records that belong to the zone in the
middle pane. By default every zone creates NS and SOA records.
|
Replicating DNS zones
After you set up your primary DNS zone, you will then
want to replicate the zones to at least one secondary server. To set up
DNS replication, perform the following:
1. | Log on to the server that will serve as a host to the secondary DNS zone.
|
2. | Open Server Manager from Start | Administrative Tools | Server Manager.
|
3. | If the DNS Server Role is not installed, you will need to install it.
|
4. | Select the Forward Lookup Zones node from Roles | DNS Server | DNS | <your DNS Server name>.
|
5. | Right click the Forward Lookup Zones node and select New Zone. The New Zone wizard will launch. Click Next to begin creating a new DNS zone.
|
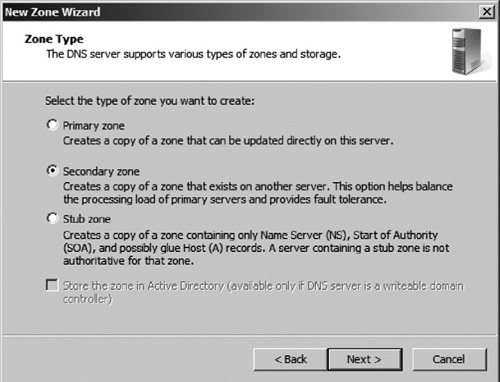
6. | Select the zone type (see Figure 11). Since this will be a Secondary zone, select the Secondary zone option. Then click Next.
|
7. | Enter the name of the zone (see Figure 12). This should be the same name as the Primary zone. In our example, we will use Syngress.com.
|
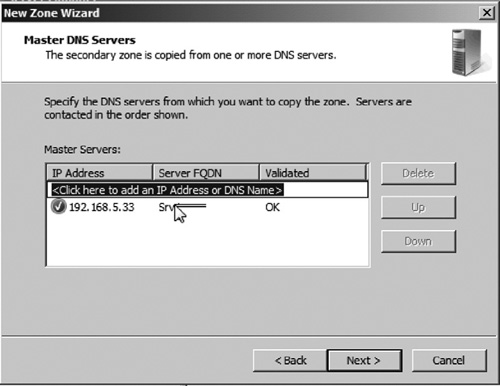
8. | Enter the IP address of FQDN of the primary DNS Server (see Figure 13). Then click Next.
|
9. | Click the Finish
button to complete the set up of the Secondary zone. You now need to
allow the Secondary zone to pull information from the primary. To do
this, log on to the primary DNS Server.
|
10. | Open Server Manager from Start | Administrative Tools | Server Manager.
|
11. | Select the Forward Lookup Zones node from Roles | DNS Server | DNS | <your DNS Server name>
|
12. | Right click the zone you wish to modify. Then click Properties. In our case, we will be modifying Syngress.com.
|
13. | Click to select the Name Servers tab.
|
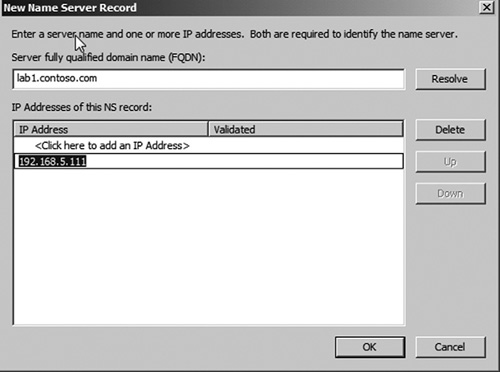
14. | Enter the IP address and FQDN of the secondary DNS Server (see Figure 14). Then click OK.
|
15. | You
should now be able to go back to the secondary DNS Server and see the
zone data inside the zone. Any new records created on the primary server
should automatically replicate to the secondary server.
|
Creating DNS records
After DNS zones are set up, configured, and verified,
you are ready to start creating records. To create a new DNS record,
perform the following:
1. | Log on to the server that hosts the primary DNS zone.
|
2. | Open Server Manager from Start | Administrative Tools | Server Manager.
|
3. | Expand the DNS role and servers. Then expand the Forward Lookup Zones node. Right click the zone where you want to create a new record and select New Host (A or AAAA) Record...
|
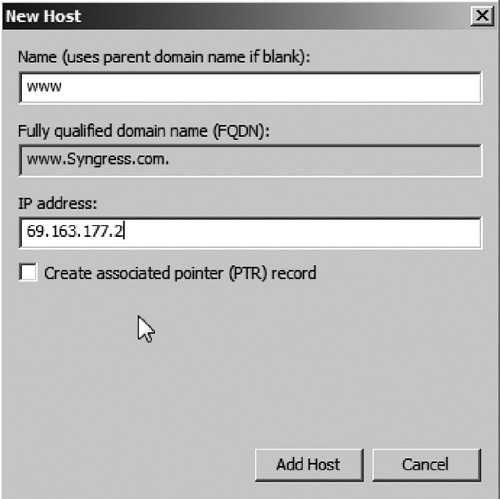
4. | Enter the host name to complete the FQDN, and then enter the IP address that the record should point to (see Figure 15).
|
5. | You
can now test the new host record. Ensure that your computer is set to
use your DNS Server as the primary DNS Server in the TCP/IP settings.
|
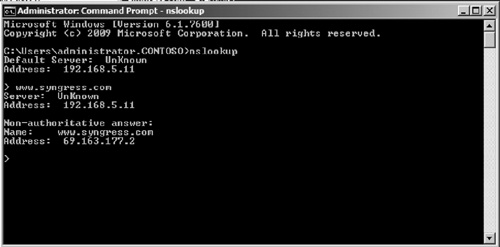
6. | Open a command prompt.
|
7. | Type nslookup at the command prompt, and then hit Enter.
|
8. | |
9. | You should come back with a nonauthoritative reply with the IP address you specified when setting up the record (see Figure 16).
|