Generally speaking, networking is designed
to facilitate two things: a connection between your PC and the outside
world—including other PCs as well as the Internet—and sharing resources
between your PC and the outside world. For the latter case, Microsoft
has been building sharing features into Windows for years in the form of
shared folders, shared printers, and shared media libraries, and this
functionality is even easier to use in Windows 7 than it was in XP or
Vista because of the advent of HomeGroup sharing.
1. HomeGroup Sharing
When you think of "sharing" with regard to PCs on
home networks, you generally mean two types of resources: files and
printers. For a long time, Microsoft has supported sharing these types
of resources in various ways, but there was always a level of complexity
involved. In Windows 7, there's a better way. And while it requires two
or more PCs in your home to be using Windows 7, the result is worth it:
HomeGroup sharing makes sharing documents, music, pictures, video, and
other files, as well as printers, easier than ever.
NOTE
HomeGroup sharing does not replace the workgroup
network scheme that was previously discussed. In fact, to use HomeGroup
sharing, you must be on a workgroup. HomeGroup sharing does not work
with domain networks like those found in corporations. It is very
specifically a consumer-oriented feature aimed at home users.
NOTE
Microsoft's use of the word HomeGroup may seem inconsistent because the word appears variously as HomeGroup, Homegroup, and homegroup throughout the Windows 7 user interface. However, Microsoft tells us this is all by design. The word HomeGroup is a trademarked term and refers to the Windows 7 sharing feature. A homegroup, meanwhile, is the generic "thing" that is created by the feature, as you will see. And if you see it spelled as Homegroup
(with a capital "H" but a small "g"), that's just because it's a title
or other place in the UI where an initial capital letter is required.
Seriously, they told us this.
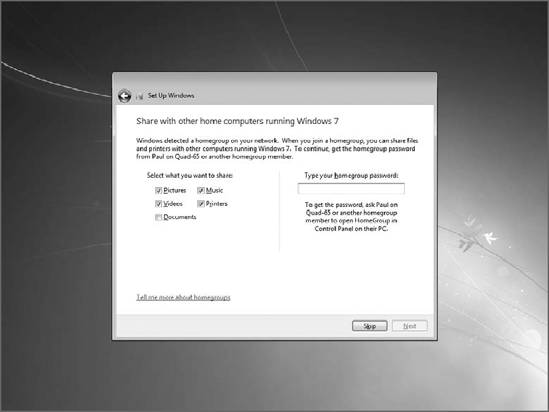
HomeGroup sharing is so important to Windows 7 that
Microsoft actually makes joining or creating a homegroup part of the
Windows 7 Setup experience. As you can see from Figure 1, you're given this opportunity in one of the final phases of Setup.
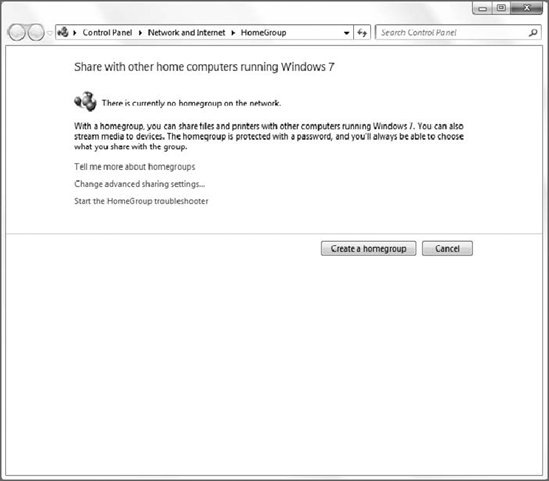
We recommend not configuring a homegroup until you
already have Windows 7 up and running. If you run the HomeGroup control
panel (either by typing homegroup in Start Menu Search or by clicking Choose homegroup and sharing options in the Network and Sharing Center) in Windows 7, you'll see a window like that shown in Figure 2.
|
Well, you'll probably
see that window. Depending on the status of homegroup sharing and your
network connection type, you may see that this computer already belongs
to a homegroup, that there is already an existing homegroup configured
on the current network that you can try to join, or, if you're joined to
a Public network (or domain), that you cannot connect to a homegroup.
Here, we will assume that you are setting up a homegroup for the first
time.
|
|
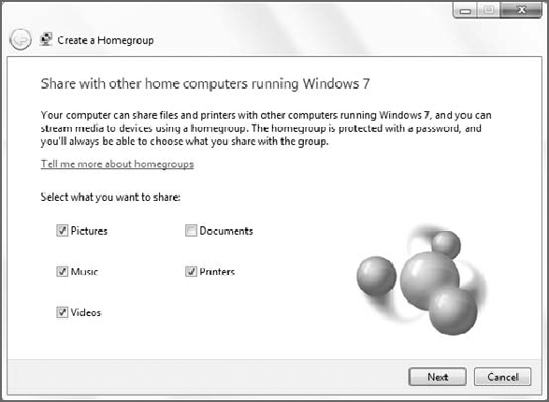
1.1. Creating a New Homegroup
To create your homegroup, click the Create a homegroup button. The Create a Homegroup wizard appears, shown in Figure 3.
From this window, you can choose which resources you'd like to share.
These include pictures, music, videos, documents, and printers.
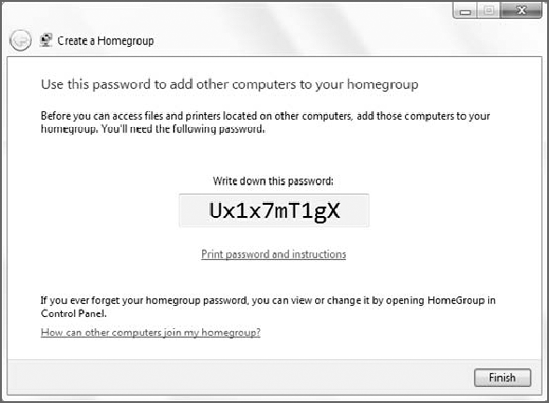
Once you've chosen, click Next. HomeGroup will set up
your homegroup and then you'll be presented with the password, as shown
in Figure 4.
The wizard recommends jotting this password down, as you will need it
on other PCs that want to join the homegroup, but you can skip that
step: we're going to change the homegroup's password next.
Click Finish to close the wizard.
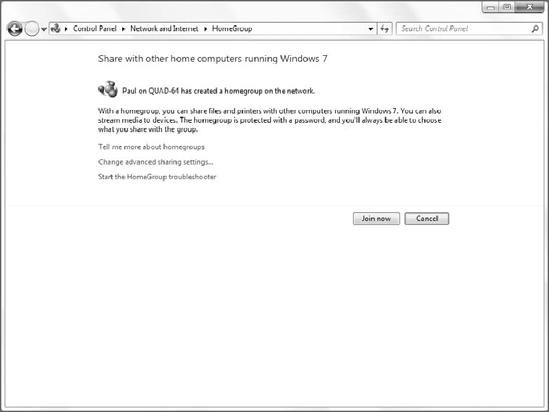
1.2. Joining a Homegroup
Once a homegroup has been created on your network,
you can connect to it from other PCs. To do so, you will again access
the HomeGroup control panel. Only this time, because there is already a
homegroup on the network, the window looks a bit different (see Figure 5).
NOTE
You can configure only one homegroup per network.
To join the existing homegroup, click the Join now
button. You will be prompted to pick the resources you want to share and
then enter the homegroup password before you are allowed to join.
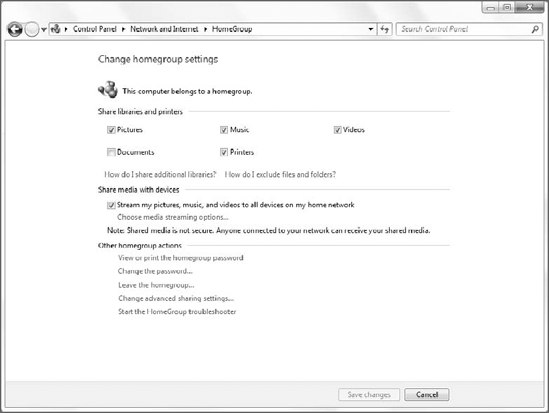
1.3. Configuring a Homegroup
Once you've created or connected to a homegroup, you
can use the HomeGroup control panel to configure it in various ways. As
shown in Figure 6,
once there is a homegroup on your network and you are joined to it, the
HomeGroup control panel changes yet again. Now, it's designed to help
you make changes to the homegroup configuration.
NOTE
Homegroups are not tied to the PC from which they
were created. Instead, any PC that is joined to the homegroup can be
used to make configuration changes.
Here are the changes you can make to your homegroup from this interface:
Change which resources you're sharing from this PC.
At the top of the HomeGroup control panel is a section called Share
libraries and printers. From here, you can check (enable) and uncheck
(disable) the sharing of pictures, documents, music, videos, and
printers. The first four items are shared on a per-Library basis.
NOTE
You can, however, share other items via the
homegroup. There are two instances in which this may be desirable.
First, you may have created custom libraries. Second, you may simply
have a folder of whatever files somewhere, outside of a library, that
you'd like to share. To share nonstandard libraries or any other folders
via your homegroup, simply navigate to that location with Windows
Explorer. Then, click the Share toolbar button and choose Share with and
then either Homegroup (Read) (for read-only access) or Homegroup (Read/Write) (for full access).
Share media with devices.
Since all media sharing now occurs via the HomeGroup mechanism, you can
access the Media Sharing options window.
View or print the homegroup password. This one is pretty self-explanatory but note that you cannot change the homegroup password from this interface.
Change the password.
This allows you to change the homegroup password. We recommend doing
so, and using a password that you will remember if you need to join the
homegroup from another PC.
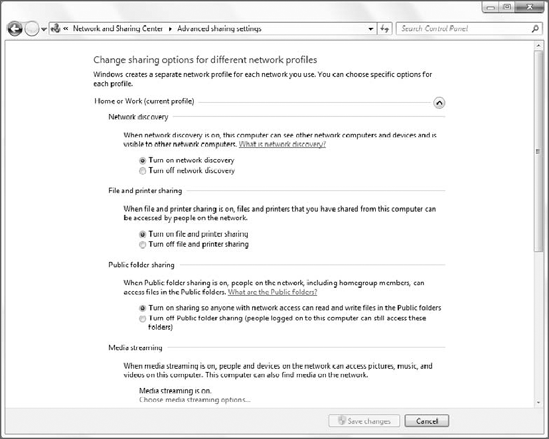
Change advanced sharing settings. The enormous window (see Figure 7)
that appears when you select this option lets you access a number of
important network- and sharing-related features. These include network
discovery (which determines whether your PC can find other computers and
devices on the network and vice versa), file and printer sharing (which
can be globally enabled or disabled), public folder sharing (which can
be globally enabled or disabled), media streaming ,
password-protected sharing , and HomeGroup connections
(which determines whether to allow Windows to utilize simple
homegroup-based sharing or to revert to the sharing technologies
provided by previous Windows versions).
NOTE
All of the settings in Advanced sharing settings
can be configured separately for Home/Work networks and Public networks.
As you might imagine, most of these options tend to be enabled for wide
open sharing on Home or Work network types and are disabled by default
on Public network types.
Finally, you can use this interface to trigger a HomeGroup troubleshooter.