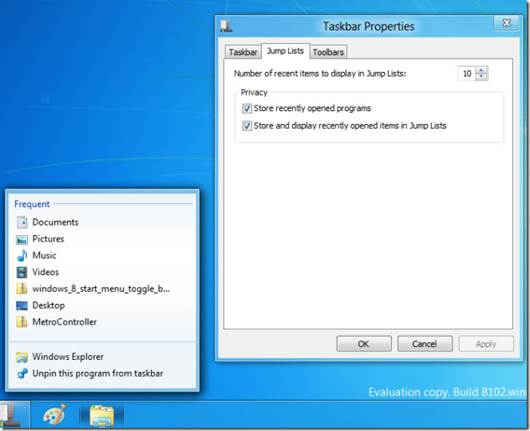
31. Pin items to jump lists Jump Lists
appear when you right-click program shortcuts on the Taskbar or highlight items
in the left-hand pane of the Start menu. By default, recently opened items are
shown this way, but you can also pin your favorite documents so they always
appear. Either click the pin icon next to one of the recent items to make it a
permanent fixture, or simply click and drag a file from a folder on to the program’s
Taskbar icon.
Jump
Lists appear when you right-click program shortcuts on the Taskbar or highlight
items in the left-hand pane of the Start menu
32. Remove
pinned items If you fall out of love with
something, simply roll your mouse over the unwanted item in the pinned list and
click on the pin icon that appears to remove it from the list.
- Remove recent list If you don’t use the Recent list or have privacy concerns,
it’s easy to disable it. Click ‘Start’ right-click ‘Computer’ and the
select ‘Properties’. Untick ‘Store and display recently opened items on
the Start menu and Taskbar’ and click on ‘OK’.
- Change number of recent items Alternatively, you can click ‘Customize’ instead and change
‘Number of recent items to display in Jump Lists’ from the default value
of 10 – it can be as low as one, or as high as 60. We suggest no more than
15.
Speed up
Follow these tips to streamline your
PC and make it perform faster
- Trim your start-up Stopping non-essential programs from starting with Windows
doesn’t just cut boot times, it frees up system resources and speeds up
your PC, too. Use Autoruns (http://technet.microsoft.com/en-us/sysinternals/bb963902.aspx)
to identify and disable those programs you rarely use or don’t need
immediately.
- Stagger start-up programs Sometimes your PC slows to a crawl during the boot process
because too many programs are trying to start at once. Use a free program
called Startup Delayer on the disc to delay less important programs, so
they start at a quieter time, speeding up performance and boot times in
the process.
- Clear out the clutter Install CCleaner from this month’s free cover disc – this
clears out unwanted files, reclaims system resources and cleans up your
Registry, although remember to always be careful when tinkering with the
Registry because serious problems can occur if you make a mistake. Don’t
delete any Registry backups in case you need them later.
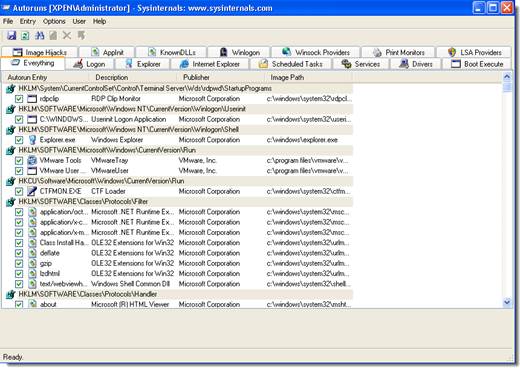
Use
Autoruns to identify and disable those programs you rarely use or don’t need
immediately
- Get online more quickly If Internet Explorer 8 takes an age to open, select ‘Tools
> Internet Options > Programs’. Click on ‘Manage add-ons ‘ and view
the load times for each add-on (you may need to scroll to the right to
view this). Try disabling sluggish add-ons unless they’re particularly
important, like those linked to your security program.
- Speed up start menu searches Right-click the ‘Start’ button and select ‘Properties’. Click
‘Customize’, scroll down the list of available options and select ‘Search
without public folders’ under ‘Search other files and libraries’. Click
‘OK’ and you should find that results appear much more quickly than
before.
- Load websites more quickly Change your DNs servers to OpenDNS to browse the internet more
quickly and safely. Visit https://www.opendns.com/start
to sign up for a free basic plan, or follow the step-by-step guide we
published on page 82 of issue 39 (if you missed it first time around,
visit www.myfavouritemagazines.co.uk
to purchase a back issue).
- Scale back visual effects If you don’t have a lot of memory installed (1GB in Windows 7
or Windows Vista, or 256MB in Windows XP), click ‘Start’, right-click
‘Computer’ or ‘My Computer’ and select ‘Properties’. Select ‘Advanced
system settings’ (or ‘Advanced’ in Windows XP) and click ‘Settings’ under
Performance. Select ‘Adjust for best performance’ and click ‘OK’ for a speed
boost.
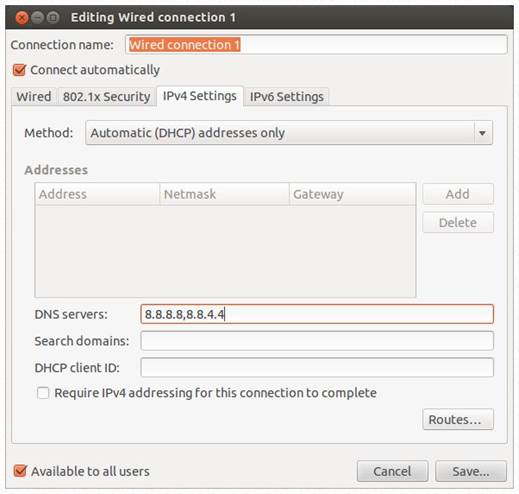
Change
your DNs servers to OpenDNS to browse the internet more quickly and safely
- Speed up your drives If you’re not worried about data loss, press [Windows] + [R],
type devmgmt.msc in the box that appears and then press [Enter] to
open Device Manager. Expand ‘Disk drives’, double-click each hard drive or
USB drive in turn and switch to the Policies tab. Select the option for
better performance, but make a note of the warnings before clicking ‘OK’.
- Give your PC a helping hand If you have a spare USB flash drive, you may be able to use it
to give your PC a small performance boost. Plug the drive in and – if
prompted choose ‘Speed up mi system’. Otherwise, click ‘Start >
Computer’, right-click your flash drive and choose ‘Properties’, then look
for a ReadyBoost tab.
- Configure ReadyBoost Choose ‘Use this device’ to enable ReadyBoost. Make sure the
amount of space you allocate to ReadyBoost is at least the same as the
amount of memory (in gigabytes) installed in your PC – you can find this
figure out by clicking ‘Start’, right-clicking ‘Computer’ and them
selecting ‘Properties’.
- Manage your fonts Over time, the number of fonts installed on your PC will
gradually increase, and each one uses up precious system resources. Use a
program such as AMP Font Viewer (on the cover disc) to remove those fonts
you never use. Windows Vista and Windows 7 users should right-click the
program shortcut, choose Properties > Compatibility tab and tick ‘Run
this program as an administrator’ for it to work.
Tidy up your disk
- Auslogics disk defrag A fragmented hard drive slows your computer down because it
takes the PC longer to access your files – it also increase the workload
of your hard drive, shortening its life. There is a free defragmentation
tool built into Windows, but if you want to push the performance envelope
further, install the free Auslogics Disk Defrag from the cover disc.
- Speed up file access Disk Defrag can also reorganize your hard drive during the
defragging process to improve performance. Click ‘Settings > Program
Settings > Algorithms’ and tick ‘Move system files to the beginning of
the disk’. Click ‘OK’, select your drive and then choose ‘Action >
Defrag & Optimize’.
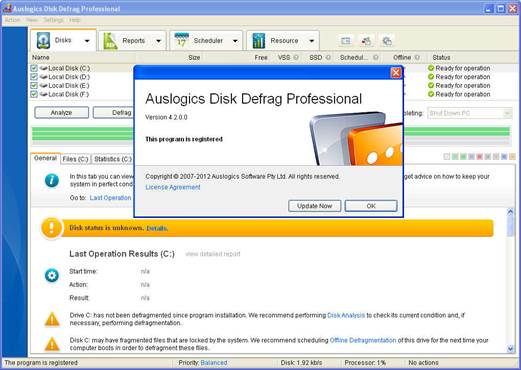
Disk
Defrag can also reorganize your hard drive during the defragging process to
improve performance