2. Access a Shared Folder Remotely
As
soon as a folder or drive has been shared, it can be accessed from
another PC on your local network. Just open Windows Explorer and
navigate to the Network folder in the tree.
The Network folder will show all the PCs (discoverable PCs, that is) on your local network. If it doesn't, press F5 to refresh the window; if you see the green progress bar moving slowly from left to right at the top of the window, be patient.
Or
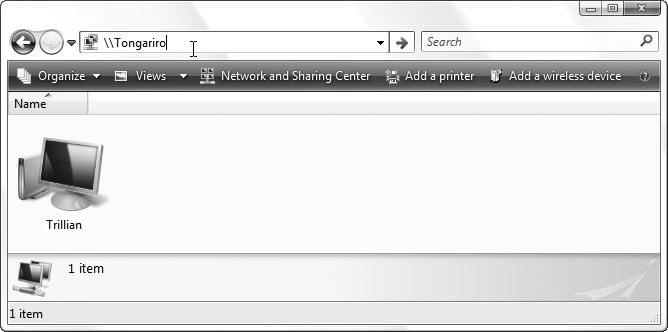
not. If the PC you want isn't in the list, you don't have to sit around
and wait for it to magically appear. Just click the address bar, erase
the text that's there, type two backslashes (\\) followed by the PC's name (as in Figure 4), and press Enter.
Once you see the remote PC in the Network
folder, double-click it to see its shared resources. Here, you should
see an entry for each shared folder and printer on that PC; just open
the resource to see what's inside, and then access those files as though
they were on your own hard disk.
If
there's an account on a remote machine with the same username as the
one you're using, Vista won't give you the opportunity to log in as a
different user, even if it's necessary to access the resource. To get around this, click the shared folder and select Map Network Drive and then click the different user name link. Fill out the fields, and click OK and then Finish when you're ready. At
this point, you'll see a new drive letter appear in Windows Explorer,
which you can use to access the remote folder. Unfortunately, this is
the only way to force a login box to appear. |
2.1. Remember remote shared folders
It's not uncommon to return to the same remote folder again and again. So, why navigate manually through the slow-as-molasses Network folder each time?
A remote folder has a path just like a folder on your hard disk; it follows the UNC naming convention, which looks like this:
-
\\Xander\Desktop
This path points to a folder named Desktop on the Xander PC (presumably Xander's desktop). It's important to note that the local path on the Xander PC—namely, C:\Users\Alexander\Desktop—is not part of the UNC path; all you see is the name of the PC and the share name.
Open the Zeppo folder on Xander's desktop, and the path changes to:
-
\\Xander\Desktop\Zeppo
Not only does this mean that you can
quickly get to a remote path by typing, but it means that you can create
shortcuts to remote paths to get back even quicker. Just drag the icon
on the left side of Windows Explorer's address bar onto your desktop to
create the shortcut.
Of course, if Xander ever renames his PC, or if he ever stops sharing the Desktop folder, then the shortcut will stop working.
Another way to access frequently used remote shares is with the old-school drive-mapping approach explained in the "Map a Network Drive" sidebar, next.
In most cases, you'll want to access remote folders through the Network folder. However, there's another system in place in
Windows Vista, included mostly as a holdover from years past. In Windows Explorer, navigate to the Network folder. Open a remote PC, right-click a shared folder, and select Map Network Drive. In the window that appears, select a free drive letter from the list, turn on the Reconnect at logon option (if you think you'll use this again), and click Finish when you're done. A new drive will appear in the Computer branch of the folder tree in Windows Explorer, and you can use it to get to the files contained therein. There are a few reasons why you might want to do this. First, the feature is there to provide compatibility with old—and I mean old—applications that don't understand UNC paths (e.g., \\Xander\Desktop).
Of course, you may encounter a new program that doesn't work reliably
with UNC paths, and this is a perfectly cromulent workaround. Second, network drives make for shorter paths. Map drive N: to \\Xander\Desktop, and the file \\Xander\Desktop\carrots.xlsx can now be found at N:\carrots.xlsx. The latter is certainly easier to type, which is a real concern when working with the Command Prompt. |
3. Turn Off Administrative Shares
In
a world where we must concern ourselves with spyware, phishing emails,
and clowns trying to break in to our wireless networks, it's almost
reassuring when Windows itself is the security threat. Well, not so much
reassuring as infuriating.
It
turns out that every copy of Vista has a backdoor that could permit
someone else to read any file on your PC, and that vulnerability exists
on Windows 2000 and XP PCs, too.
By default, every hard disk on your PC is shared. That's right, the whole thing.
What's worse is that the shares are hidden, which means they don't show up in the Network folder in Windows Explorer, and thus most users don't know their drives are being shared.
You can hide any network share by adding the $ character to the end of the share name, like this: Desktop$. Then, to access the share, type the UNC path into Windows Explorer's address bar (e.g., \\Xander\Desktop$) and press Enter to open it.
To
test your PC, open Windows Explorer and type the name of your own PC
into the address bar, followed by the administrative share name for
drive C:, like this:
\\your_pc_name\c$
and then press Enter. If you see the contents of your hard disk, then administrative shares are enabled on your PC.
Now,
it's not just a matter of unsharing the drives; you've got to disable
the mechanism that shares them automatically each time your PC starts.
If administrative shares are enabled on your PC, here's how to turn them
off:
Open the Registry Editor .
Expand the branches to HKEY_LOCAL_MACHINE\SYSTEM\CurrentControlSet\Services\lanmanserver\parameters.
In the right pane, double-click the AutoShareServer value, type 0 in the Value data field, and click OK. (If AutoShareServer isn't there, go to Edit → New → DWORD (32-bit) Value to create a new DWORD value by that name.)
Next, double-click the AutoShareWks value, type 0 in the Value data field, and click OK. (Again, create the value if it's not there.)
Close the Registry Editor when you're done.
Next, open the Start menu, type compmgmt.msc into the Search box and press Enter to fire up the Computer Management tool.
Expand the System Tools branch on the left, then expand Shared Folders underneath that, and then click the Shares folder.
Here,
you'll see a list of all the shared folders on your PC, whether they're
hidden or not. Even if you're not hunting down administrative shares,
this is a handy tool to keep tabs on your shared resources.
To manually remove the administrative shares, right-click each one (e.g., C$, D$, E$) and select Stop Sharing. Answer Yes to both prompts.
Go
ahead and remove any hidden share you want (anything with a dollar-sign
suffix in the name), with the following three exceptions:
IPC$,
which stands for Inter-Process Communication, is used for remote
administration of your computer, something very few people need outside
of a corporate environment. Although it has been proven that the IPC$
share can be exploited, the only way to disable it permanently is to
turn off file sharing altogether. You can stop sharing IPC$ temporarily,
but Windows will recreate the share the next time you restart.
print$ is used to exchange printer driver files when you share a printer. You should leave this share intact.
wwwroot$
will be present if Microsoft's Internet Information Server (IIS)
software is installed. Leave this share intact if you want to use your
computer as a web server or a web software development platform.
When
you're done, restart Windows, then reopen the Computer Management tool
to make sure the administrative shares are gone for good.
The
preceeding solution is sometimes met with skepticism among those who
don't see administrative shares as a security threat. After all, these
hidden shares are there for legitimate reasons; namely, to allow network
administrators to install software, run Disk Defragmenter, access the
Registry, or perform other maintenance on a PC remotely.
Administrative shares are required for the Previous Versions feature to work. Turn off administrative shares, and the Previous Versions tab of any file's Properties window will be empty. |
|
If
you're on the fence, go to another PC on your network and perform a
little experiment. Type the UNC path from the beginning of this section
into Windows Explorer's address bar, and press Enter to see what happens.
Now,
consider that user accounts in Vista don't have passwords by default,
and remember that Windows passwords can be cracked with a variety of
methods, and you'll see the problem. Unless your PC is in a corporate
environment and you need to use remote administration, you have nothing
to gain by leaving this backdoor open—and everything to lose.