1. Developing Migration Files
USMT
ships with three standard migration .xml files. You can customize these
files to control the behavior of USMT during migration. In addition to
the three standard files, you can develop custom .xml files to migrate
special application settings and files. The three migration .xml files
included with USMT are:
MigSys.xml
When migrating to a computer running Windows XP, this file controls
which operating system and browser settings to migrate. You can
customize this file for specific needs. This file is not used when
migrating to Windows Vista because USMT uses manifests to migrate these
settings.
MigApp.xml
This file controls which application settings to migrate to both
Windows XP and Windows Vista. You can customize this file for specific
needs.
MigUser.XML
This file controls which user folders, files, and file types to migrate
to both Windows XP and Windows Vista. You can customize this file for
specific needs.
Customizing USMT
You manage USMT
through command-line options and the migration .xml files. You can
modify the default files to control some aspects of the migration and
create custom .xml files to migrate specific application settings and
data. The following list describes customization points for USMT:
Command-Line Control You can use command-line options, such as /ui and /ue,
to include and exclude specific users during the migration process. You
can also specify custom .xml files and manage encryption and
compression options.
Customizing the Migration XML Files
You can modify the migration .xml files to exclude portions of a
standard migration or to redirect data and settings during the migration
process. This capability is especially helpful for scenarios in which
you want to consolidate migrated data.
Generating Config.xml
You can generate a Config.xml file to exclude an entire component from
the migration. For example, you can exclude the entire My Documents
folder or exclude all of the settings for a specific application. Using
this file to exclude components is easier than modifying the migration
.xml files because you don’t have to understand the migration rules or
syntax. Using this file is also the only way to exclude operating system
settings when migrating to Windows Vista; USMT does not use MigSys.xml
when migrating to Windows Vista. For more information about Config.xml,
see the usmt.chm help file in USMT.
Control File Syntax
The default migration .xml
files use XML elements to control migration behavior. These files cover
the most common applications, documents, and setting. If you want to
migrate settings and
application data that the default migration .xml files don’t cover, you
should create a custom .xml file. The full XML reference for USMT is
available at http://go.microsoft.com/fwlink/?LinkId=73855. The usmt.chm help file in USMT also describes how to create migration .xml files.
Deploying Migration Files
By default, Scanstate and
Loadstate look for the migration .xml files in the same folder from
where the programs start (C:\Program Files\USMT30). You can copy your
customized versions of these files into the program folder, or you can
store them centrally and use command-line options to specify the
location of these files. The following list describes how to deploy
custom migration .xml files for stand-alone use, with BDD 2007, and with
the SMS 2003 OSD Feature Pack:
Stand-alone use
You can store the migration .xml files in the USMT program folder or
place them in a central location. If you store them in the USMT program
folder, you don’t need to specify a path on the command line. If you
store them centrally, you must specify the full path (scanstate \\server\share\computer /i:\\server\share\custom.xml).
BDD 2007 BDD 2007 has a specific organization for distribution shares. You must store custom migration .xml files in the Tools\platform folder of the distribution share, where platform is either x86 or x64.
SMS 2003 OSD Feature Pack
The SMS 2003 OSD Feature Pack uses USMT to migrate user state data
during operating system deployments. You can specify the location of
migration .xml files and data stores during the configuration of the SMS
2003 OSD Feature Pack. See the SMS 2003 OSD Feature Pack documentation
for more information.
2. Using USMT in BDD 2007
User state migrations
can be launched and controlled in a number of ways. Among these are
direct command-line execution, scripting, BDD 2007, and the SMS 2003 OSD
Feature Pack. This section describes how
to enable USMT in BDD 2007 as well as how to add custom migration .xml
files to BDD 2007.
|
The default
task sequence separates the process into two phases. One of the
pre-installation phases is State Capture; one of the post-installation
phases is State Restore. The entire state migration work is tucked into
these two phases.
In the State Capture phase, the Capture User State step runs ZTIUserState.wsf /capture
to capture user state. It uses settings from the deployment point’s
CustomSettings.ini file or the BDD 2007 database. In the State Restore
phase, the Restore User State step runs ZTIUserState.wsf /restore to restore the state data captured in the Capture User Step.
The first step in
ZTIUserState.wsf is to install USMT 3.0 on the computer—if USMT 3.0 is
not already installed—whether the script is capturing user state or
restoring it. ZTIUserState.wsf installs the correct platform and
operating system version of USMT. For the /capture
command-line option, ZTIUserState.wsf reads its settings (UDDShare,
UDDir, and so on) from the environment and then chooses the best place
to create the data store based upon UserDataLocation. In the final step,
the script executes ScanState with the command-line arguments that it
assembled from the data in the environment. For the /restore
command-line option, ZTIUserState.wsf retrieves information about the
data store it created from the environment and then runs LoadState using
the command line that it assembled from that information.
|
Downloading USMT Components
BDD 2007 can automatically
download USMT components and place them in the correct folders. The
advantage of allowing BDD 2007 to download the components is that BDD
2007 always downloads the most recent version of the files. You can also
manually install USMT components by downloading and copying them to the
Tools\platform folder in the BDD 2007 distribution share. Use the locations specified in Table 1 to locate the destination for each file.
Table 1. USMT File Locations
| File | Copy to |
|---|
| InstallUSMT30_x86_2000andXP.exe | \Tools\x86 |
| InstallUSMT30_x86_vista.msu | \Tools\x86 |
| InstallUSMT30_x64_XP.exe | \Tools\x64 |
| InstallUSMT30_x64_vista.msu | \Tools\x64 |
To download and install the USMT files using Deployment Workbench
1. | In the BDD Workbench, click the Components item in the console tree. (See Figure 1.)
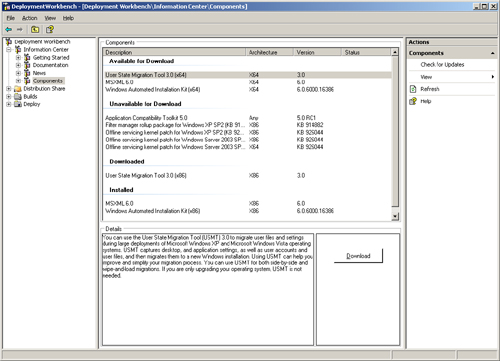
|
2. | Click State Migration Tool 3.0 (platform), where platform
is either x86 or x64, in the Available For Download section of the
details pane, and then click Download. Deployment Workbench will
download the most current version of the USMT components and add them to
the appropriate folders of the distribution share (Tools\x86 and
Tools\x64). After downloading USMT, Deployment Workbench moves it to the
Downloaded section.
|
3. | In the Downloaded section, click User State Migration Tool 3.0 (platform), where platform is either x86 or x64, and then click Browse to open the folder in which Deployment Workbench copied the files in Explorer.
|
Specifying the Data Store Location
The data stores can be
within the BDD 2007 distribution share. However, creating a share for
the data stores on a separate server is better than putting the data
stores in the distribution share, as it spreads the load and allows you
to more easily dedicate resources to user state migration.
After
creating the share for the data stores, you configure the data store
location by customizing properties in each deployment point’s
CustomSettings.ini file, as shown in Figure 2.
To configure CustomSettings.ini, right-click a deployment point in
Deployment Workbench and click Properties; then configure
CustomSettings.ini on the Rules tab. You can also customize these
properties in the BDD 2007 database.

Table 2. USMT Properties in BDD 2007
| Property | Controls |
|---|
| LoadStateArgs=arguments | The
arguments passed to LoadState. BDD 2007 inserts the appropriate
logging, progress, and data store parameters. If this value is not
included in the settings file, state restore process is skipped. For
example, LoadStateArgs=/v:5 /c /lac. |
| ScanStateArgs=arguments | The
arguments passed to ScanState. BDD 2007 inserts the appropriate
logging, progress, and data store parameters. If this value is not
included in the settings file, the user state backup process is skipped.
For example, ScanStateArgs=/v:5 /o /c.
Use USMTMigFiles to specify the .xml files to be used by
ScanState.exe instead of using the /I parameter in the ScanStateArgs
property. This prevents the ZTIUserState script from potentially
duplicating the same list of .xml files.
|
| UDDShare=Path | The network share in which to create data stores. For example, UDDShare=\\server\MigData$. |
| UDDir=Folder | The
folder where the user state migration data is stored. This folder
exists beneath the network shared folder specified in UDDShare. For
example, UDDir=%ComputerName%. |
| UserDataLocation=[blank| AUTO | NETWORK | NONE] | The location in which stores user state migration data:
BLANK
For LTI, the Windows Deployment Wizard prompts for the storage
location. For ZTI, this is the same as setting the property to NONE. AUTO
BDD 2007 creates the data store on a local hard disk, if space is
available. Otherwise, it creates the data store on the network location
specified in the UDShare and UDDir properties. NETWORK BDD 2007 creates the data store in the location designated by the UDShare and UDDir properties.
|
| UDProfiles=Profile1, Profile2, ProfileN | A
list of user profiles to save during the BDD 2007 State Capture phase
by ScanState.exe. For example, UDProfiles=Administrator, Patrice, Dave. |
Note
You
can also use removable media and local data stores during a user state
migration by not setting the UserDataLocation value. The Windows
Deployment Wizard will prompt you for the user data location. See the Configuration Reference Guide in BDD 2007 for more details about these properties. |
Adding Custom Migration Files
BDD 2007 will use
only the default migration .xml files unless you indicate the path to
your custom .xml files. As with other properties in BDD 2007, you can
configure them in each deployment point’s CustomSettings.ini file or add
them to the BDD 2007 database.
Set the property
USMTMigFiles to the name of each custom migration .xml file. If you
don’t configure this property, BDD 2007 uses the default migration
files: MigApp.xml, MigUser.xml, and MigSys.xml. If you do configure this
option, BDD 2007 uses only the files specified in the property.
Therefore, if you configure this property, it must also include the
default migration .xml files. For example, the following line in
CustomSettings.ini adds Custom.xml to the default .xml files:
USMTMigFiles=MigApp.xml, MigUser.xml, MigSys.xml, Custom.xml
Note
Do not try to customize the script that drives the USMT process (ZTIUserState.wsf) to add migration .xml files by adding the /I
command-line option. This can potentially cause the script to work
improperly. Only add custom migration .xml files by customizing the
USMTMigFiles property. |