The process of installing a
clustered SQL Server instance has changed since SQL Server 2005. There
are now two installation options: Integrated and Advanced.
1. Integrated vs. advanced installation
An integrated
installation creates a single-node failover cluster, from which
additional nodes (nodes on which the instance can fail over to) are
added via a separate installation. As shown in figure 2,
the initial and subsequent node installations are started by choosing
the New SQL Server Failover Cluster Installation and Add Node to a SQL
Server Failover Cluster options on the Installation tab of the SQL
Server Installation Center.
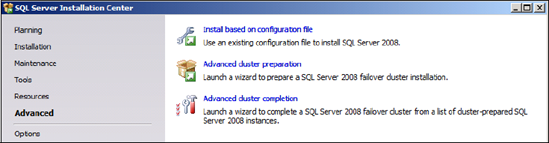
In contrast to the
one-node-at-a-time approach of the integrated installation, the advanced
installation prepares multiple-cluster nodes in one step, before
completing the installation on the node chosen as the initial active
node for the instance. As shown in figure 3,
you specify this installation type by selecting the Advanced Cluster
Preparation and Advanced Cluster Completion options on the Advanced tab
of the SQL Server Installation Center.

Clustered installations share some of the same installation
screens and steps, so rather than repeat them, let's walk through the
steps unique to a clustered installation using the integrated method.
2. Integrated installation steps
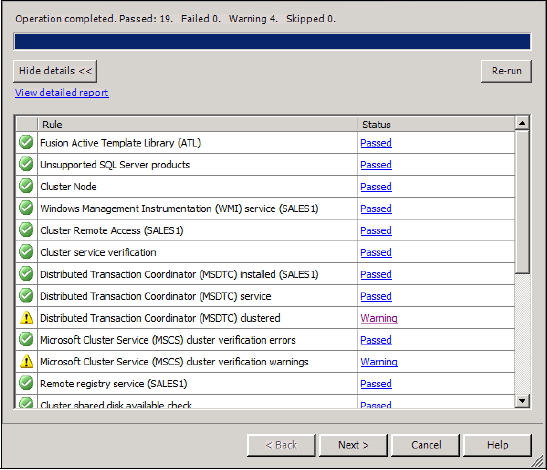
As with a
nonclustered installation, you begin a failover clustering installation
by running setup.exe from the installation DVD. Next, you go through a
series of steps to install setup support files and check various setup
rules. As shown in figure 4, the setup checks for a clustered installation are more detailed than for a nonclustered installation.
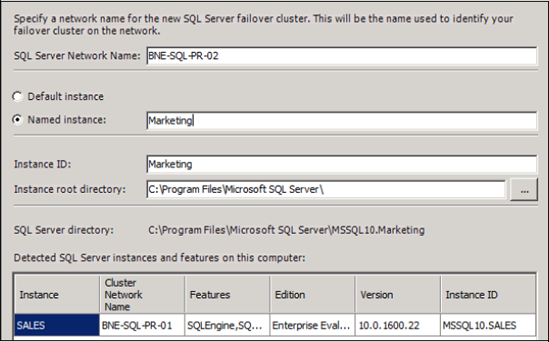
Installation continues
with the usual prompts for a product key, acknowledgment of license
terms, and feature selection, before arriving at the instance
configuration step, as shown in figure 5.
The one difference
between this step and the equivalent step in a nonclustered installation
is the SQL Server Network Name field. The name you enter is used to
identify an instance on the network. In our example, we'll use
BNE-SQL-PR-02 as our network name, and together with the instance name
(Marketing), we'll access this instance as BNE-SQL-PR-02\Marketing
without ever needing to know which of the two cluster nodes the instance
is running on.
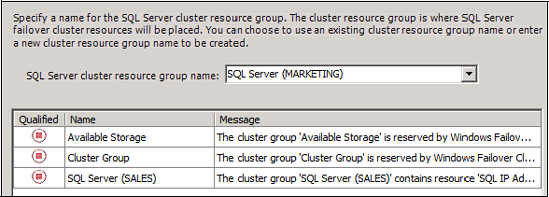
Installation continues through the disk space requirements check before prompting for a cluster resource group, as shown in figure 6.
The resource group name is used as a container for holding the
resources (disks, IP addresses, and services) for the installed
instance.
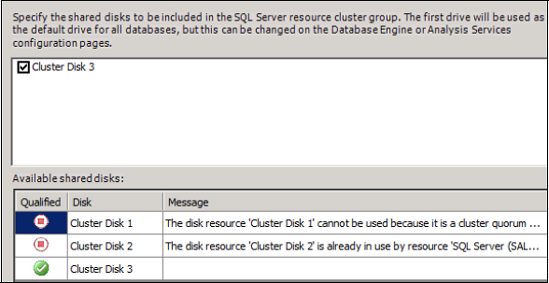
In the next
step, you'll identify available cluster disk resources that can be
chosen for inclusion in the instance's resource group. As shown in figure 7,
the quorum disk and cluster disks that have been previously assigned to
another clustered instance are unavailable for selection.
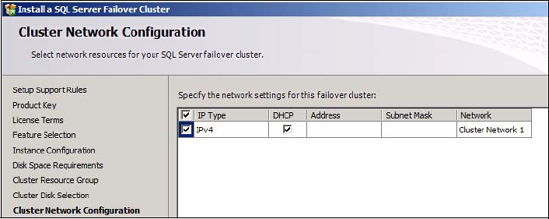
As shown in figure 8, the next step lets you specify either a static or DHCP-based IP address for the SQL Server instance.
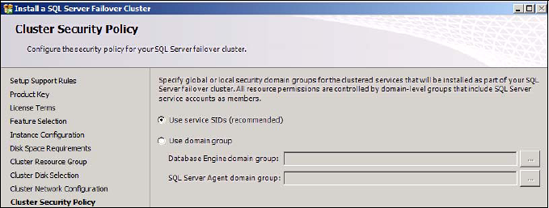
The only
remaining cluster-specific installation step is configuring the Cluster
Security Policy. In previous versions of SQL Server, the service
accounts had to be added to newly created domain groups prior to
installation. Permissions for the service accounts were then managed at
the domain group level. This requirement was often misunderstood, and
introduced complexities when the domain groups needed to be changed. In
response to this, SQL Server 2008 introduced an alternative method that
uses service security identifiers (SIDs).
As you can see in figure 9, using SIDs is the recommended configuration, although support for the old domain group method remains.
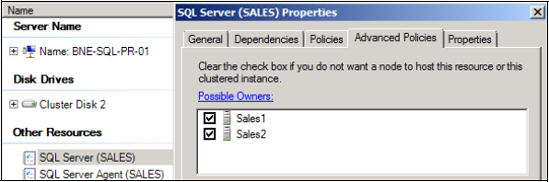
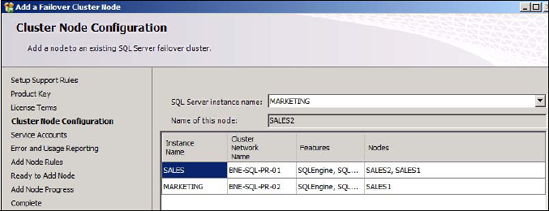
At the end of the installation, the
clustered instance will be created and available, but can't fail over to
other cluster nodes until you run the Add Node installation on the
appropriate nodes. This installation option is used to enable additional
cluster nodes to participate as failover nodes for an existing SQL
Server failover clustering instance. Figure 10
shows one of the screens from this installation option, and in this
case, we've chosen to allow the SALES2 server to host the MARKETING
instance.
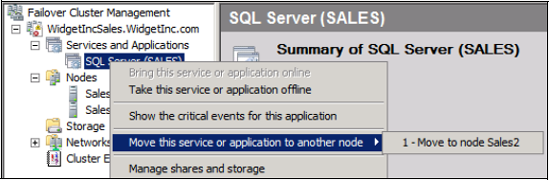
When installation is
complete, you can manage the clustered instance using the Failover
Cluster Management tool in the Administrative Tools folder, or by
running Cluadmin.msc from the Start menu. In the example in figure 11,
you can manually move, or fail over, a clustered instance to another
cluster node by right-clicking the resource group and selecting the
"Move this service or application to another node" option.