Completed report definitions
are loaded to a report server, where they can be accessed and subscribed
to. The process of loading the report is referred to as publishing.
The report is parsed and stored in an SQL database partially compiled,
somewhat like a Transact-SQL (T-SQL) stored procedure. The report
appears in a folder hierarchy similar to filespecs in Windows Explorer.
Each folder and report has properties and settings that determine
visibility, access, data source, and execution capabilities. Several
tools are available for organizing and managing the published reports.
These include the Web-based Report Manager, the Visual Studio–based SQL
Management Studio, and Web service and WMI programmatic interfaces.
Publishing
Popular
report authoring and development tools have built-in publishing
methods. Some are geared to developers, some to end users, and others to
system administrators. Pay careful attention because the terminology
used in each tool is quite different!
Report Designer uses
the Deploy menu option in the Solution Explorer folder tree. Select
Deploy on the project name to publish all data sources and reports in
the project to a target report server folder specified in the project
properties. You can also deploy a single report file. Once deployed, the
server copy cannot be edited directly. Instead, edit your local copy
and redeploy.
Report Builder has a business user slant and uses the term Save instead of Deploy.
It also lets you open a report directly from a report server or file
location, as long as the report definition was created in Report
Builder. The edited report can be saved to a report server folder or a
file location.
Report
Manager administrators can select the Upload File button on the
toolbar. Select the Browse button to open a file dialog box. The report
name is specified with an Overwrite check box. An existing report has a
General property page with Edit and Update links. The Update link loads
an RDL file to an existing report name. The Edit link lets you save the
RDL for editing in another tool (such as Report Designer).
SQL Server Management
Studio can connect to an instance of Reporting Services. The folder
hierarchy appears in Object Explorer. Right-click any folder and select
Import File to get a dialog box prompting for the report name and file
location. Right-click an existing report object to get options for
editing, viewing, replacing, and scripting a report definition. The
latter option is interesting because Visual Basic code is created that
includes the entire report definition and all associated settings. This
is a good tip for anyone interested in using the Reporting Services
object library to manage report definitions.
Finally, programmers can use the Web service interface to load and manipulate report definition settings.
Report Manager
Report Manager is the
Web-based report content manager that by default registers a virtual
directory called http://someservername/reports. It uses ASP.NET 2.0 Web
pages to present tabbed views of folders and rendered reports.
Administrators have extra tabs for manipulating object properties.
This tool was developed
using the Web service interface that installs at another virtual
directory called http://someservername/reportserver. You can use this
Web site as the main interface for all reporting functions, but it is
actually intended as a demonstration of what can be programmatically
accomplished using the Web service foundation and architecture. The
ASP.NET pages are available for editing, but most of the work is done by
controls and code-behind. The documentation recommends that you not
make any changes because service packs and future versions might
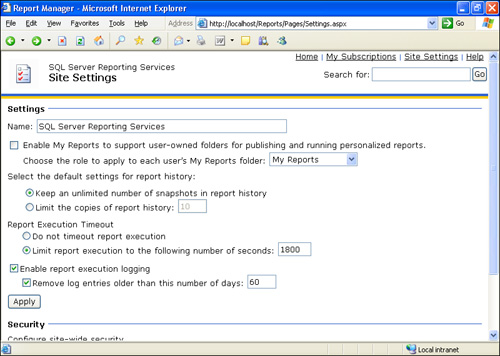
overwrite your work. You can edit the CSS style sheets to change fonts
and colors. You can also change the main title in the Settings page, as
shown in Figure 1.
Report Manager offers
simple and straightforward navigation. The title and folder name appear
in the upper-left corner. Below that is a set of breadcrumbs that help
you move through the folder hierarchy. The next level has a set of tabs
that will vary depending on user roles and permissions. The toolbar
below that has buttons for adding new objects to the current folder.
Again, only users with elevated roles have these options. The button on
the far right of the toolbar shows and hides object details. This is
useful for seeing hidden objects, owners, and timestamps. The details
view also provides a check box for item deletion (Figure 2).

The upper-right corner has menu links for Subscriptions, Settings, and Help. The Settings page (Figure 21-29)
has a text box for the descriptive server name, the My Reports option,
timeout values, and logging options. Below that is a security and job
scheduling section where you can manage permissions.
A search option is also
available in the upper-right corner on each page. Use this to find an
object by name or description. This option can be quite helpful on a
fully loaded report server with hundreds or thousands of items.
Report Manager Objects
Each object in
Report Manager has a set of properties and additional tabs as needed.
The main object types are folders, reports, data sources, and models.
Folders
You use folders to
organize and categorize reports. The breadcrumb navigation and
descriptions help guide you to the report you need. Each folder in a
report server has a property page. Using the property page, you can set
the name and description of the folder, and you can restrict access to
particular security roles through the Security tab. Buttons on the
General tab handle deleting and moving folders. You can use the details
view to delete or move report items.
The Security tab lists
the applicable group or users with their assigned roles. Most security
is inherited from the parent folder. It you select the Edit Item
Security toolbar button, you are warned that inheritance will be
affected. You can then add new role assignments so that only specific
users or groups can view or edit folder items. At any time, you can use
the Revert To Parent Security toolbar button to put inheritance back.
This security approach applies to all object types.
Reports
Reports are published RDL files that have General, Parameters, Data Sources, Execution, History, and Security tabs, as shown in Figure 3.
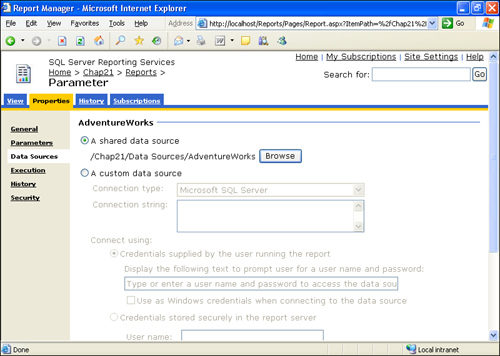
The General tab
supports name and description editing. It includes links for editing and
updating the RDL file and buttons for moving and deleting.
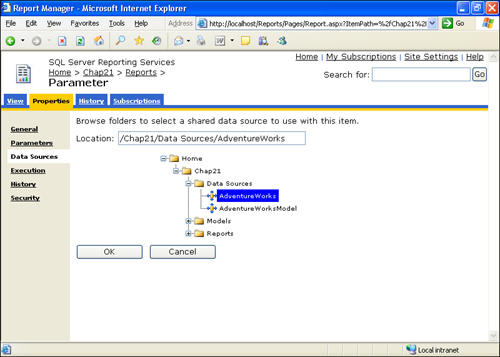
The Data Source
tab toggles between shared and custom data source information. Shared
data sources store server connection and credential information
centrally, so many reports can benefit from one definition. You can set
shared data sources using a graphical selection tool (Figure 4). (We’ll discuss custom credentials shortly.)
On the Execution
tab, you can control caching, snapshots, and timeout values. Caching can
greatly reduce report query impact on the target data source. You can
cache on an expiration time period or a shared or custom schedule. If
you have data that changes only once a week, consider creating a
schedule that caches the data weekly. All report requests during the
week will come directly from cached data stored in the
ReportServerTempDB database. Reports will appear faster, and other
database processing will continue at a faster clip. Snapshots are
similar to caching, but they make a point-in-time copy of the data that
is stored indefinitely. You can use a snapshot weeks or months later to
get a report using data saved at that point in time. This method is more
efficient than archiving a report in a certain output format because
the user can specify the desired output format and the exact snapshot
dataset to render.
On the History
tab, you can control snapshot aging and schedules and also determine
manual history creation. The History tab for the report will then
display records of snapshots created and reports rendered. Note that
both history and snapshots are dependent on cached credentials (as
you’ll see shortly).
The Security tab for a report works exactly like folder security (explained earlier).
Reports
have two additional tab pages on the horizontal menu. History displays a
list of snapshot and report execution records. The Subscriptions tab
lists all subscriptions for this report and allows you to create new
subscriptions (as covered in more detail shortly).
Data Sources
Data sources are
published RDS files that contain shared data connection information and
associated credentials. It is useful to store all data sources in a
separate folder. The Visual Studio project properties enable this (as
explained earlier). You can upload data sources or create new ones from
scratch. Existing data sources have General and Security tabs on their
property pages.
The General tab lets
you edit the name and description and offers a hide option. The
Connection Type and String options define the target data server. The
Connect Using section covers the credential details. User credentials
can appear in a prompt when the report runs, be stored securely on the
server using key encryption, be integrated with Windows (typically via
Active Directory), or be left blank. Note that some useful features such
as history and snapshots require stored credentials.
The Security tab for a report works exactly the same as for folder security (explained earlier).
Data sources have
two additional tab pages on the horizontal menu. The Dependent Items
page displays a list of all reports that use this data source. The
Subscriptions page lists all subscriptions that rely on this source.
Models
Report models, stored
as SMDL files, are custom built in a Visual Studio project or generated
from a data source. It is better to keep all models in a separate
folder. The model property page has General, Data Source, and Security
tabs.
The General tab
allows editing of the name, description, and hide option. It offers
links for editing and updating the SMDL file and includes Move and
Delete buttons.
The Data Source tab has only a Shared Data Source option. You cannot specify custom credentials.
The Security tab for a report works exactly the same as for folder security (explained earlier).
An additional page on the
horizontal menu for Dependent Items lists any reports built with this
model. Models are primarily used in Report Builder, so this is a good
place to see how the models are being used and who is using them.
Resources
You can load
other resources into the report server. When you select the Upload File
toolbar button, the Choose File dialog box defaults to Any File Type. It
is common to load images (such as JPEG or GIF) that are shared by
several reports. This is more efficient than storing images in the RDL
file, but it does make them less portable. Another popular resource is
an XSLT file that processes an XML output format to render a new XML
dialect or custom XHTML. You can also load text files or plain HTML for
documentation and training purposes.
My Reports
My
Reports is a special feature that is enabled on the Site Settings page.
It automatically creates a folder for each user that has a role and
permissions on the server. End users can create their own reports and
control access without having broad permissions on production folders.
This is a good solution in situations where business analysts are
empowered with tools such as Report Designer or Report Builder.
The feature creates a
hidden folder called Users under the Home level. Administrators can
browse the folders to monitor user activity. Each user has a folder with
his or her user name. The folder appears to users as My Reports. This
works well if users are already comfortable with the My Documents or My
Pictures folders in Windows Explorer.
Security
Security is configured on the Site Settings page, which offers three links to security-related tasks.
Site Wide Security maps a
Windows user or group to a defined role. The role has a detailed list of
tasks that can be enabled for fine-grained control. By default, only
system administrators have access. All others must be assigned a role.
Item-level roles
package several discrete security tasks into a named entity, which can
then be assigned to a user at the item (report, folder, data source, or
model) level. Five roles are built in, and you can add as many others as
you like. Browser is the most common role; it allows a user to view and
render reports. The Content Manager role can manage (administrate)
objects on the report server.
System-level
roles include Administrator and User. You can associate a user or group
with such a role if they will be working with reports in most folders
of the report server. Keep in mind that all folder and object
permissions are inherited: If users have the System User role, they can
get to any report in any folder. To keep someone out of a folder, you
must override the inherited permissions and set specific users and group
roles for that object. The role assignments for the home folder are
shown in Figure 5.

Schedules
One other area of
interest in Site Settings are Schedules and Jobs. You can use shared
schedules for report caching, snapshots, and subscriptions. Rather than
enter time and date particulars for each report, you can simply define a
shared schedule with a meaningful name and then link this schedule to
the target objects. Note that schedules have start and stop dates, so
you can be very particular about when things happen.
The Jobs link at the
bottom of the Site Settings page is a simple monitoring tool for
report-related job activity. Any in-progress report or subscription
appears here if it has been running for at least 30 seconds. This is the
place to cancel long-running reporting jobs.
SQL Server Management Studio
SQL
Server Management Studio can open a connection to Reporting Services.
You can manage the folder namespace and all objects as shown in Figure 6.

The nodes of Object
Explorer represent the report server folder namespace and the built-in
Security and Shared Schedules folders. Each object has a unique icon and
shortcut menu. Use the right-click shortcut menus to access
node-specific options. The dialog boxes mimic all the functionality of
Report Manager in a simple interface. System administrators will be very
comfortable with this productive approach.
Reporting
Services Scripts (RSS, not to be confused with Really Simple
Syndication) is a feature unique to Management Studio. Select a data
source, model, or report object and use the shortcut menu to generate a
script to a file, the clipboard, or a query window. Save the generated
RSS file for use with the command-line utilities mentioned in the next
section. You can also paste the resulting code into a Visual Basic
project to save precious development time. Unfortunately, you cannot
script folders, roles, or schedules.
Command-Line Utilities
Three
command-line utilities are included for maintenance and batch
operations. The script host, Rs.exe, runs batch scripts in RSS format
that copy content between servers, publish reports, adjust item
properties, and more. The configuration tool Rsconfig.exe stores
encrypted data connection credentials in the RSReportServer.config file.
The key management utility, Rskeymgmt.exe, manages symmetric keys used
to encrypt report data. It also creates key sets used in large
multi-server scale-out deployments.
Programming: Management Web Services
The Chap21 solution in
the code samples includes C# and Visual Basic projects that interact
with Reporting Services. The CS Forms project has two forms, called
Service.cs and Render.cs, that enumerate folders and report items using
the Web service interface. You must add a Web reference to this WSDL:
http://localhost/reportserver/reportservice2005.asmx?wsdl
You then create an instance of the ReportServer object. Numerous objects and methods expose the management and rendering functionality of the server. In our two examples, the ReportingService2005 object is queried with the ListChildren
method to get a list of items at a specific folder level. The item
names are stored in a list box in Service.cs and in a tree view in
Render.cs. The latter has logic to iterate multiple folder levels.
This
is just one example of the Reporting Services Web service power. You
can create tools that modify properties, manage schedules, create
snapshots, and render reports. Note that Report Manager is actually
written using this functionality.