The rest of this article focuses on building two
applications that consume the OData service that you just enabled on
your SQL Azure database. The first one is very simple, to whet your
appetite and show you the basics. The second is the cool one. (But don't
skip the first one!)
7.5.1. Simple Demo App
For this first example, create
a Windows Forms Application project. The name of the project and
language don't matter. When your project is created, follow these steps:
Drop a list box and a button on the form.
In Solution Explorer, right-click the References node, and select Add Service Reference from the context menu.
When the Add Service Reference dialog appears, you need the URI you copied from this article.
Paste it into the Address field, and click the Go button. After several
seconds the available services and associated endpoints appear in the
Services section of the form, as shown in Figure 1.
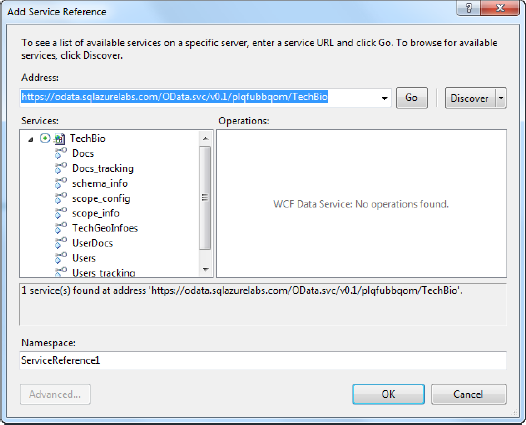
Leave
the Namespace name as is, and click OK. A new Service Reference node
appears in Solution Explorer, which lists the service you just added.
In the code behind the form, add the following using statements:
using System.Data.Services;
using System.Data.Services.Client;
In
the declaration section, add the following two lines of code. The first
line declares your context variable, which references the newly added
service; the second line defines the URI that accesses the OData
service:
private ServiceReference1.TechBio context;
private const string svcUri = "https://OData.sqlazurelabs.com/OData.svc/v0.1/servername/TechBio";
In the button's click event, add the following code:
context = new ServiceReference1.TechBio(new Uri(svcUri));

var userQuery = from u in context.Users
                select u;

foreach (var u in userQuery)
{
    listBox1.Items.Add(u.Name);
}
Run
the application. When the form displays, click the button. After a few
seconds, the list box populates with usernames, as shown in Figure 2.
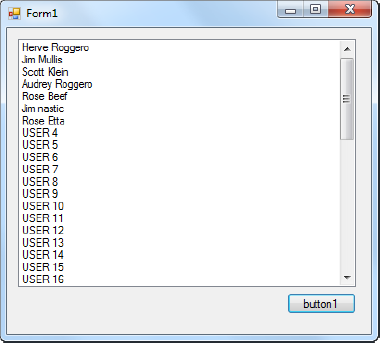
Very simple, but a good
foundation to build on. This example gives you an idea of how you can
consume on OData service via a .NET application. But you're probably
tired of waiting, so let's move on to the really cool example: the
Windows Phone application.