When we explored some of the built-in database maintenance routines
configurable through the SMS Administrator Console. In this section
we’ll review the procedure for backing up and restoring the database
directly through SQL Server.
You can back up the contents
of the database and transaction log to a device such as a tape drive or
to another file location on the server. The frequency of the backup is
up to you, the SMS administrator. Generally, you’ll back up the SMS
database as frequently as necessary to ensure a current and accurate
restoration of the data. A common database strategy involves performing a
complete backup of the database once a week, with incremental backups
of the data that has changed each day between full backups.
Note
Several
third-party backup programs, such as Veritas Backup Exec for Microsoft
Windows 2000, include modules designed specifically for backing up SQL
Server databases. If you have access to such a product, you can have it
perform the backup as part of its systemwide backup routine, eliminating
the need to configure a backup redundantly through SQL Server or
through the SMS Administrator Console.To preserve the data’s integrity,
it’s important that no SMS components try to access the SMS database
when the backup or restore is taking place. Be sure that no SMS
Administrator Consoles are running and that all SMS components on the
site server have been stopped. In addition, when you’re restoring the
database be sure to set the database to single-user mode. This is set as
a property of the database. Note that you won’t be able to set the
single-user mode option if any open connections exist to the database. |
Backing Up and Restoring Using SQL Server 2000
Although the preferred
method for backing up the SMS site database is to use the site
maintenance task provided in the SMS Administrator console, there’s no
corresponding restore task. You can back up and restore the SMS site
database through the SQL Enterprise Manager.
To back up the SMS database using SQL Server 2000, follow these steps:
1. | In Enterprise Manager, navigate to the Databases folder and expand it.
|
2. | Select
the SMS database you want to back up, right-click it, and choose
Properties to display the Database Properties dialog box.
|
3. | Select the Options tab, shown in Figure 1. Select the Restrict Access check box and then select Single User. Click OK to return to Enterprise Manager.

|
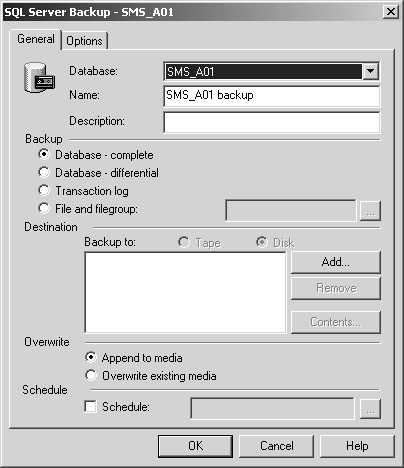
4. | Right-click
the database entry again, choose All Tasks from the context menu, and
then choose Backup Database to display the SQL Server Backup dialog box,
shown in Figure 2.
|
5. | In
the General tab, confirm that your SMS database is selected. Modify the
name of the backup if you want and verify that the Database - Complete
option has been selected.
|
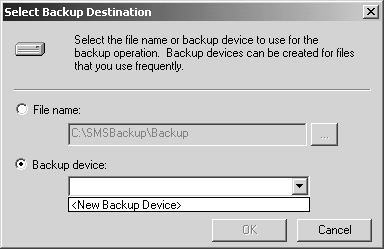
6. | To specify a backup device, click the Add button to display the Select Backup Destination dialog box, shown in Figure 3.
Enter a filename and select an existing backup device from the Backup
Device list or select New Backup Device to create a new device.
|
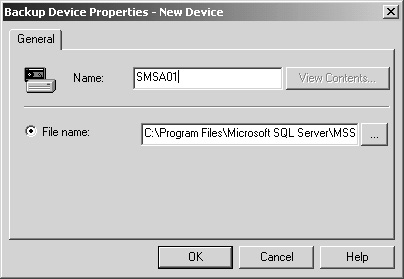
7. | If you select New Backup Device, the Backup Device Properties - New Device dialog box will appear, as shown in Figure 4. Enter a name for the device and then click OK to return to the Select Backup Destination dialog box.
|
8. | Click OK again to accept the device destination and return to the SQL Server Backup Properties dialog box.
|
9. | Remove
any other backup devices that might be listed in the Backup To list in
the General tab, such as a temp file. Set whatever other options you
want in the General and Options tabs and then click OK to begin the
backup process. (You can click Help for more information about each of
the options available in these tabs.)
|
10. | When the backup is complete, a message to that effect will be displayed. Click OK.
|
To restore the database, follow these steps:
1. | In Enterprise Manager, navigate to the Databases folder and expand it.
|
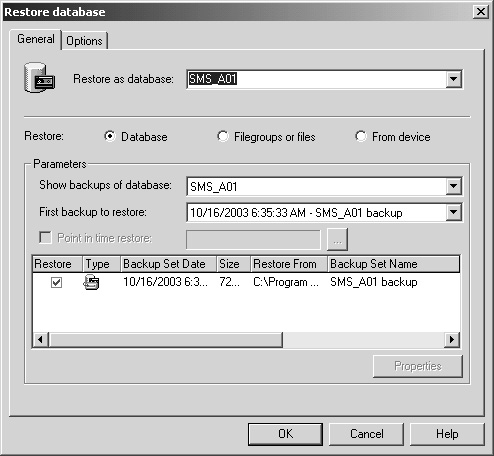
2. | Select
your SMS site database, right-click it, choose All Tasks from the
context menu, and then choose Restore Database to display the Restore
Database dialog box, shown in Figure 5.
|
3. | In
the General tab, verify that the correct database is selected and that
the Database option in the Restore section has been enabled.
|
4. | In
the Parameters section, select the appropriate backup device from the
Show Backups Of Database drop-down list. The First Backup To Restore
drop-down list displays in chronological order the database backups for
this device. This option allows you to restore selective differential
backups if you performed them. Select the appropriate entry.
|
5. | Click OK to begin the restore process.
|
6. | When the restore process has completed successfully, SQL Server will display a message to that effect. Click OK.
|
Note
After
you perform your backup and restore procedure, be sure to clear the
Single User option you set in step 3 of the backup steps outlined
previously. |
In
this section we’ve looked at the procedures for backing up and restoring
SMS databases using SQL Server. Note that what we discussed are only
essential procedures. You should consult the SQL Server documentation
for other configuration options.