As you'll soon see, often a gap exists between what you can do and what you should
do. In most professional applications, you'll need to write and
fine-tune your data access code for optimum performance or access to
specific features. That's why you've spent so much time learning how
ADO.NET works, rather than jumping straight to the data source controls.
The data source controls
include any control that implements the IDataSource interface. The .NET
Framework includes the following data source controls:
SqlDataSource:
This data source allows you to connect to any data source that has an
ADO.NET data provider. This includes SQL Server, Oracle, and OLE DB or
ODBC data sources. When using this data source, you don't need to write
the data access code.
AccessDataSource:
This data source allows you to read and write the data in an Access
database file (.mdb). However, its use is discouraged, because Access
doesn't scale well to large numbers of users (unlike SQL Server
Express).
NOTE
Access databases do not have
a dedicated server engine (like SQL Server) that coordinates the
actions of multiple people and ensures that data won't be lost or
corrupted. For that reason, Access databases are best suited for very
small websites, where few people need to manipulate data at the same
time.
ObjectDataSource:
This data source allows you to connect to a custom data access class.
This is the preferred approach for large-scale professional web
applications, but it forces you to write much more code.
XmlDataSource: This data source allows you to connect to an XML file.
SiteMapDataSource:
This data source allows you to connect to a .sitemap file that
describes the navigational structure of your website.
EntityDataSource: This data source allows you to query a database using the LINQ to Entities feature.
LinqDataSource:
This data source allows you to query a database using the LINQ to SQL
feature, which is a similar (but somewhat less powerful) predecessor to
LINQ to Entities.
You can find all the data
source controls in the Data tab of the Toolbox in Visual Studio, with
the exception of the AccessDataSource.
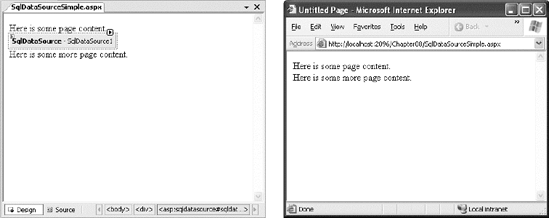
When you drop a data source
control onto your web page, it shows up as a gray box in Visual Studio.
However, this box won't appear when you run your web application and
request the page (see Figure 1).
If you perform more than one
data access task in the same page (for example, you need to be able to
query two different tables), you'll need more than one data source
control.
1. The Page Life Cycle with Data Binding
Data source controls can perform two key tasks:
They can retrieve
data from a data source and supply it to bound controls. When you use
this feature, your bound controls are automatically filled with data.
You don't even need to call DataBind().
They
can update the data source when edits take place. In order to use this
feature, you must use one of ASP.NET's rich data controls, like the
GridView or DetailsView. For example, if you make an edit in the
GridView and click Update, the GridView will trigger the update in the
data source control, and the data source control will then update the
database.
Before you can use the data
source controls, you need to understand the page life cycle. The
following steps explain the sequence of stages your page goes through in
its lifetime. The two steps in bold (4 and 6) are the steps where the
data source controls will spring into action:
The page object is created (based on the .aspx file).
The page life cycle begins, and the Page.Init and Page.Load events fire.
All other control events fire.
If
the user is applying a change, the data source controls perform their
update operations now. If a row is being updated, the Updating and
Updated events fire. If a row is being inserted, the Inserting and
Inserted events fire. If a row is being deleted, the Deleting and
Deleted events fire.
The Page.PreRender event fires.
The
data source controls perform their queries and insert the data they
retrieve into the bound controls. This step happens the first time your
page is requested and every time the page is posted back, ensuring you
always have the most up-to-date data. The Selecting and Selected events
fire at this point.
The page is rendered and disposed.
2. The SqlDataSource
Data source controls turn up in the .aspx markup portion of your web page like ordinary controls. Here's an example:
<asp:SqlDataSource ID="SqlDataSource1" runat="server" ... />
The SqlDataSource
represents a database connection that uses an ADO.NET provider. However,
this has a catch. The SqlDataSource needs a generic way to create the
Connection, Command, and DataReader objects it requires. The only way
this is possible is if your data provider includes something called a data provider factory.
The factory has the responsibility of creating the provider-specific
objects that the SqlDataSource needs to access the data source.
Fortunately, .NET includes a data provider factory for each of its four
data providers:
System.Data.SqlClient
System.Data.OracleClient
System.Data.OleDb
System.Data.Odbc
You can use all of these
providers with the SqlDataSource. You choose your data source by setting
the provider name. Here's a SqlDataSource that connects to a SQL Server
database using the SQL Server provider:
<asp:SqlDataSource ProviderName="System.Data.SqlClient" ... />
Technically, you can omit this piece of information, because the System.Data.SqlClient provider factory is the default.
NOTE
If you have an up-to-date
third-party provider (such as ODP.NET for accessing Oracle databases),
it will also include a provider factory that allows you to use it with
the SqlDataSource.
The next step is to supply
the required connection string—without it, you cannot make any
connections. Although you can hard-code the connection string directly
in the SqlDataSource tag, it's always better to keep it in the
<connectionStrings> section of the web.config file to guarantee
greater flexibility and ensure you won't inadvertently change the
connection string.
To refer to a connection string in your .aspx markup, you use a special syntax in this format:
<%$ ConnectionStrings:[NameOfConnectionString] %>
This looks like a data
binding expression, but it's slightly different. (For one thing, it
begins with the character sequence <%$ instead of <%#.)
For example, if you have a connection string named Northwind in your web.config file that looks like this:
<configuration>
  <connectionStrings>
    <add name="Northwind" connectionString=
"Data Source=localhost\SQLEXPRESS;Initial Catalog=Northwind;Integrated Security=SSPI" />
  </connectionStrings>
  ...
</configuration>
you would specify it in the SqlDataSource using this syntax:
<asp:SqlDataSource ConnectionString="<%$ ConnectionStrings:Northwind %>" ... />
Once you've specified the
provider name and connection string, the next step is to add the query
logic that the SqlDataSource will use when it connects to the database.
|
If you want some help
creating your connection string, select the SqlDataSource, open the
Properties window, and select the ConnectionString property. A drop-down
arrow will appear at the right side of the value. If you click that
drop-down arrow, you'll see a list of all the connection strings in your
web.config file. You can pick one of these connections, or you can
choose New Connection (at the bottom of the list) to open the Add
Connection dialog box, where you can pick the database you want. Best of
all, if you create a new connection Visual Studio copies the connection
string into your web.config file, so you can reuse it with other
SqlDataSource objects.
|
|
3. Selecting Records
You can use each SqlDataSource
control you create to retrieve a single query. Optionally, you can also
add corresponding commands for deleting, inserting, and updating rows.
For example, one SqlDataSource is enough to query and update the
Customers table in the Northwind database. However, if you need to
independently retrieve or update Customers and Orders information,
you'll need two SqlDataSource controls.
The SqlDataSource command
logic is supplied through four properties—SelectCommand, InsertCommand,
UpdateCommand, and DeleteCommand—each of which takes a string. The
string you supply can be inline SQL (in which case the corresponding
SelectCommandType, InsertCommandType, UpdateCommandType, or
DeleteCommandType property should be Text, the default) or the name of a
stored procedure (in which case the command type is StoredProcedure).
You need to define commands only for the types of actions you want to
perform. In other words, if you're using a data source for read-only
access to a set of records, you need to define only the SelectCommand
property.
NOTE
If you configure a
command in the Properties window, you'll see a property named
SelectQuery instead of SelectCommand. The SelectQuery is actually a
virtual property that's displayed as a design-time convenience. When you
edit the SelectQuery (by clicking the ellipsis next to the property
name), you can use a special designer to write the command text (the
SelectCommand) and add the command parameters (the SelectParameters) at
the same time. However, this tool works best once you've reviewed the
examples in this section, and you understand the way the SelectCommand
and SelectParameters properties really work.
Here's a complete SqlDataSource that defines a Select command for retrieving product information from the Products table:
<asp:SqlDataSource ID="sourceProducts" runat="server"
  ConnectionString="<%$ ConnectionStrings:Northwind %>"
  SelectCommand="SELECT ProductName, ProductID FROM Products"
/>
|
You can write the data
source logic by hand, or you can use a design-time wizard that lets you
create a connection and create the command logic in a graphical query
builder. You can even test the query as you build it to make sure it
returns the records you want. To launch this tool, select the data
source control on the design surface of your page, and click the
Configure Data Source link in the smart tag.
|
|
This is enough to build the
first stage of the record editor example shown earlier—namely, the
drop-down list box that shows all the products. All you need to do is
set the DataSourceID property to point to the SqlDataSource you've
created. The easiest way to do this is using the Properties window,
which provides a drop-down list of all the data sources on your current
web page. At the same time, make sure you set the DataTextField and
DataValueField properties. Once you make these changes, you'll wind up
with a control tag like this:
<asp:DropDownList ID="lstProduct" runat="server" AutoPostBack="True"
  DataSourceID="sourceProducts" DataTextField="ProductName"
  DataValueField="ProductID" />
The best part about this
example is that you don't need to write any code. When you run the page,
the DropDownList control asks the SqlDataSource for the data it needs.
At this point, the SqlDataSource executes the query you defined, fetches
the information, and binds it to the DropDownList. The whole process
unfolds automatically.
3.1. How the Data Source Controls Work
You can bind to a DataReader or a DataSet. So it's worth
asking—which approach does the SqlDataSource control use? It's actually
your choice, depending on whether you set the DataSourceMode to
SqlDataSourceMode.DataSet (the default) or to
SqlDataSourceMode.DataReader. The DataSet mode is almost always better,
because it supports advanced sorting, filtering, and caching settings
that depend on the DataSet. All these features are disabled in
DataReader mode. However, you can use the DataReader mode with extremely
large grids, because it's more memory-efficient. That's because the
DataReader holds only one record in memory at a time—just long enough to
copy the record's information to the linked control.
Another important fact
to understand about the data source controls is that when you bind more
than one control to the same data source, you cause the query to be
executed multiple times. For example, if two controls are bound to the
same data source, the data source control performs its query twice—once
for each control. This is somewhat inefficient—after all, if you wrote
the data binding code yourself by hand, you'd probably choose to perform
the query once and then bind the returned DataSet twice. Fortunately,
this design isn't quite as bad as it might seem. First, you can avoid
this multiple-query overhead using caching, which allows you to store
the retrieved data in a temporary memory location where it will be
reused automatically. The SqlDataSource supports automatic caching if
you set EnableCaching to True.
Second, contrary to what you might expect, most of the time you won't be binding more than one control to a data source. The
GridView, DetailsView, and FormsView—have the ability to present
multiple pieces of data in a flexible layout. If you use these controls,
you'll need to bind only one control, which allows you to steer clear
of this limitation.
It's
also important to remember that data binding is performed at the end of
your web page processing, just before the page is rendered. This means
the Page.Load event will fire, followed by any control events, followed
by the Page.PreRender event. Only then will the data binding take place.